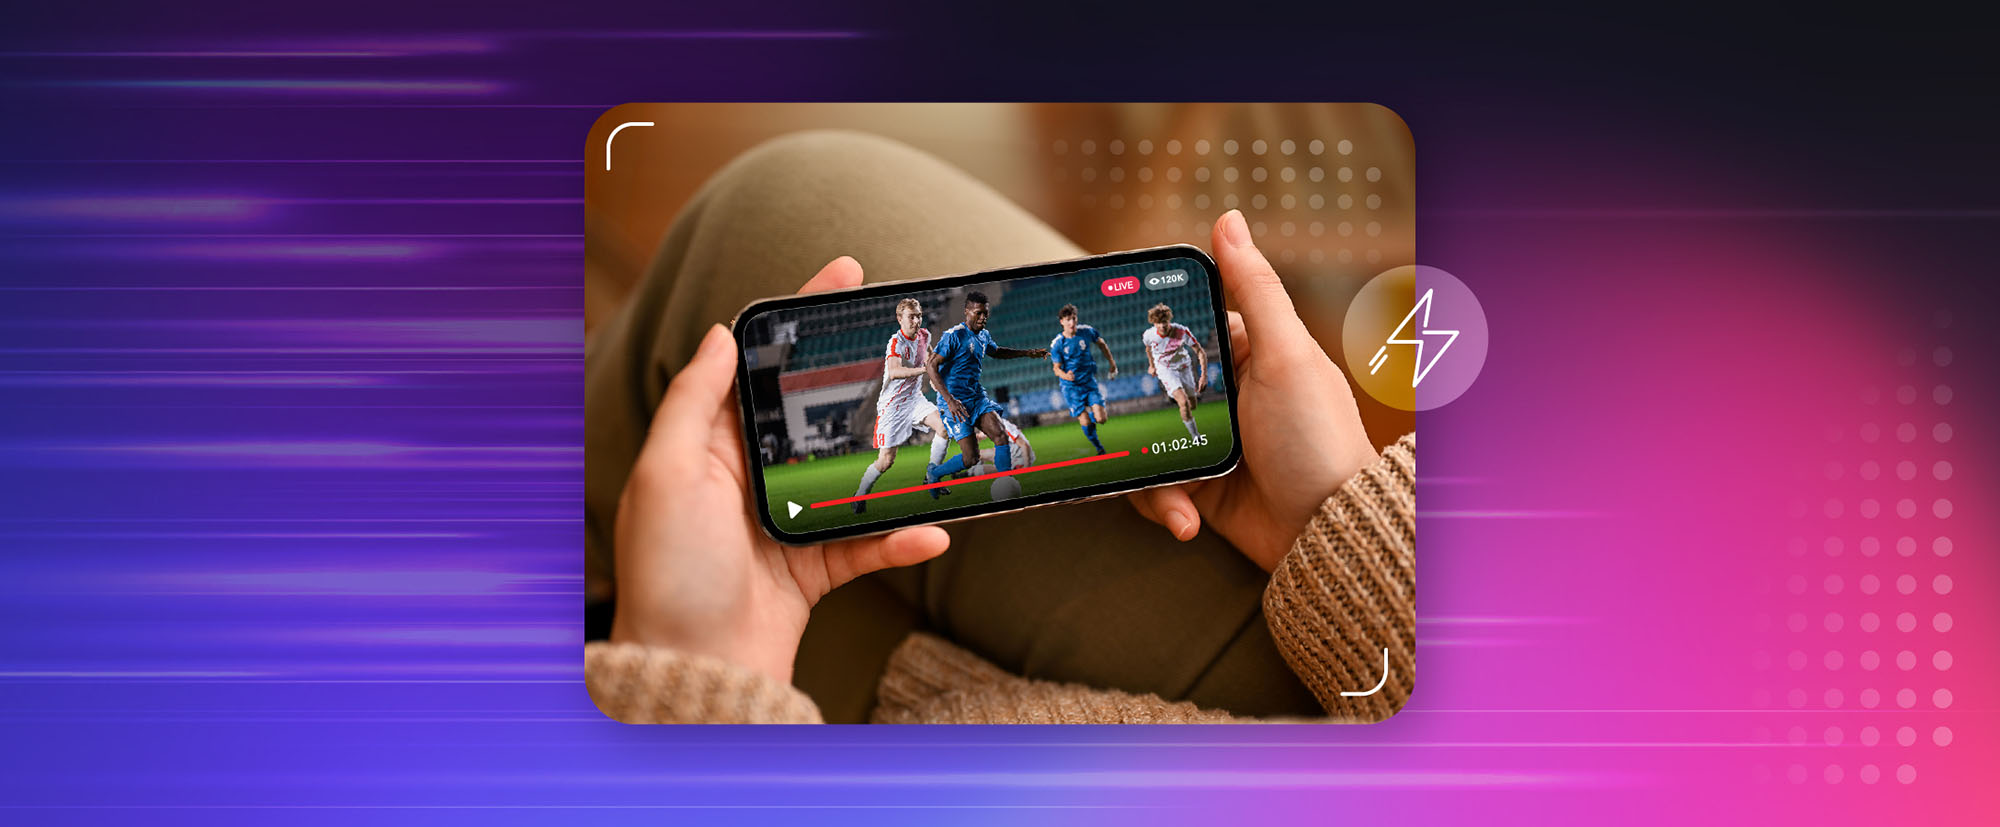
Have you ever been watching a Livestream and wished you could switch to a different angle? What about a different stream entirely? With Dolby.io streaming you have the ability to enable Multiview, a feature that lets you simultaneously view multiple WebRTC streams at once and swap between each stream all without adding a delay or sacrificing quality. Multiview engages users with the view and content they prefer all in real-time, making it a great addition to any virtual live event or online streaming experience.
In this guide, we’ll be outlining how you can enable multisource stream ingest, create multiple streams, and stream them all into a real-time multi-stream viewer with just a few button clicks.
Setting up a WebRTC Stream Multiviewer
To enable Multiview you first must have an active Dolby.io account. You can create a free Dolby.io account limited to 50 Gigabytes of data transfer a month, which will be plenty for testing out the WebRTC Multiview feature.
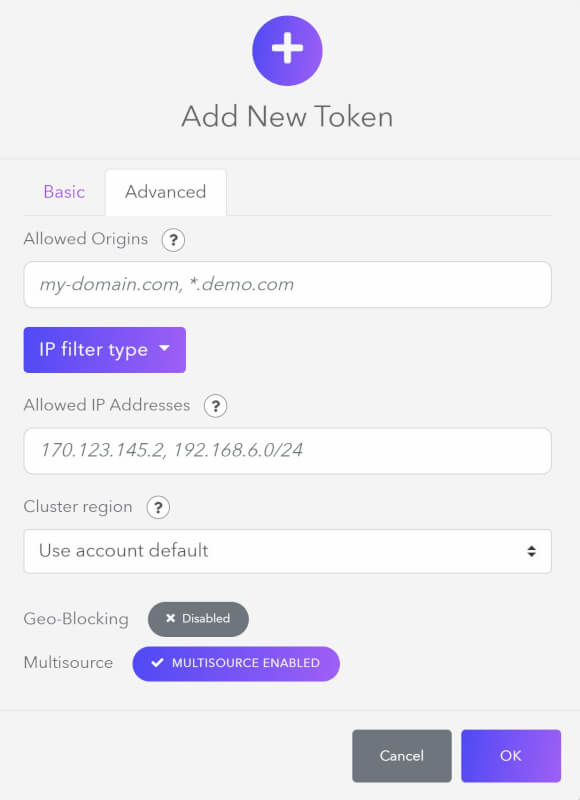
Once you have created your account, log in and navigate to the streaming dashboard. From here add a new token called “Multiview Test”. When creating the token make sure to switch to the Advanced tab and enable Multisource. The Multisource parameter allows users to bundle multiple WebRTC and RTMP feeds into a single stream and distinguish each by different Source IDs.
With our token created we can now begin setting up our individual streams. Click on the Broadcast button of your newly created token and then on the gear icon in the bottom right of the broadcaster. From here select Media Settings. Inside Media Settings enable Multisource and add a unique identifier to Source ID, in this case, I chose PC_VIEW. Multisource allows for the token to ingest multiple video and audio feeds and is required for Multiview to work.
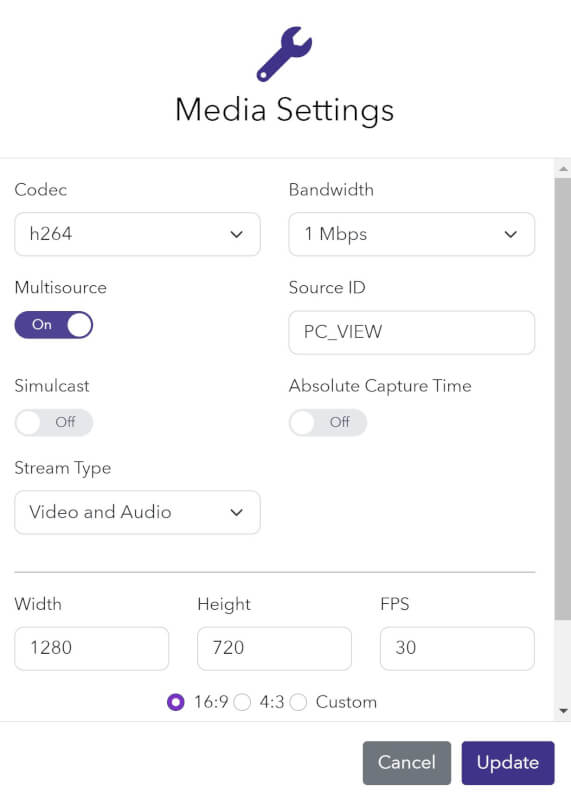
Once you click Update, the first view is ready.
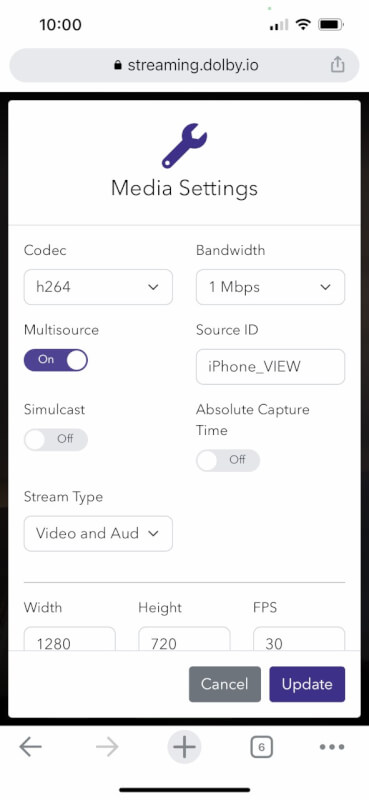
Since we are testing Multiview we need to set up multiple streams. For this demo, I chose to set up a second view from my phone by signing into my Dolby.io account and opening the broadcaster from my Multiview Test token. From the broadcaster I emulated the same steps as for the first view, opening the media settings, enabling multisource, and setting the Source ID.
Finally, I want to add one more feed, this time with the WebRTC-enabled version of OBS. If you are interested in setting up WebRTC-enabled OBS check out this guide here. Inside WebRTC-enabled OBS add your credentials to the stream section of the settings, tick the multisource box, and include a unique identifier for your Source ID.

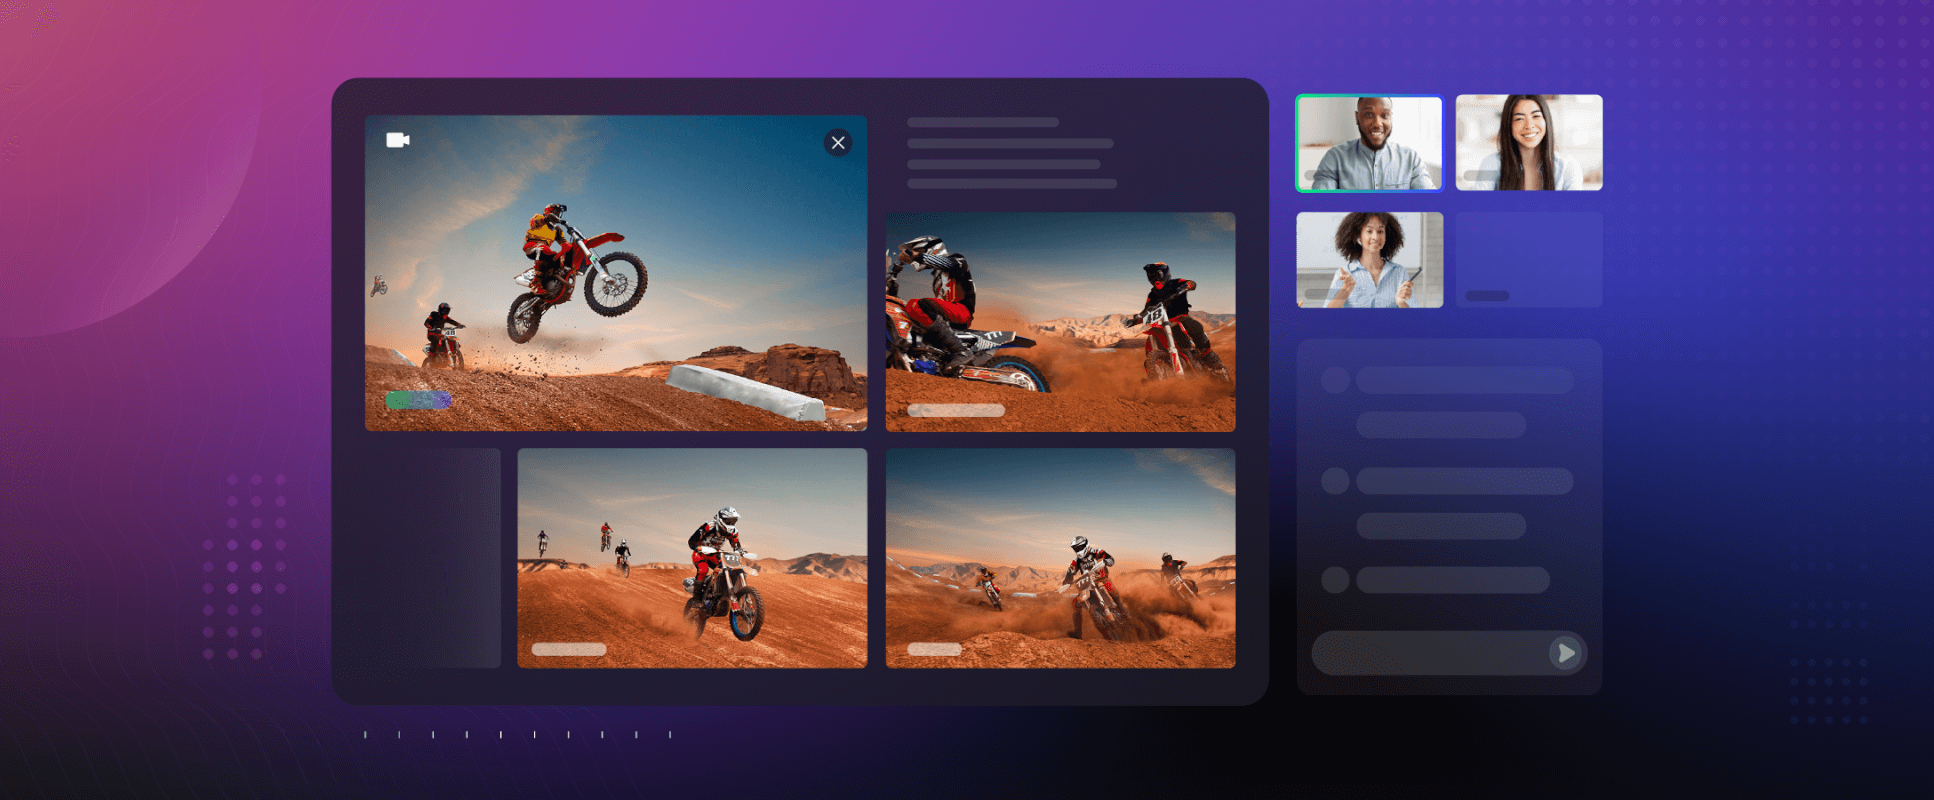
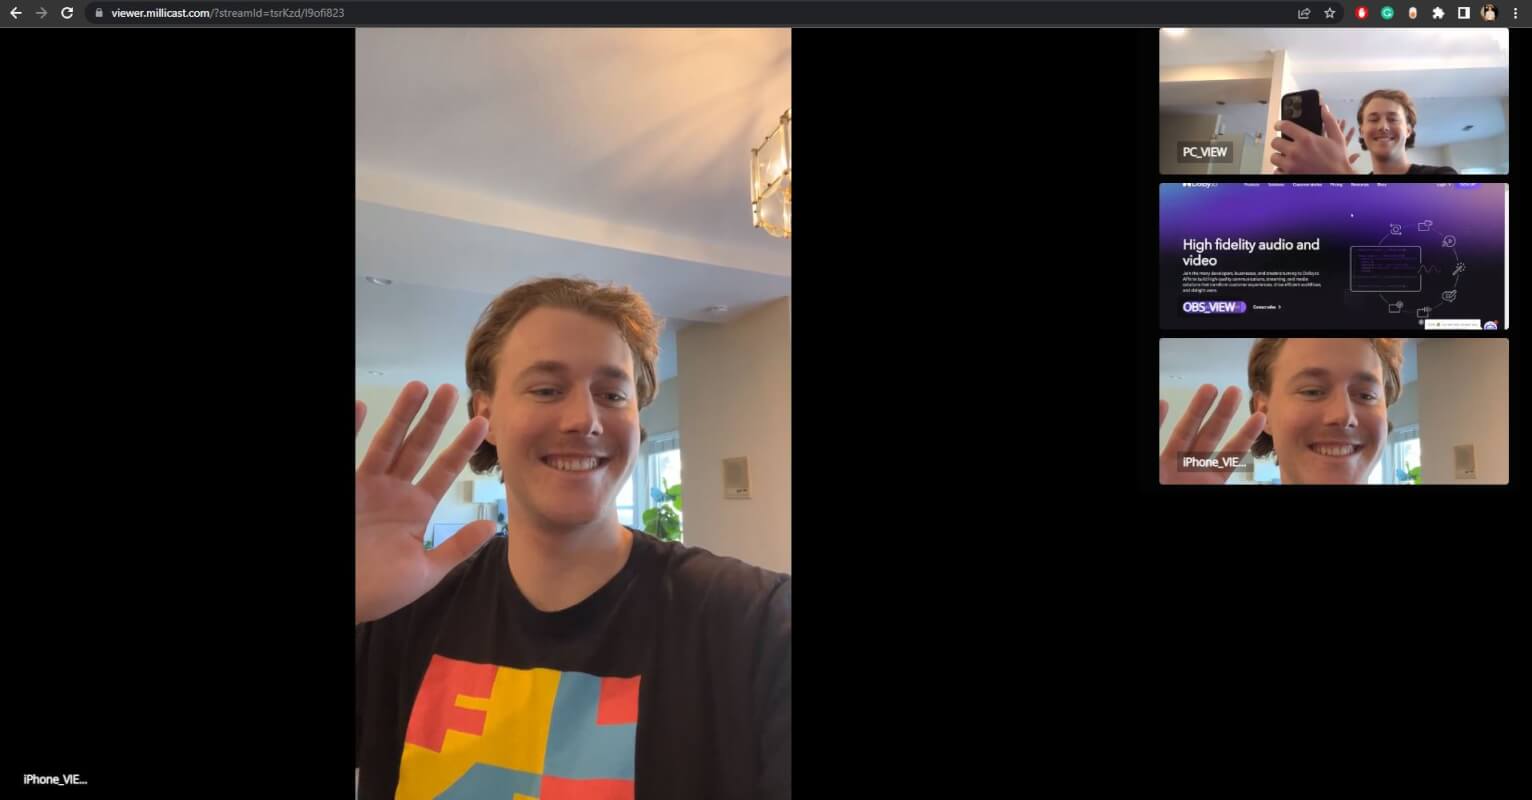
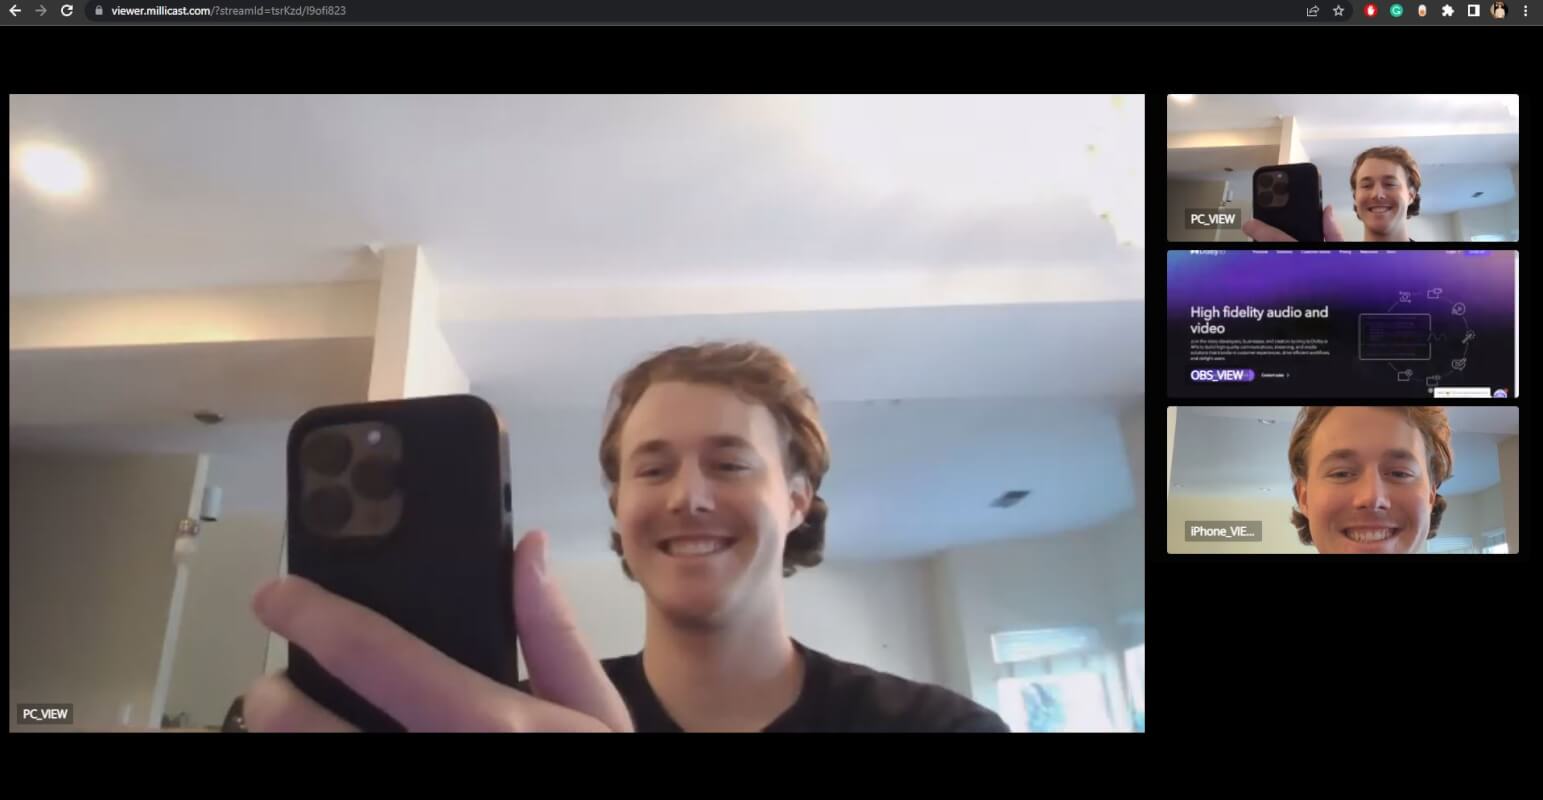
Great, so now we have three views set up: a PC web camera view, an iPhone view, and a desktop screen view with WebRTC OBS. Now all that’s left is to start the streams and open the stream viewer. You can open the stream viewer from the Dolby.io dashboard or by navigating to:
https://viewer.millicast.com?streamId=[YOUR_ACCOUNT_ID]/[YOUR_STREAM_NAME]You’ll notice when joining that the bottom right gear icon will flash a notification prompting you to enable Multiview. Enable it to begin viewing all three streams.
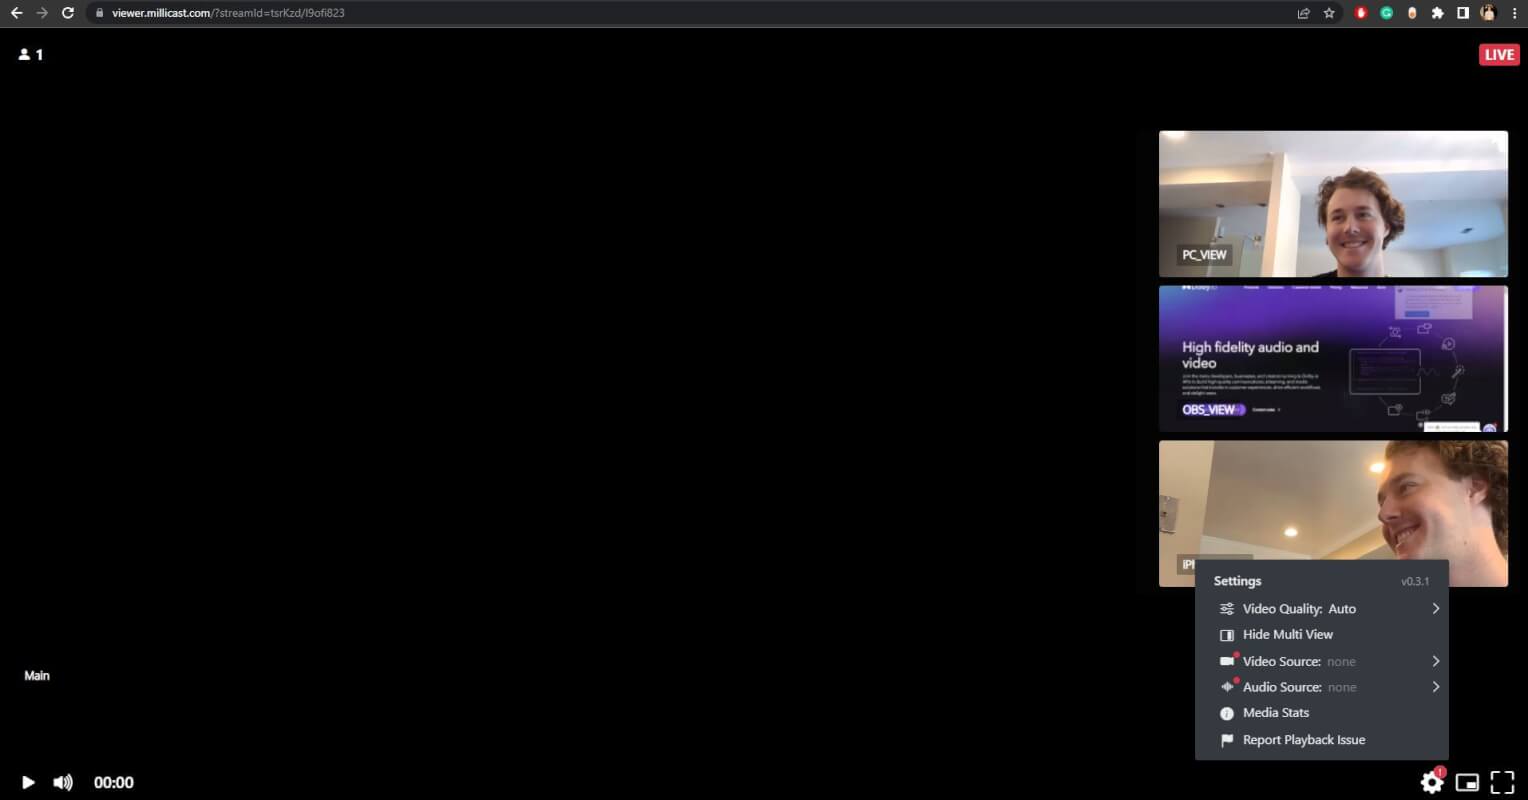
Note: We never defined a default feed causing the viewer to open to a black screen. To define the default feed don’t add a source ID when enabling Multisource.
From here users can switch between different feeds as they desire.

It’s important to note that there are some limitations to the Multiviewer. Dolby.io streaming allows you to deliver as many tracks to the viewer as you like, however, there is a 12mbps limit that the viewer can receive. Hence, it is important to throttle your feeds appropriately so that the end user remains under this threshold. In the example above I limit each feed to 1mbps by using the Bandwidth parameter.
Interested in building your own custom multiviewer? Check out this guide here.
Start Experimenting with WebRTC Multiview
The Multiview feature offers an exciting way to engage viewers, allowing them to swap between real-time WebRTC feeds seamlessly. This feature is perfect for virtual live events where viewers want to get multiple angles on the action all without sacrificing quality or adding delay. If you are interested in building your own Livestream viewer using JavaScript check out this guide here or learn more about Dolby.io streaming by checking out our documentation.
Feedback or Questions? Reach out to the team on Twitter, LinkedIn, or via our support desk.