As you begin developing a brand and a streaming presence, it is often desirable to define and establish your branding with digital assets that are used at the beginning and ends of each of your stream. Often times we see this as an intro video that will broadcast to your audience that your stream is beginning, giving them time to settle in and get excited for the show, whether it be an auction, sports broadcast, gaming event, or something else. While entirely possible to do this manually every time, it can add to the growing complexity of tasks to do when beginning your broadcast. Sometimes you might even forget to play the video at all, human error and all. In this article, we will showcase a few different ways we can automate the media playback to occur whenever you begin your stream, taking an extra step away so you can focus on the broadcast while keeping your brand intact.
Starting Stream
Before thinking about what the intro video is going to look like, first think about what the very beginning of a stream looks like. Most viewers who show up early will see a “Broadcast is not Live” page by default, which isn’t ideal. We want to ensure that users know that you are about to go live soon to keep them on the page instead of closing the window. Though if we start too early, not enough users will be around to see the intro video in the first place, both losing brand awareness, and letting people feel like they missed out. The solution to this is to still start the stream ahead of schedule, but with a static image or video that simply lets the audience know that stream is starting soon.
We can automate the process of beginning this video with an OBS plugin called Advanced Scene Switcher. Once downloaded and installed with the appropriate installer for your system, this plugin will create a new option on the “Tools” menu of OBS with the same name.

Note: If you are experiencing issues seeing this plugin in the Tools menu, ensure you are not installing OBS from Homebrew on MacOS or similar package managers, but from the official install site. We have experienced issues with the package managed versions.
Adding Advanced Scene Switcher to OBS-WebRTC
For use with Dolby.io Streaming, we will want to add the plugin to our installation of OBS-WebRTC. Thankfully, the plugin is compatible, however the installer will only look for OBS-Studio. To add the plugin manually to OBS-WebRTC, do as follows:
MacOS:
In ~/Library/Application Support/obs-studio there will be a folder titled “plugins”

Copy this folder with the installed plugin(s) and paste it into ~/Library/Application Support/obs-webrtc. Restart OBS-WebRTC and it should appear as normal.
Windows:
Follow the above instructions, but replacing the MacOS path with the Windows path for plugins:
C:Program FilesOBS-Studioobs-plugins64bit
C:Program FilesOBS-WebRTCobs-plugins64bit
Using Advanced Scene Switcher
Upon opening Advanced Scene Switcher, we should see a few options. The most important of which is determining if it is on. You can customize how you want OBS to auto-start the plugin, though ensure that the status is Active before using it.

Then, switch to the “Macro” tab.
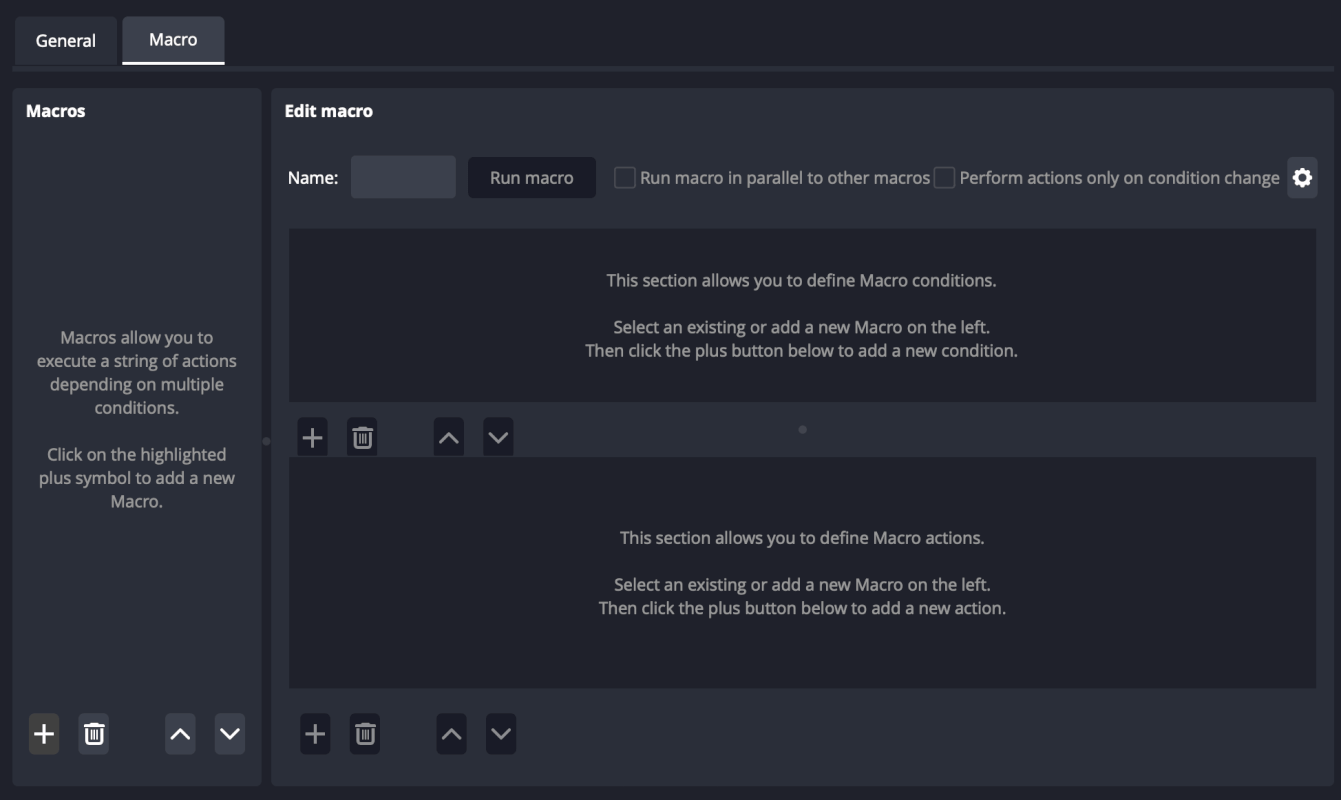
Here we can begin adding macros for our stream to automate multiple different actions. Let’s begin with the “Stream is about to begin” automation.
Starting the Stream
Inside the Macro tab, we have a few different panels to work with. To begin, lets add a new macro by clicking the “+” under the left “Macros” panel and name it what you want. In this case, I named it “Starting stream”
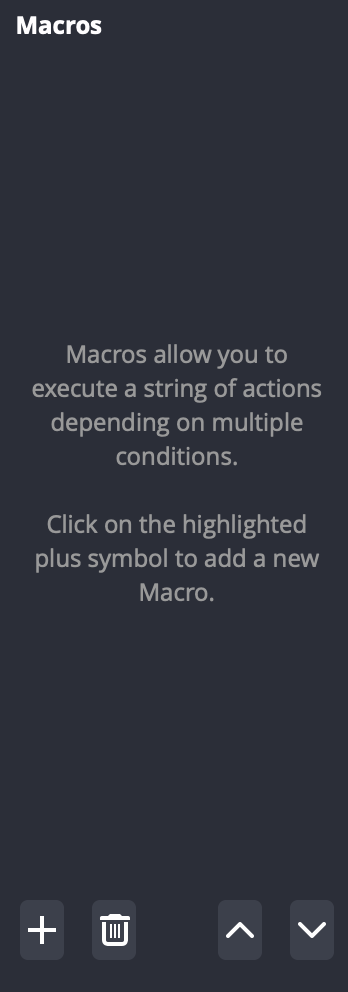
Now, under the “Edit macro” panel, we have two sections, the macro conditions on top and the macro actions on the bottom. First, lets click the “+” under macro conditions to create a new condition. This will then generate a conditional statement builder for us to define what will begin our macro. In this case, we want it to read “If Streaming Stream starting”. This will trigger the macro whenever we start the stream.

Next, we want to create a new macro action by clicking the “+” under the bottom panel. There are a couple of things we want to do here, the first of which being to switch to our Starting stream scene. This can be one with an action with the following information: Switch scene → Switch to scene <scene name> using “Cut”, which will automatically set the stream to that scene upon starting the broadcast.
If you haven’t already yet, we suggest creating a scene with a placeholder image or looping video to direct to.

We can also add in some audio as a part of this automation. First, lets add a media source into our scene with some royalty free music we want to play as people join the stream. This could also be a looping video if you are not using a static image in the scene. Ensure that “Loop” and “Restart playback when source becomes active” are checked to ensure that the music doesn’t fully stop until you tell it to.
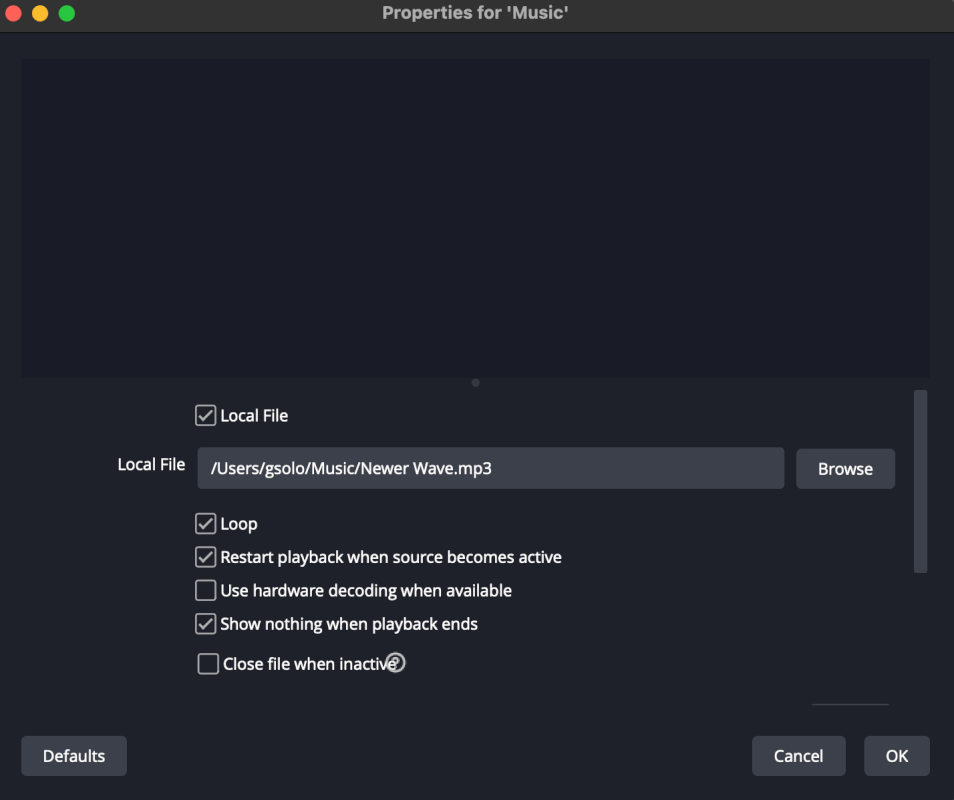
Then, back in Advanced Scene Switcher, we can add a new macro action to our Starting stream macro to read “Media Music Play <Music/video source>”. This will then ensure that the audio file starts upon starting your stream!

Now, upon starting your stream, OBS will automatically switch to your “Starting stream” scene, and play the audio/video file for a greeting page for all early viewers to be welcomed by as you start amassing viewers.
Creating a Stream Intro
Now that we have created our “Starting soon” macro, we will want to add in a macro for an intro video that will play before switching to the live video feed. This can be done very much in a similar way to what we did above, but with a different macro condition. With a new macro we will title “Intro”, we want to create a condition this time with the “Hotkey” option. Name it whatever seems best to you.

We can then modify the hotkey within the OBS Settings menu under “Hotkeys” to whichever key command seems best, which can be found under the name submitted in the previous step.
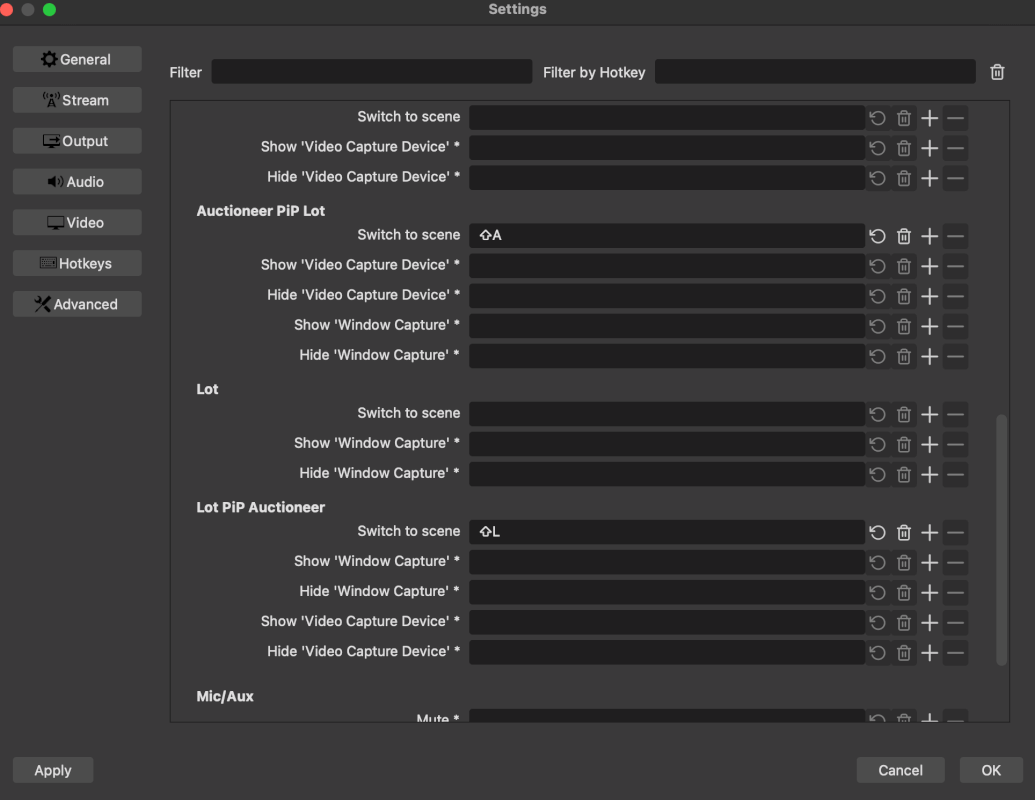
Back in Advance Scene Switcher, we can now add in the actions as we did before. Let’s add in another Switch scene:

Another Media action:

This time, we want to switch the scene one more time after the video finishes. To do this, we first need to add a “Wait” action equal to the length of the intro video. This will keep the actions from triggering before the video is finished.

Then after the wait, we can Switch scene one last time:

And now upon hitting the assigned hotkey, the Getting Started scene will swap to your intro video, play it, then switch to the live feed when complete!
Ending Stream Macro
Before ending your stream, you may want to give your viewers another “Stream is ending” screen to let them know the broadcast is completed if tuning in. This will be build very similarly to the previous macro. To begin, we start with another Hotkey condition:

Next, we switch the scene to “Stream Ending”:

Play our exit music or video

Wait for the media to finish:

Then stop the stream with a final action of “Streaming → Stop Streaming”

And that’s it! One hotkey will transition to an ending slide, play music, and end the stream for you. No more fiddling around with multiple applications and buttons to finish that task.
Wrapping Up
In this article, we outlined a few different things:
- Installing Advanced Scene Switcher to OBS (and OBS-WebRTC)
- Configuring macros for
- Starting a stream
- Playing an intro video
- Ending a stream
- Adding custom hotkey support
- Managing autoplayed media for streams
This is an extremely useful tool for turning your live streams into a more professional, broadcast quality operation, with use cases expanding to many different industries needing to live stream their content and events.
Read more about the Advanced Scene Switcher on the OBS Forum, or read this blog post on getting started with OBS-WebRTC to enable your live streams to broadcast in real time for maximum interactivity with your viewers.
Happy streaming!

