Surround sound can be used to create compelling and moving experiences for a variety of audiences. Sometimes called immersive audio, surround sound requires the use of multiple audio channels to add dimensionality to the audio, allowing sounds to surround the listener.
In this guide, we will walk you through setting up a streamed 5.1 surround sound environment that allows the movement of sound in real time when published with Dolby.io and OBS.
The guide will walk you through the setup for Windows and Mac computers. For hardware, a 4 channel audio interface is used to connect to the REAPER DAW. Additional audio interfaces can be used to support as many audio input channels as desired.
Streaming 5.1 Surround Sound with Windows
To get started, install the following items on your Windows PC:
Software
- Dolby.io OBS WebRTC. (Windows Install)
- Reaper Audio DAW.
- On installation of Reaper, select the add-on ASIO plugin.
- ReaPlugs (ReaPlugs VST FX Suite)
- Asio4all Drivers
Hardware
- ZOOM AMS 44 audio interface.
OBS WebRTC
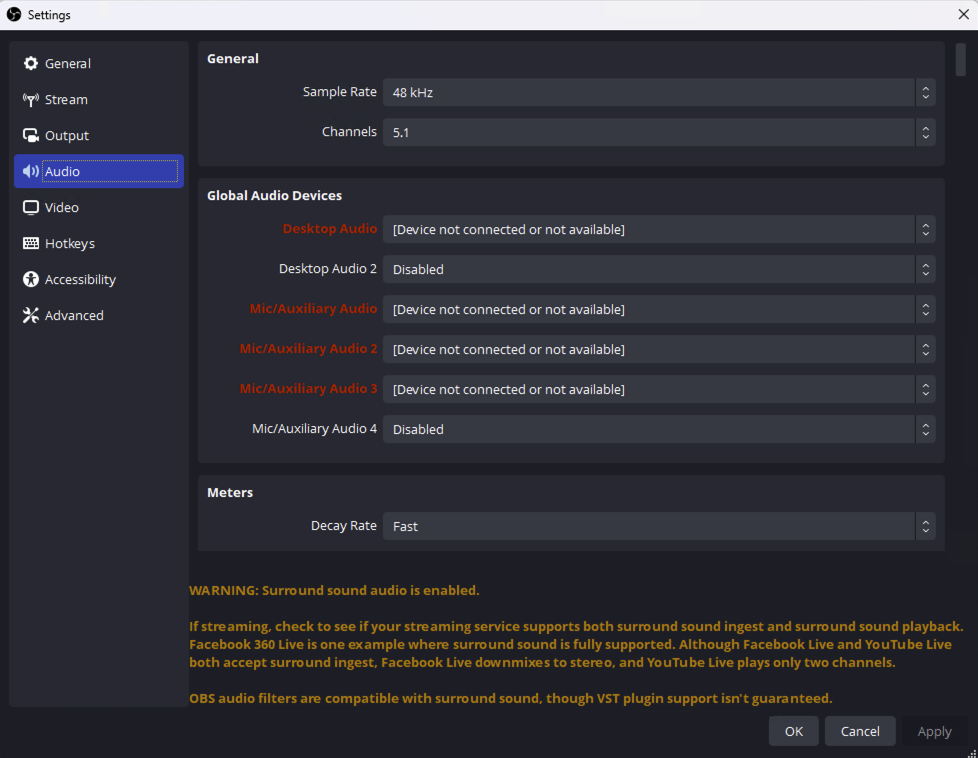
With the required Software and Hardware installed, we now need to configure OBS. Open OBS WebRTC and on the left select Audio panel. Select the 5.1 option in channels.
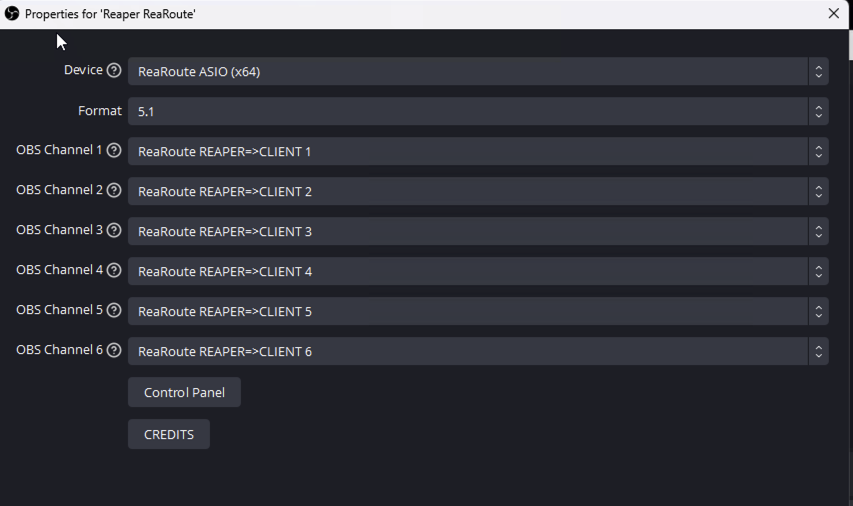
Next, create your Scene and add your sources to OBS. Create an Audio Source and select ReaRoute Asio(x64). You will want to use the 5.1 format for this setup and here we will map each of the six OBS WebRTC channels. Select ReaRoute REAPER=>CLIENT 1 through 6 as shown below.
With the channels configured, save and exit the audio panel. At this stage in the OBS setup, you can choose to add a video feed in the video panel.
The final step to setting up OBS is to add your Dolby.io stream credentials to the stream tab of the settings. If you haven’t done this before it’s recommended you follow the Dolby.io streaming with OBS guide.
The REAPER DAW
With OBS configured it is now time to set up the REAPER DAW. Follow the below steps:
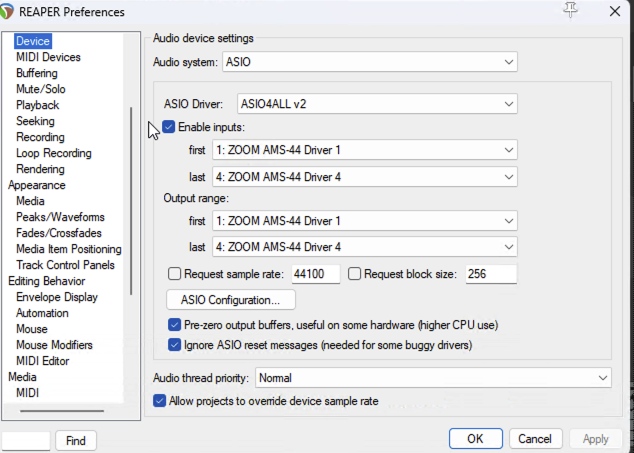
- Open your REAPER DAW and at the top select>options>preference.
- On the left select the of preference select>Audio>Devices.
- Depending on your audio interface you will select ASIO>ASIO4ALLv2
- Enable the inputs and for this audio interface, you see ZOMM AMS-44.
- Use all audio inputs by adding the first as ZOOM AMS-44 Driver 1 and the last as ZOOM AMS-44 Driver 4
- The number of input devices you can capture to your DAW will be dependent on the audio interface you use.
- Select OK and you should see your inputs available in REAPER.
You are now ready to add sources to REAPER. Add a new track by selecting the “Add” button on the left panel. Select the red button to arm the input source.

Once it is armed add your input source. For the ZOOM AMS-44, I have four input options. For this, I will be using a Mono mic setup for each.

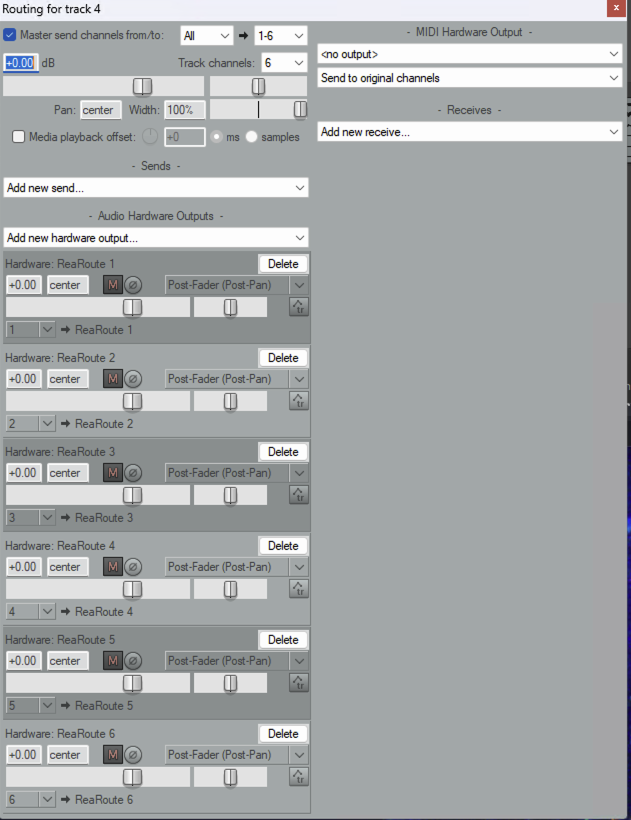
Now that you have your input ready the audio needs to be set up for surround sound. Select>Route to map each of the 6 channels. This will need to be done for each track or input device. Select>Add new hardware output and create a Mono channel mapped to each ReaRoute channel as shown.
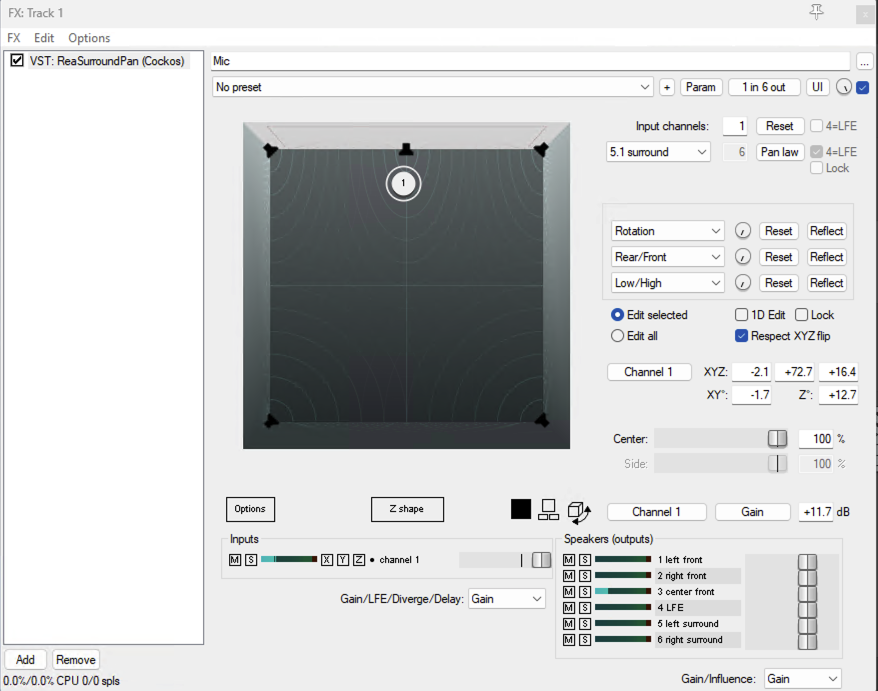
Select the FX button VST REASurround (Cockos) or ReaSurroundSoudPan(Cockos) for 3D. Input channels should be 1 and speaker output should be 5.1 surround. The white puck (Pictured below) represents the Mic in the center of the room and can be placed in any location. This will also be done for each of the audio sources used for each REAPER track.
Adding a Multitrack Audio Sample
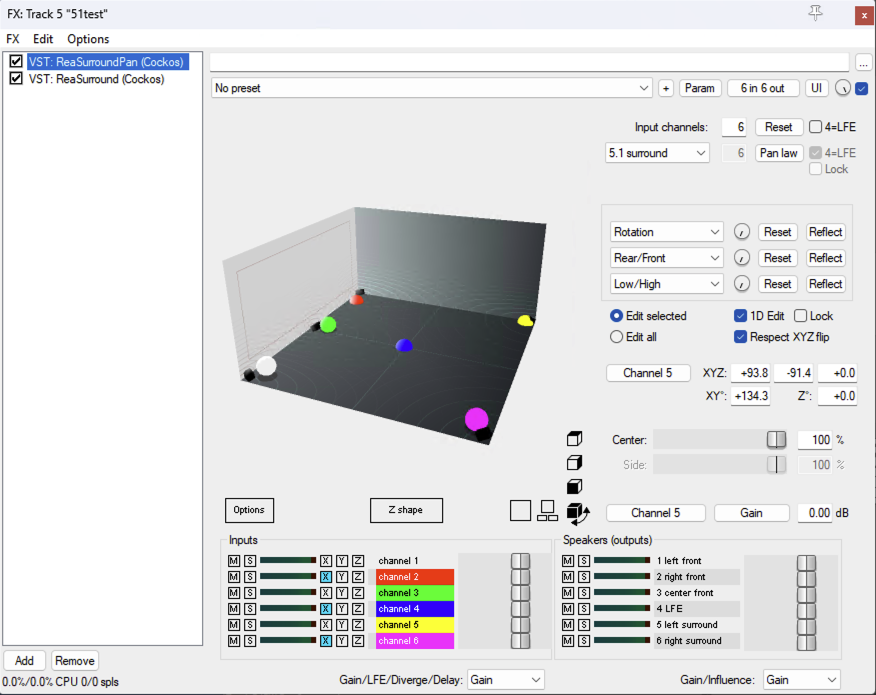
You can also take an existing surround sound audio track and set it up the same way. This will allow you to move each audio track to a different position as needed.
Here we are using a 5.1 speaker test audio file.
- Input channels will be 6 and output speakers 5.1 surround.
- Each colored puck represents the corresponding audio track and can be moved to any location.
Start Streaming
You have now configured your inputs and media, and are ready to publish for your audience.

Streaming 5.1 Surround Sound with Mac
First, install the following items on your MAC.
Software
- Dolby.io OBS WebRTC. (Mac Install)
- Reaper Audio DAW.
- BlackHole (Select 16 Channel version)
Hardware
- ZOOM AMS 44 audio interface.
OBS WebRTC
With the required Software and Hardware installed, we now need to configure OBS. Open OBS WebRTC and on the left select Audio panel. Select the 5.1 option in channels.
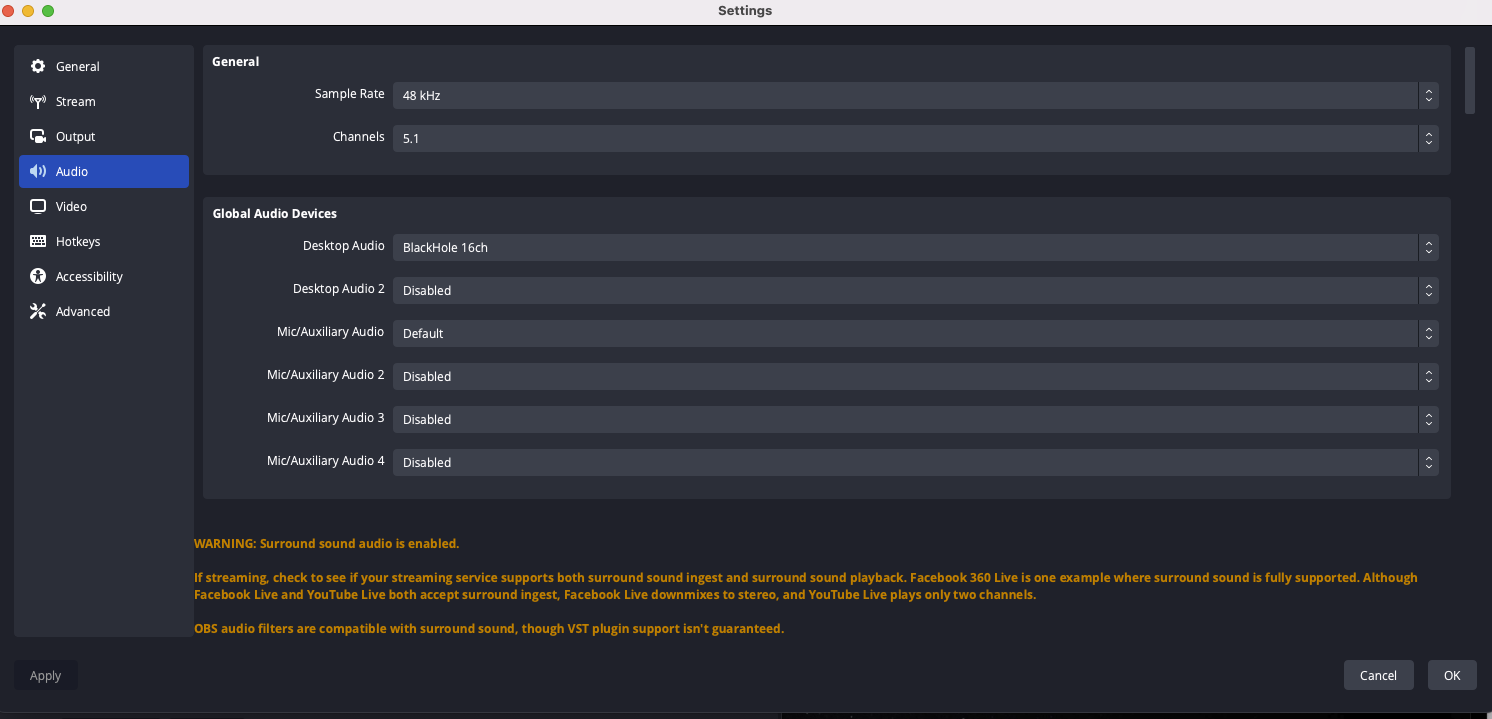
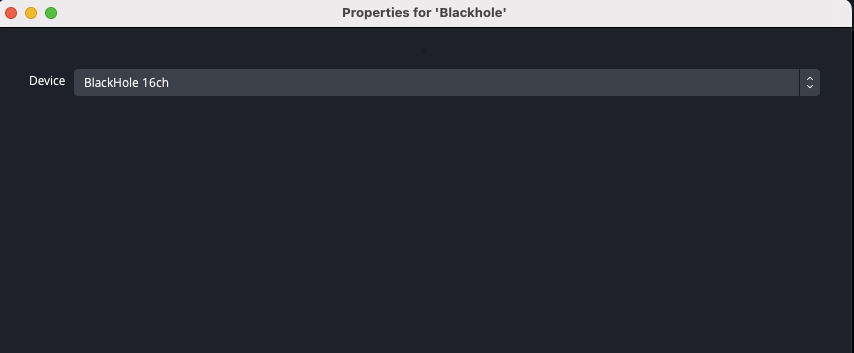
Create your Scene and add your sources to OBS. Create an Audio Source and select BlackHole 16ch.
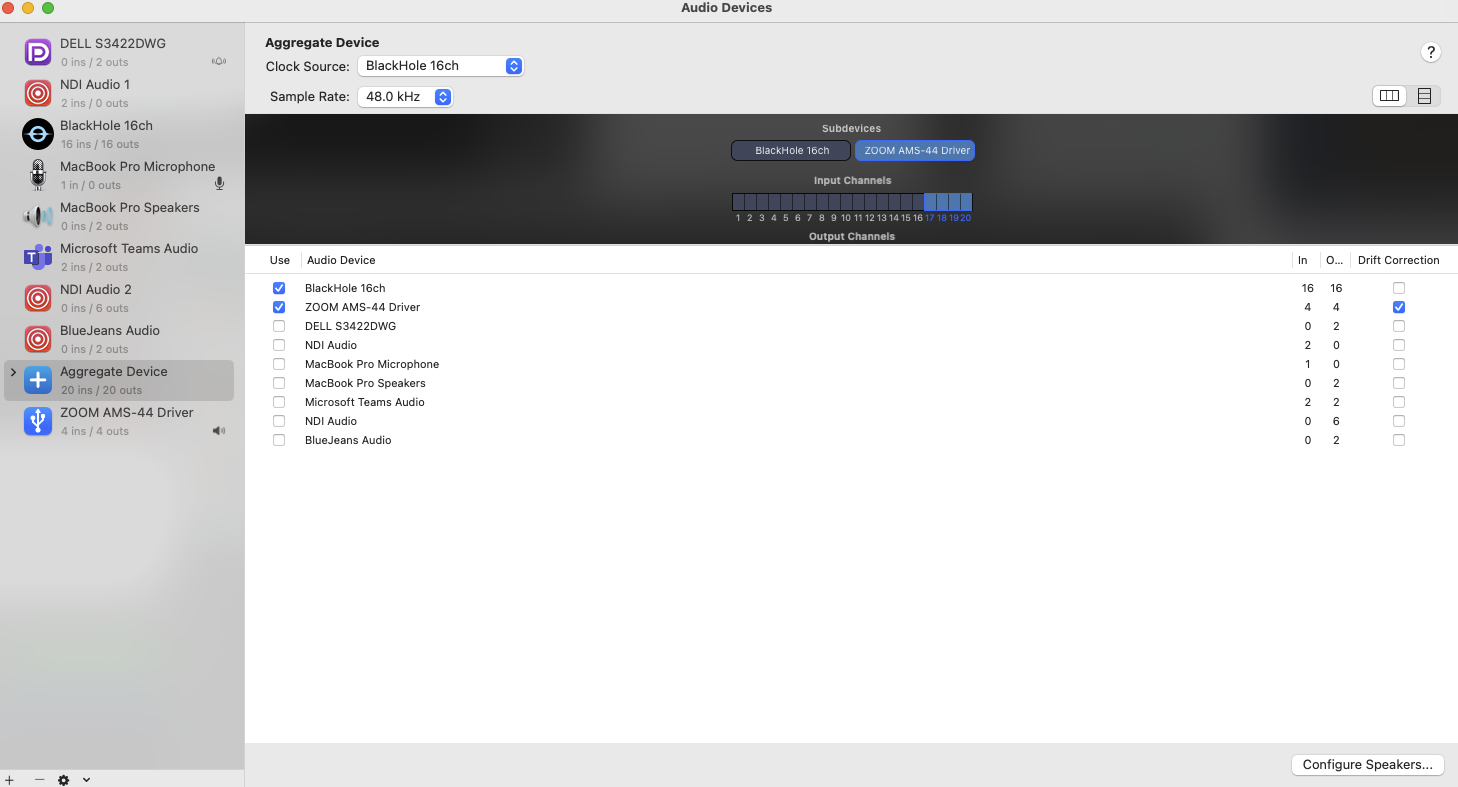
We need to add the audio interface (Zoom AMS-44) and BlackHole to both be seen by your DAW(REAPER) Open MAC audio MIDI and you should see your BlackHole 16ch and ZOOM AMS-44 driver. Select the + to add an Aggregate Device using BlackHole 16ch first then ZOOM AMS-44 driver.
The REAPER DAW for MAC
- Open your REAPER DAW and at the top select>options>settings.
- On the left select the of preference select>Audio>Devices.
- Depending on your audio interface you will select Aggregate Device.
- Select OK and you should see your inputs available in REAPER.
Now you’re ready to add your sources to REAPER and can add a new track by clicking the add button on the left panel. Select the red button to arm the input source.

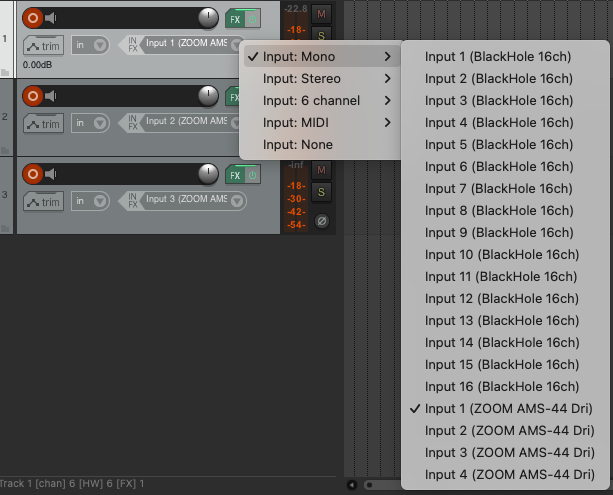
Once it is armed add your input source. For the ZOOM AMS-44 I have four input options. For this demo, I will be using a Mono mic setup.
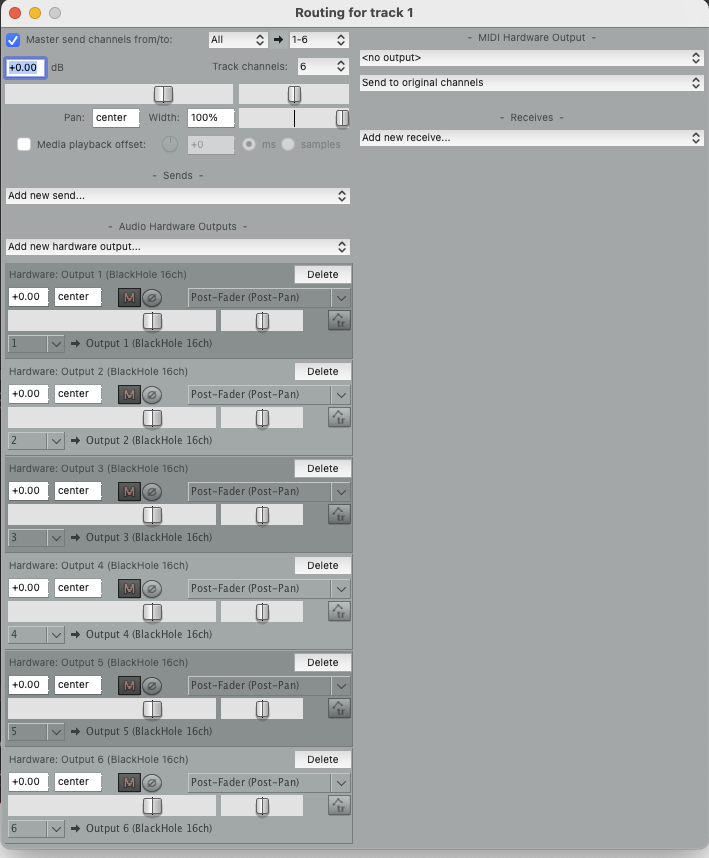
Now that you have your input ready the audio needs to be set up for surround sound. Select>Route to map each of the 6 channels. This will need to be done for each track or input device. Select>Add new hardware output and create a Mono channel mapped to each BlackHole 16ch channel as shown.
Select the FX button>VST REASurround (Cockos) or ReaSurroundSoudPan(Cockos) for 3D. Input channels should be 1 and speaker output should be 5.1 surround. The white puck represents the Mic in the center of the room and can be placed in any location. The will be done also for each of the audio sources used for each REAPER track.

Start Streaming
You have configured your inputs and media, and are ready to publish to your audience.