Open Broadcaster Software or OBS has quickly become the de facto app for cross-platform screencasting being free, reliable, and very popular. One downside to OBS is that in its native form it doesn’t support WebRTC, a powerful real-time communication protocol perfect for live virtual events, remote post-production, and remote live production (REMI). To remedy this feature gap, CoSMoSoftware (Now part of Dolby.io) created a forked version of OBS with WebRTC support that’s compatible with Dolby.io’s WebRTC Streaming platform (formerly Millicast). Using this forked version of OBS users can stream high-quality content at under half a second delay anywhere in the world at scale, opening the door to a world of possibilities.
In this guide, we’ll be outlining how to get set up with the WebRTC-enabled version of OBS, how to start streaming with WebRTC, and how OBS can be useful for remote live production workflows.
Interested in the video version of this blog? Check out this guide here.
How to Install WebRTC for OBS
To install our WebRTC OBS fork navigate to the open-source project here, and download the appropriate installer.
- If you are using macOS, download the
.dmgfile. - If you are using Windows, download the
.msifile. - if you are using Linux, download the appropriate
.debfile.

Once downloaded open and run the installer. Depending on what operating system you are using, OBS WebRTC might prompt you to update your NDI runtime, clicking yes downloads an installer you should run, this is required for using OBS WebRTC.
Note: If you already have OBS installed make sure you don’t get confused between our version and the original version. Our version is titled “OBS WebRTC” whereas the original is titled “OBS Studio”.
With the installation successful we can now open up WebRTC OBS and see what’s new.
Streaming WebRTC with OBS
The only major difference between this OBS fork and the original project is the ability to connect to the Dolby.io Streaming servers for streaming RTMP and WebRTC. If you click on Settings, then Stream, you should see a different list of settings.

In the settings, you can switch between RTMP and WebRTC, Codec, and even Multisource and Simulcasting. Additionally, you’ll notice a Stream Name text box and a Publishing Token text box, this is where you add your credentials to authenticate the connection to the Dolby.io Streaming servers.
Getting your Dolby.io Streaming WebRTC Streaming Credentials
In addition to installing the WebRTC OBS fork, you’ll also need to create a free Dolby.io Account. The free account is limited to 50 Gigabytes of data transfer a month, which will be plenty for testing, playing with, and using our OBS fork.
Once you have created your account navigate to the dashboard and switch to Streaming. From Streaming, you can either create a Token or use an existing token. If you are interested in learning about how to secure and protect tokens check out this blog here.

With your token created, you can click on it to enter the details page. From the details page, you can switch to the API tab to find all of your token credentials.

Copy and paste your Stream Name and Publishing Token into the appropriate text boxes in the OBS WebRTC fork.
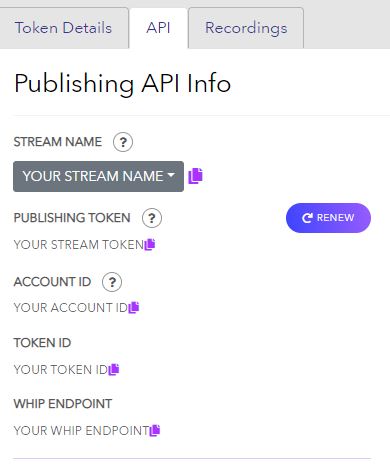
From here your credentials are all set up for starting a real-time WebRTC stream. Apply and exit the settings.
Start a Real-time Stream
You can add video, audio, and screen capture devices just like in regular OBS. Once you have all of your inputs added to the scene, and all of your scenes set up we can start streaming. Click Start Stream to get started.
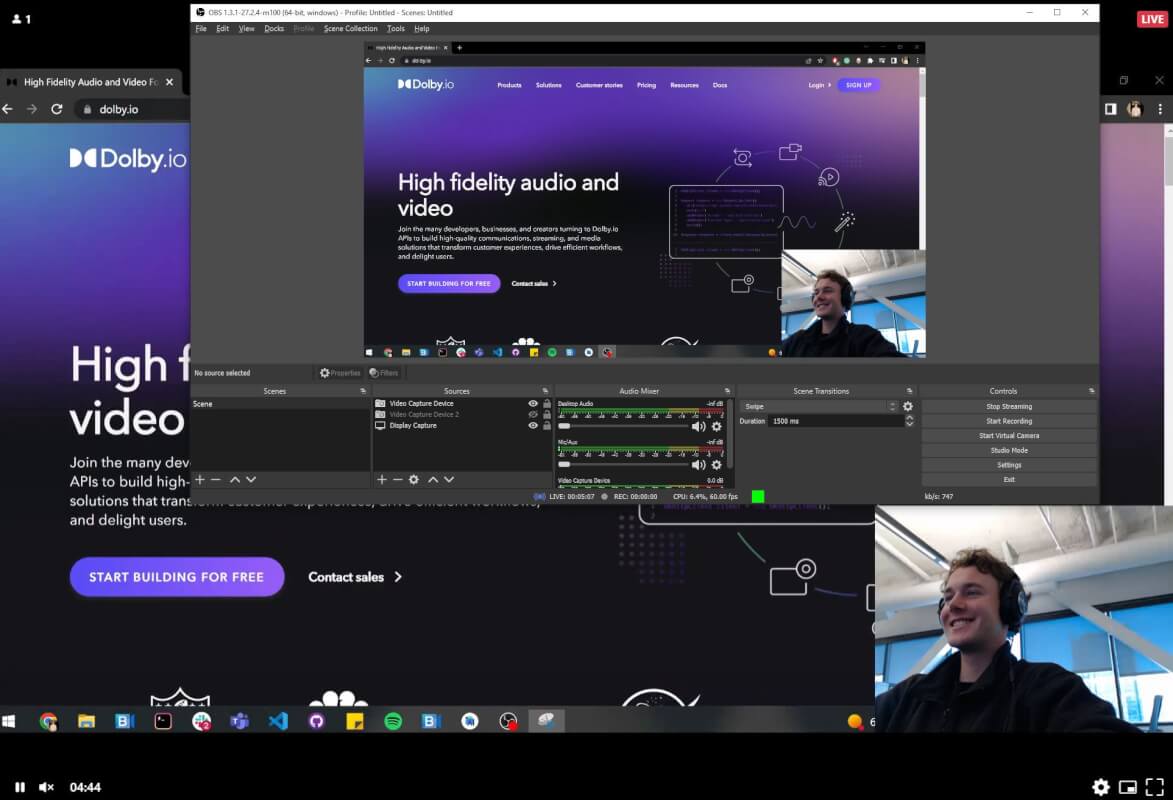
The easiest way to view the stream is through the Dolby.io Streaming Hosted Player. A link to the hosted player can be found on your dashboard in the same location we found your credentials. In general, the hosted player uses the following URL format unless you’ve secured it with a token:
https://viewer.millicast.com?streamId=<YOUR_ACCOUNT_ID>/<YOUR_STREAM_NAME>Managing Multiple Media Sources for REMI
Remote Integration Model or REMI workflows benefit from leveraging Dolby.io Streaming WebRTC technology. By ingesting multiple content streams into the WebRTC-enabled OBS fork, users can accomplish a remote production workflow before then streaming out to their audience. Because of the power of WebRTC, users minimize the delay between Camera, Remote Studio, and Audience, whilst still retaining the quality.
There are two ways to accomplish this workflow:
1. (Recommended): Using an NDI Source.
Network Device Interface or NDI enables production quality audio and video transfer over computer networks for applications such as live production. NDI sources are optimized for production quality REMI workflows, delivering uncompressed audio and high-quality video. If you are interested in setting up a REMI workflow using NDI, check out this guide here.
2. Using Browser Source.
Using the browser source method is less optimal for production quality events as the audio and video is compressed twice. The browser source method is, however, very easy to set up, and can be useful for testing how a REMI workflow using Dolby.io Streaming might look.
To set up a REMI workflow using the Browser Source first add a Browser input.
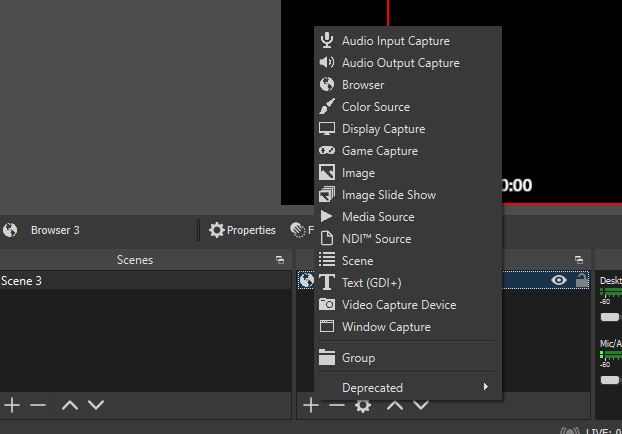
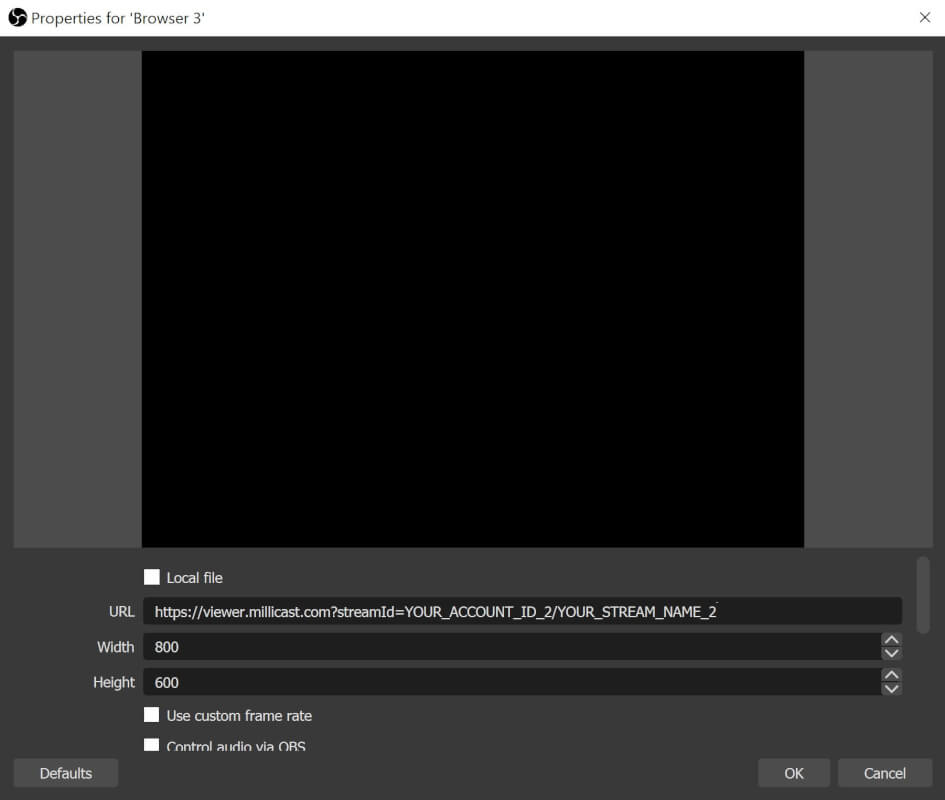
Next, add the URL to a Dolby.io Streaming viewer in the URL text box. This viewer MUST use different credentials to the ones you added in the OBS settings which will require you to create a new token on the dashboard.
Now that you’ve added your new viewer to the Browser Source URL, start streaming to that URL from a device such as a phone, you should see the video appear in OBS. For example, I started a stream from my phone, which is being streamed to the Browser Source inside OBS.
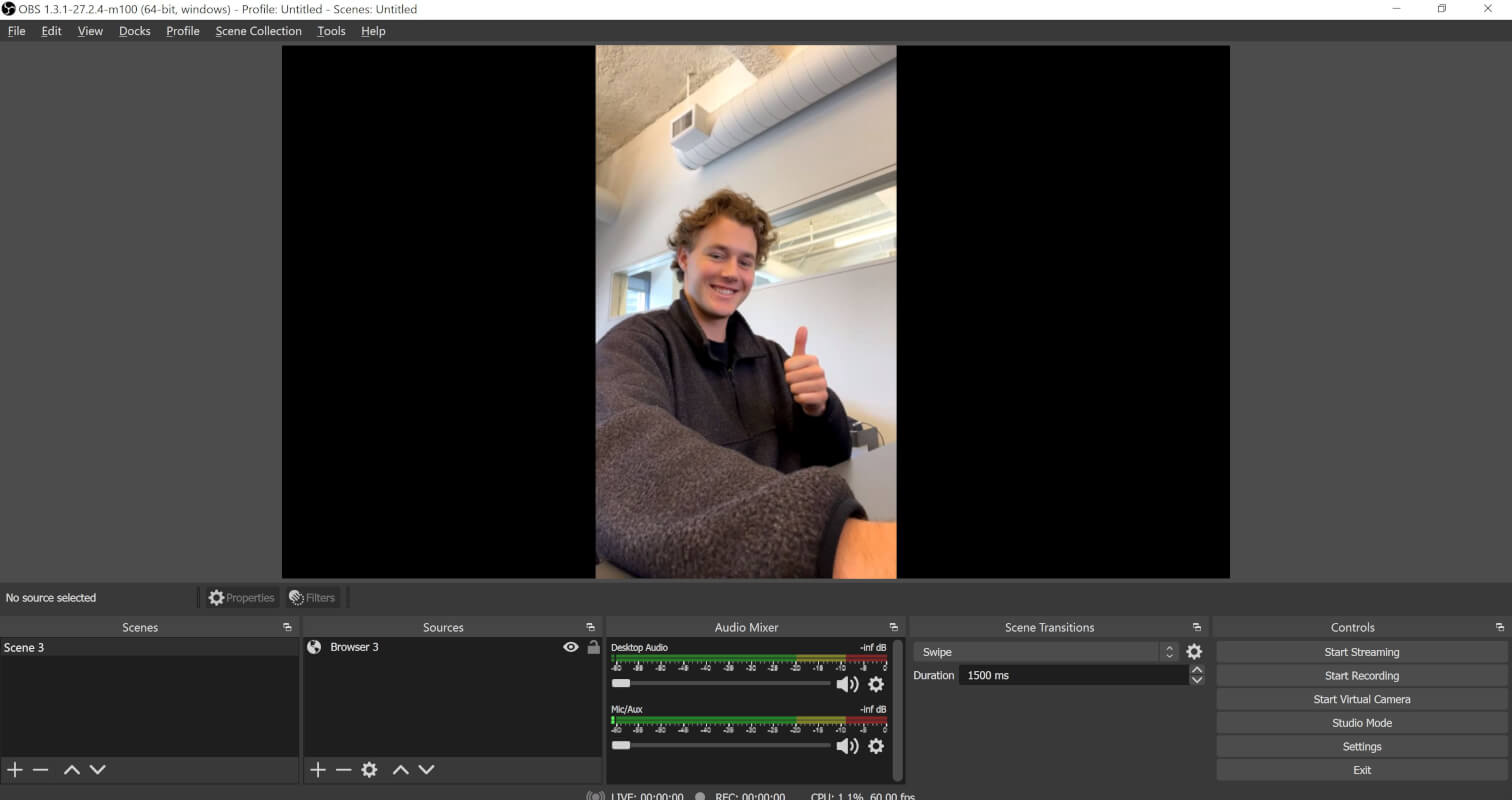
In the above image, my phone is using Dolby.io Streaming to deliver a stream to OBS on my laptop. Although we are only using one stream, we could add as many streams as we want, as long as each stream has its own Browser Source and its own unique Dolby.io Millicast viewer URL. If I wanted to mix five streams, I’d require five Dolby.io Millicast tokens, each with its own viewer URL and Browser Source.
From here we can start streaming from OBS, which will be delivered to the original viewer URL.

Try Out WebRTC and OBS Yourself
The WebRTC fork of OBS is a great tool for utilizing the power of WebRTC, Dolby.io Streaming, and the amazing open-source project OBS Studio. OBS is perfect for setting up real-time virtual events, remote post-production, and REMI workflows where quality, latency, and scale aren’t compromised. If you are interested in learning more about Dolby.io streaming check out our documentation, this guide on managing and securing tokens, or learn about how you can build your own stream viewer using JavaScript.
Feedback or Questions? Reach out to the team on Twitter, LinkedIn, or via our support desk.

