

WebRTC allows for high-quality low latency live streams, engaging audiences all over the world in real-time.
But what about those that can’t join the live stream synchronously?
In this guide, we’ll explore how to enable recording for your dolby.io WebRTC live stream and how you can retrieve these recordings for distribution on platforms such as YouTube and Facebook.
Enabling WebRTC Live Stream Recording
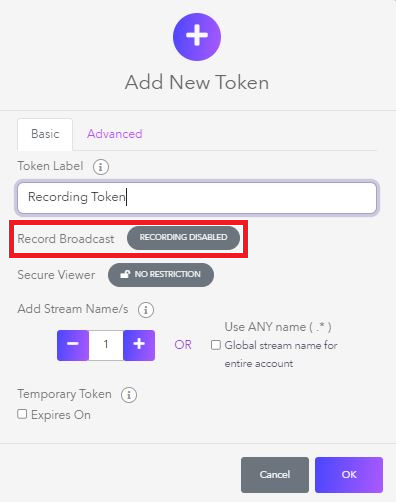
To enable WebRTC stream recording your first need to navigate to the dolby.io streaming dashboard and create a new token or edit an existing token. To create a new token, click the purple and white “create” icon on the top left of the Live broadcast - Publish tokens page, name your token, and click on the Recording Broadcast button from within the token editor.
Alternatively, if you have an existing token you want to enable recording for you can edit it in the Token details tab of the token.
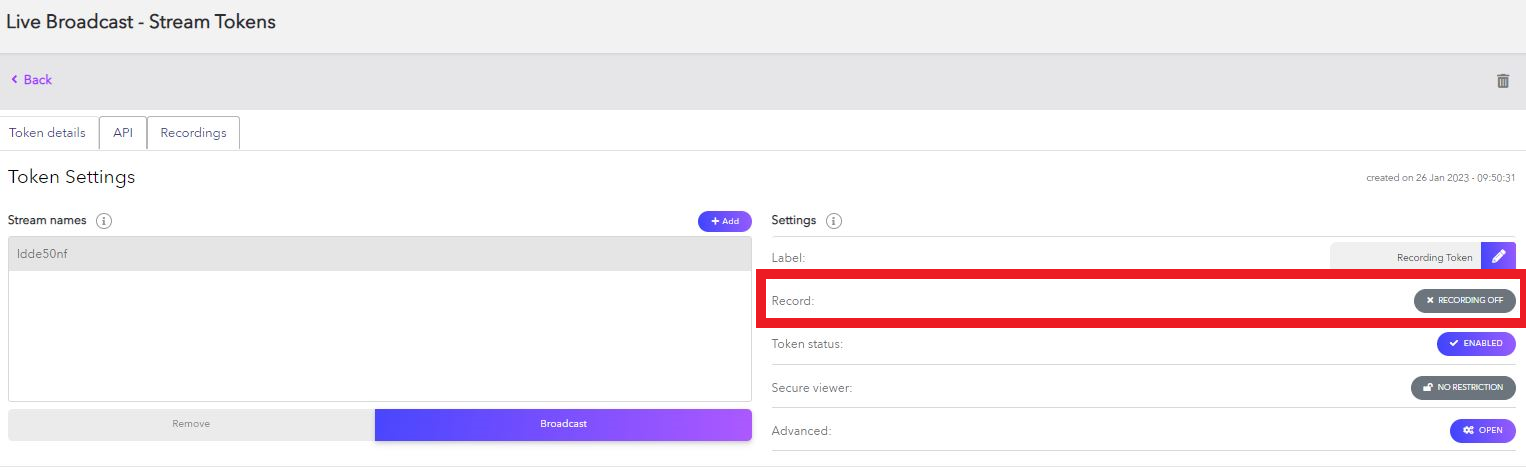
With recording enabled, any stream created with this token will automatically capture the stream and save it to the archive. It’s important to note that token properties such as recording can’t be updated during broadcast, requiring the stream to conclude before the changes take effect.
If you are programmatically creating tokens with the dolby.io Streaming REST API you can control whether the stream is recorded by setting the record flag to true.
const options = {
  method: 'POST',
  headers: {
    accept: 'application/json',
    'content-type': 'application/json',
    authorization: 'Bearer YOUR_API_KEY'
  },
  body: JSON.stringify({record: true})
};

fetch('https://api.millicast.com/api/publish_token', options)
  .then(response => response.json())
  .then(response => console.log(response))
  .catch(err => console.error(err));
Where Can I Find WebRTC Live Stream Recordings?
Once you have created a recording-enabled token you can begin streaming to your audience. Once the stream is finished, the recording will be processed and added to the archive. The archive can be found on your dolby.io Streaming Dashboard and allows you to filter by token, token name or token creation date.
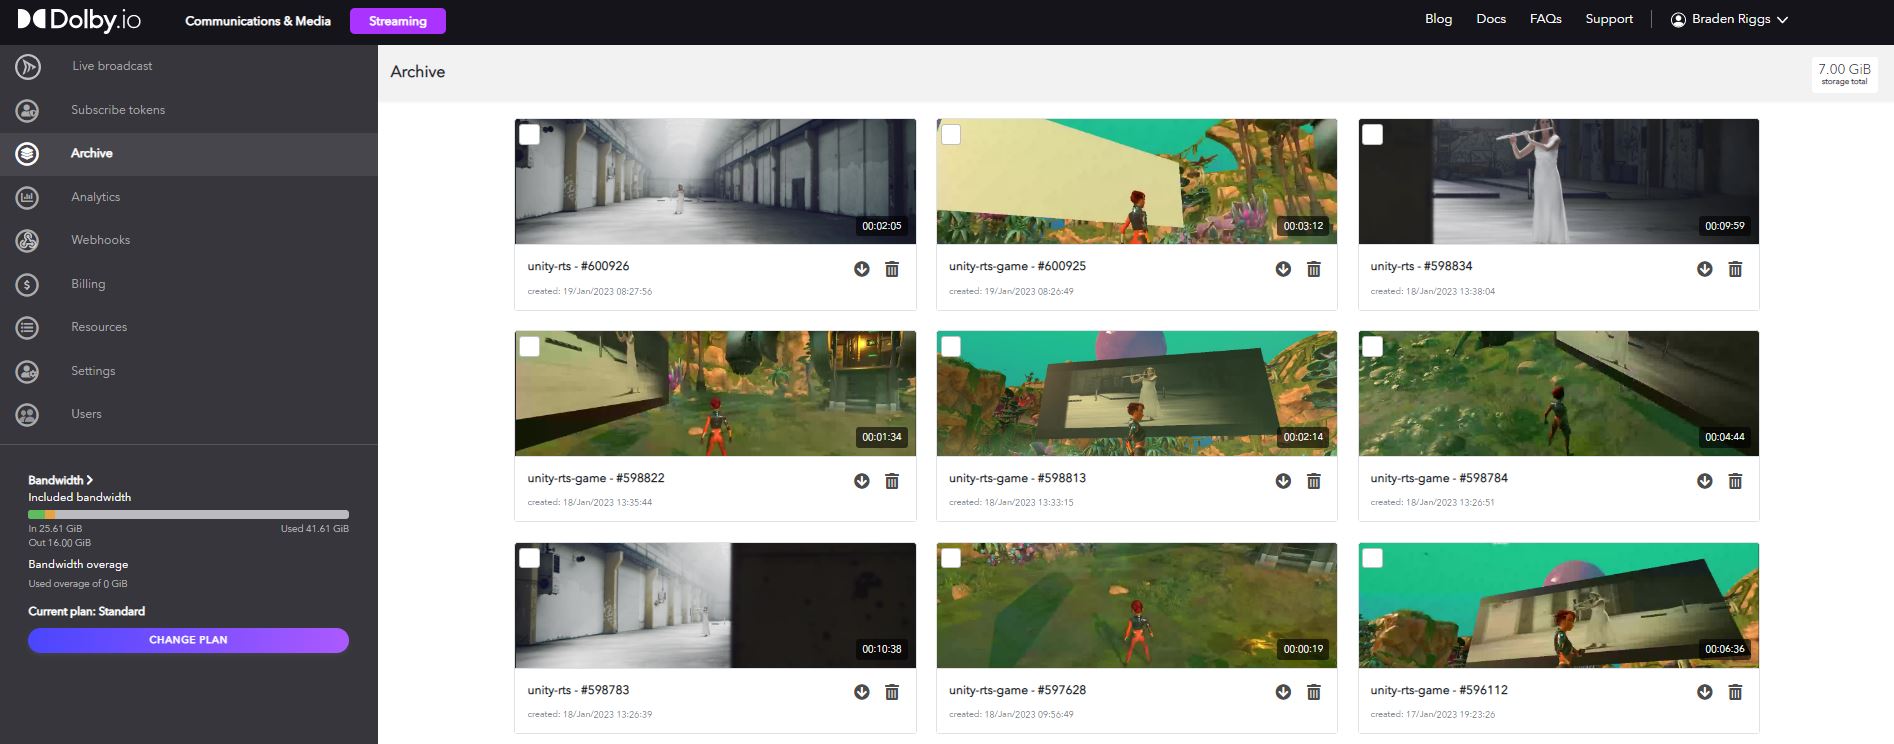
From the archive, we can download the recordings for syndication on platforms such as YouTube or Facebook.
In addition to the dolby.io Streaming Dashboard, you can list, read, and delete recordings programmatically with the Streaming REST API. For example, this API call lists 100 recordings associated with a particular token:
const options = {
  method: 'GET',
  headers: {accept: 'application/json', authorization: 'Bearer YOUR_API_KEY'}
};

fetch('https://api.millicast.com/api/record_files/list_by_token?token=YOUR_TOKEN&sortBy=RecordedOn&page=1&itemsOnPage=100&isDescending=true', options)
  .then(response => response.json())
  .then(response => console.log(response))
  .catch(err => console.error(err));
Are there Costs Associated with Recording?
Storing recordings on the dolby.io servers does incur an additional storage fee. This fee depends on your plan and can be found on the pricing page. All video archive prices are billed as price per Gigabyte (GB) per month. On the Standard plan, Video Archiving is billed at $0.25 /GB, meaning that a 1 GB file stored on the dolby.io servers for 6 days would incur a charge of $0.05.
Get Started Building with dolby.io Streaming
dolby.io WebRTC streams can be enjoyed in real-time or asynchronously without sacrificing quality or scale. If you are interested in learning more about dolby.io streaming check out our guide for building a low latency live stream app or how you can set up OBS to broadcast WebRTC streams.
Feedback or Questions? Reach out to the team on Twitter, LinkedIn, or via our support desk.


")