


With competition rising in the live streaming space, companies are battling it out to offer more compelling streaming experiences, whether that is for live events, e-learning, or remote post-production. In order to stand out, solutions must balance offering high-quality audio and video in addition to offering optimal content delivery speeds, leading platforms such as Twitch and YouTube Live to sacrifice real-time (10-15 seconds of latency) in favor of quality. But what if you didn’t have to sacrifice at all, and could have both quality and speed? In this guide, we’ll explore building a webRTC low latency streaming platform capable of delivering 4k streams with just a few lines of JavaScript.
Interested in the video version of this blog? Check out this guide here.
Building a WebRTC Streaming platform with Dolby.io Millicast and JavaScript.
To get started building your live stream platform, we first have to set up a free Dolby.io Millicast account here. Dolby.io Millicast is an ultra-low latency platform that provides APIs, SDKs, and integrations for content delivery with a delay of 500 milliseconds or less to anywhere in the world using a technology called WebRTC. The free account is hard-capped at 50 Gigabytes of data transfer a month, which will be plenty for building and testing your JavaScript live stream platform.
The Millicast WebRTC Javascript SDK
To get started, clone the GitHub repo, which contains an example app demonstrating how to implement everything you’ll need for building a Millicast WebRTC Live Stream viewing platform.
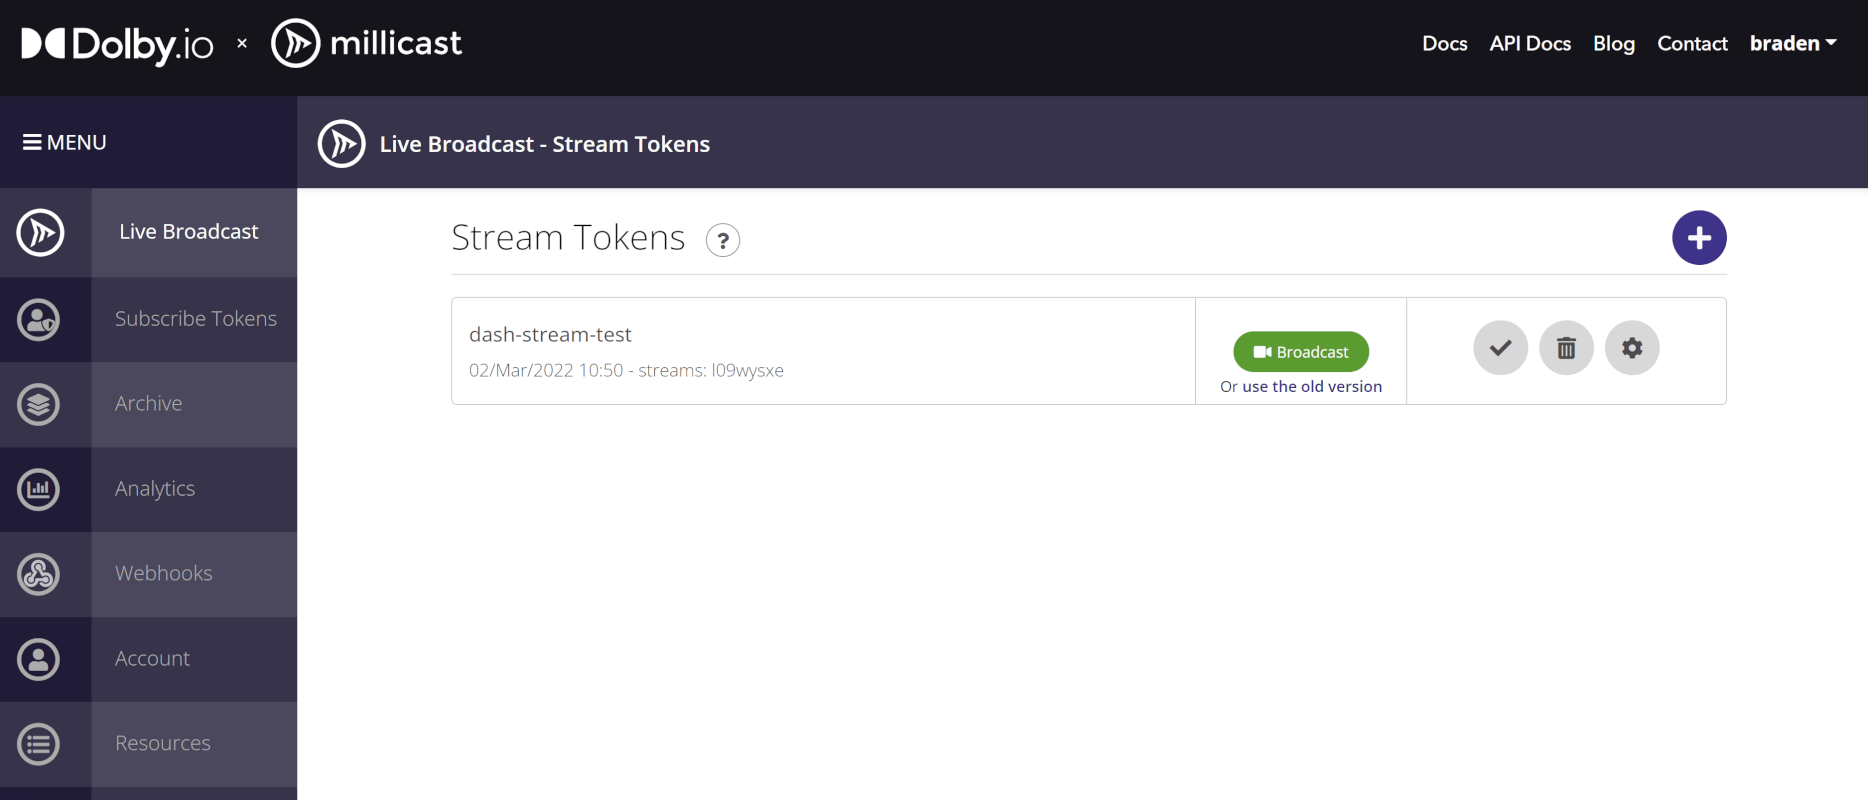
To test out this app, we need to navigate to the dashboard of your newly created Millicast account. There you’ll see a header, Stream Tokens, which includes a list of your streaming tokens. If you’ve just created an account you’ll only have one token, which you can click to open its settings.
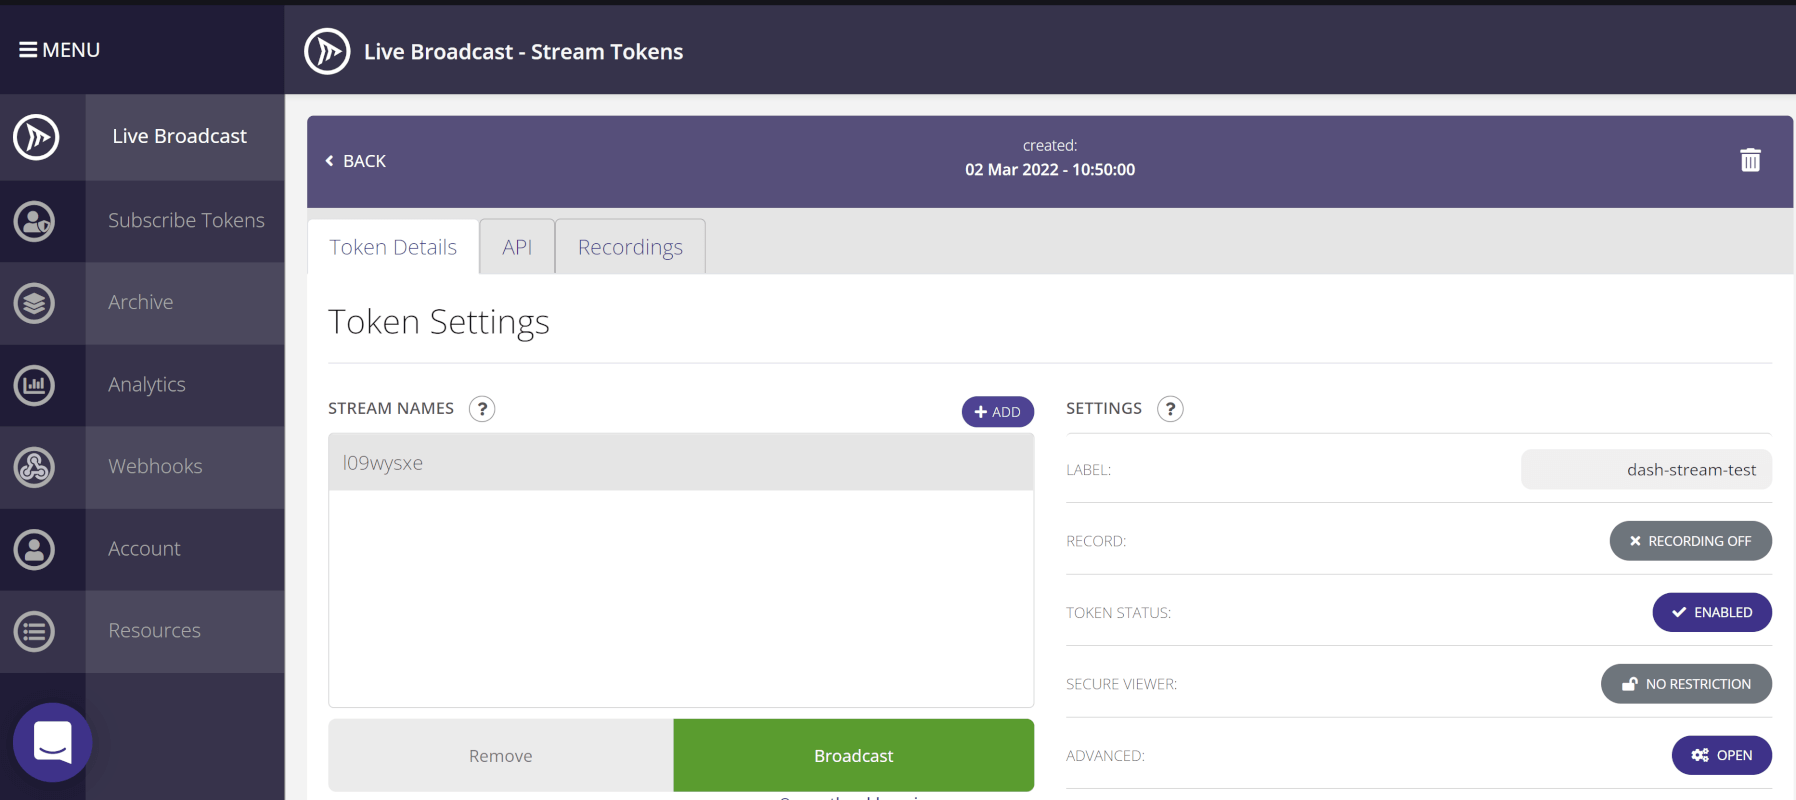
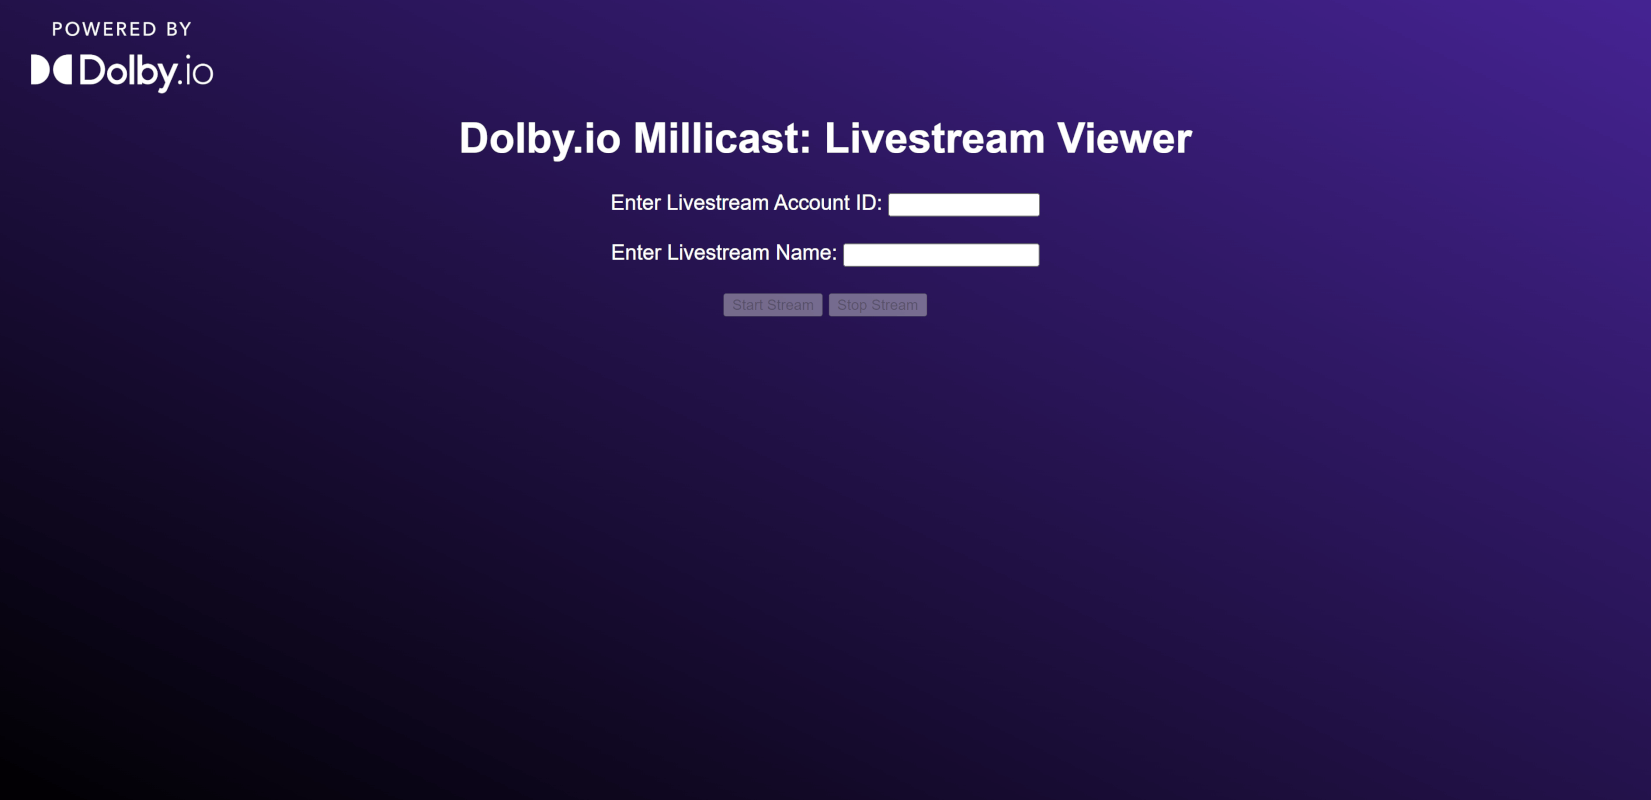
From Settings switch from Token Details to the API tab. In this tab, you’ll see lots of different tokens, endpoints, and information. We can disregard most of the info for this app and instead just copy the Account ID value and the Stream Name. Next, switch back to the Token Details tab and click on the bright green Broadcast button. This will launch a WebRTC streaming tool where you can adjust settings and start streaming, although no one will be able to join when you do until you have a working stream viewer. For now, click on the start stream button to begin a live stream. Finally, we can launch our cloned sample app by either using the Live Server extension for VS Code or just opening the index.html file in browser. With the sample app launched, you can connect to your live stream by entering the Account ID and the live stream Name.
To Summarize
- Clone the Live Stream sample project.
- From your Millicast account locate your Stream Token Settings and get your Account ID and Live Stream Name from the API tab.
- Start broadcasting a Live Stream from the Millicast dashboard.
- Launch your sample app by opening index.html in browser.
- Enter the Account ID and Live Stream Name to view your stream.
- Watch your Live Stream!
What’s cool about this sample app is, although it is simple to understand, the app could be hosted on a server and shared with anyone across the web, allowing them to watch what you’re streaming from the Millicast dashboard.
WebRTC Video Streaming with Dolby.io Millicast
Millicast supports a JavaScript SDK which you can utilize as either an NPM package or with the JSDELIVR content delivery network (CDN). For this guide, we will be using the CDN option which we import into the head of our HTML file.
<script src="https://cdn.jsdelivr.net/npm/@millicast/sdk@latest/dist/millicast.umd.js"></script>This import allows us to utilize the tools offered in the SDK. We also need to include a video tag and another script tag linking our HTML file to millicast_viewer.js, otherwise, the rest of the HTML file is set dressing.
<video width="640" height="360" hidden="True" id="videoPlayer" controls class="vidBox"></video>
<script src="src/millicast_viewer.js"></script>
With the Millicast SDK imported, our video player placed, and our HTML and JavaScript files linked, we can change over to millicast_viewer.js to learn about how we authenticate and connect to a live stream.
There are three main steps for authenticating and connecting to a Millicast broadcast inside of millicast_viewer.js.
Step #1: Token Generator
The first step in connecting to a Millicast stream is to define our token generator. Since we imported the SDK via a CDN we need to preface Millicast SDK functions with window.millicast, then the function, in this case, Director.getSubscriber. Additionally, for the token generator, we also have to include the Stream Name and the Account ID. In our example we utilize user input to get these values, however, there are a variety of different options for generating a Millicast token. Using our token generator, we can create a Millicast View option which we will use to connect to the broadcast.
const tokenGenerator = () =>
        window.millicast.Director.getSubscriber({
            streamName: streamName,
            streamAccountId: accID,
        });
const millicastView = new window.millicast.View(streamName, tokenGenerator);
Step #2: Adding the Stream to <video>
Next, we need to add the stream to our <video> tag, defined in the HTML. To do this we define a function called addStreamToYourVideoTag and listen for a track event, such as a broadcast updating, to add to our video tag.
millicastView.on("track", (event) => {
        addStreamToYourVideoTag(event.streams[0]);
    });
As for our function addStreamToYourVideoTag, it just takes in the stream element and sets our <video> tag’s srcObject equal to it.
function addStreamToYourVideoTag(elem) {
    //Adds Stream to the <video> tag.
    let video = document.getElementById("videoPlayer");
    video.srcObject = elem;
    video.autoplay = true;
}
Step #3: Connecting to the Stream
The final step in building our live stream viewer is to specify a few stream settings and connect to the broadcast. First, we define an options object which contains three main parameters:
disableVideo: set to false because we want video-enabled.disableAudio: set to false because we want audio enabled.bandwidth: used to set data transfer limits, however, we set it to zero in this case which means unlimited bandwidth, since we are only testing the app.
const options = {
        disableVideo: false,
        disableAudio: false,
        bandwidth: 0,
    };
Next, we can call the connect function using our millicastView object and our options object. We surround this function with a try-catch statement in case bandwidth issues prevent the broadcast from connecting immediately.
try {
await millicastView.connect(options);
} catch (e) {
console.log("Connection failed, handle error", e);
millicastView.reconnect();
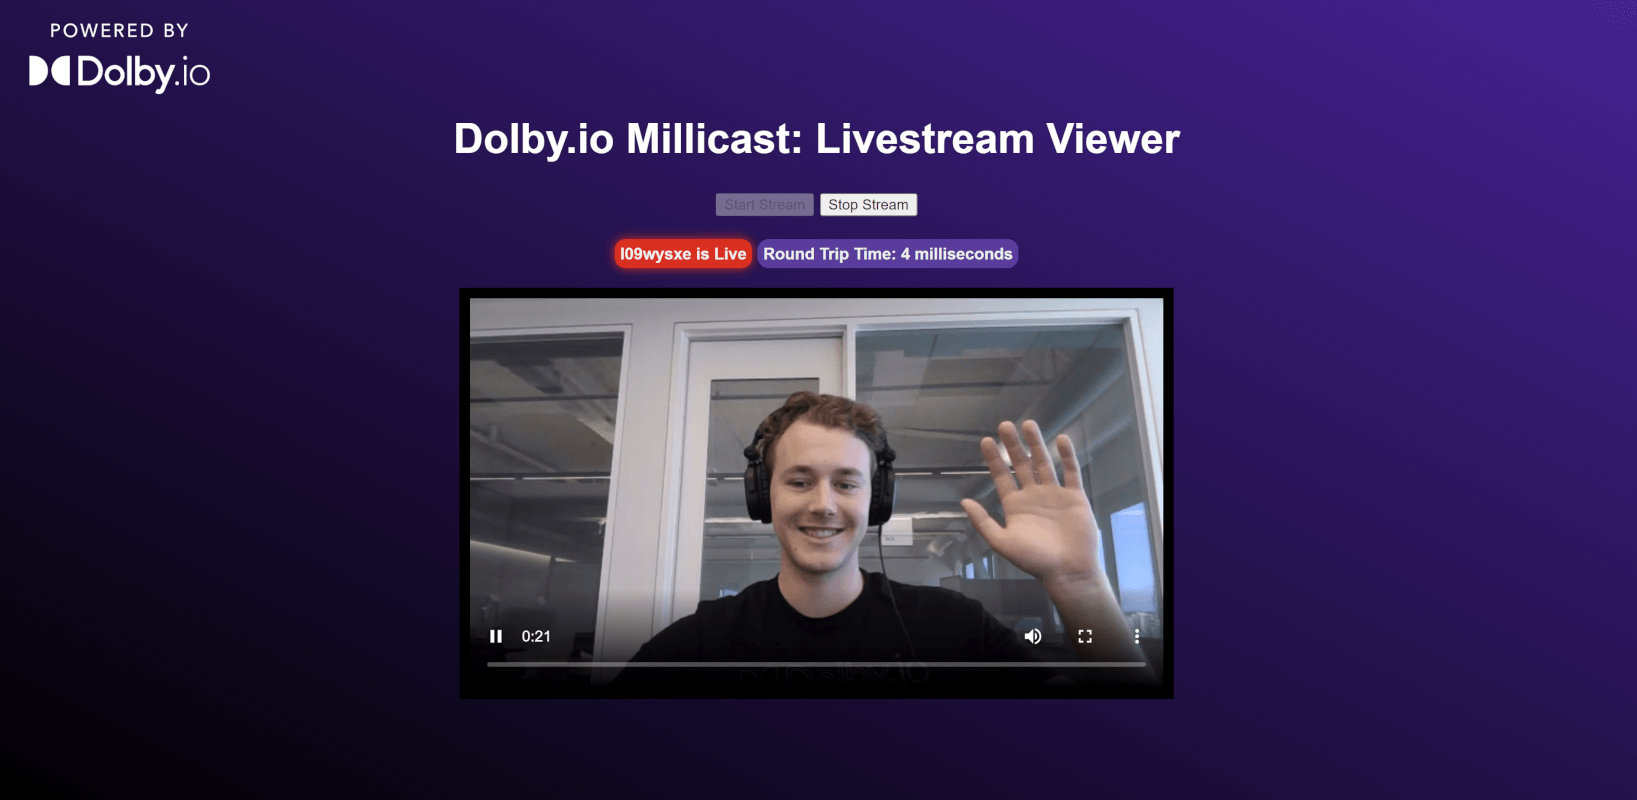
}With the connect step complete, we are now able to join a Millicast broadcast. We can see all these steps put together here and the result is a live stream viewing platform powered by WebRTC.
WebRTC Live Streaming Demo

Want to demo the live stream viewer? Launch the viewer from this repo here.
Interested in a more complicated vserion of the live stream viewer? Check out this guide on adding Multiview to the live stream viewer.
Final Thoughts on Building the Millicast Live Stream App
In this guide, we’ve outlined the fundamentals for building a low-latency live stream viewer in JavaScript that’s powered by WebRTC. If you’ve been following along with the sample project code you’ll notice a few extra parts and tools. For the most part, the additional code serves as set dressing, helping make the app look and function in a way you might expect a live stream viewer to function, however, it is not core to connecting to a Millicast broadcast. As you play around and build with the SDK more you might find better ways to create and style your app for your personal goals so don’t be afraid to play around with the code a bit. If you have any questions or are interested in learning more about Dolby.io Millicast feel free to reach out to our support or check out our documentation guides, which include many more SDKs and tools such as a Millicast OBS integration or an Unreal Engine Plugin.


")