


Screen capture, or screen sharing, is the process of capturing what a user sees on their computer screen as video, which can then be recorded or streamed to other people interested in viewing it. The screen capture process is most commonly associated with online video conferencing where a presenter shares their screen for other viewers to see.
In this guide, we’ll be exploring how to enable screen capture in browser with JavaScript, and how you can then stream the captured screen out to an audience with dolby.io Streaming. If you are interested in conferencing solutions with multiple participants sharing their screen, check out this guide here which walks through building a conferencing app with screen share functionality.
How to Screen Capture with JavaScript?
Screen capturing with JavaScript is straightforward thanks screen capture support with the getDisplayMedia method provided by the MediaDevices interface. The getDisplayMedia method is supported on both Windows and Mac devices for all major browsers, however, it isn’t currently available for mobile devices. For a full list of support for getDisplayMedia see this table here.
To get started using getDisplayMedia we first need to define our display media options:
const displayMediaOptions = {
    video: {
        displaySurface: "window",
    },
    audio: false,
};
In this case, we are not capturing the display audio just the display window as a video feed. There are a number of different settings to adjust with the full list available here.
With our options defined, we can use the getDisplayMedia method to capture our screen:
const screenCapture = await navigator.mediaDevices.getDisplayMedia(displayMediaOptions);With that, we have now begun to successfully capture our screen. When this function is called users will receive a permissions prompt from the browser which they will have to approve for the device to begin capturing content.
How to Screen Share in a WebRTC Live Stream?
Now that we are successfully capturing the device’s display how do we stream it out? To deliver a WebRTC stream we require a WebRTC CDN. Depending on how many people you’d like to view the stream we may require a CDN that supports WebRTC scaling. For this example we’ll use dolby.io WebRTC streaming since it is simple to implement, has a global delay of under 500ms, and can scale to thousands of viewers.
You can create a free dolby.io Streaming account by signing up here.
With our dolby.io account created we can continue with streaming our screen capture. dolby.io streaming requires us to define broadcast options, which include settings like simulcast, recording, multiview, and our media stream object. In this example, we can set our media stream object to our screenCapture object created in part 1.
const broadcastOptions = {
mediaStream: screenCapture,
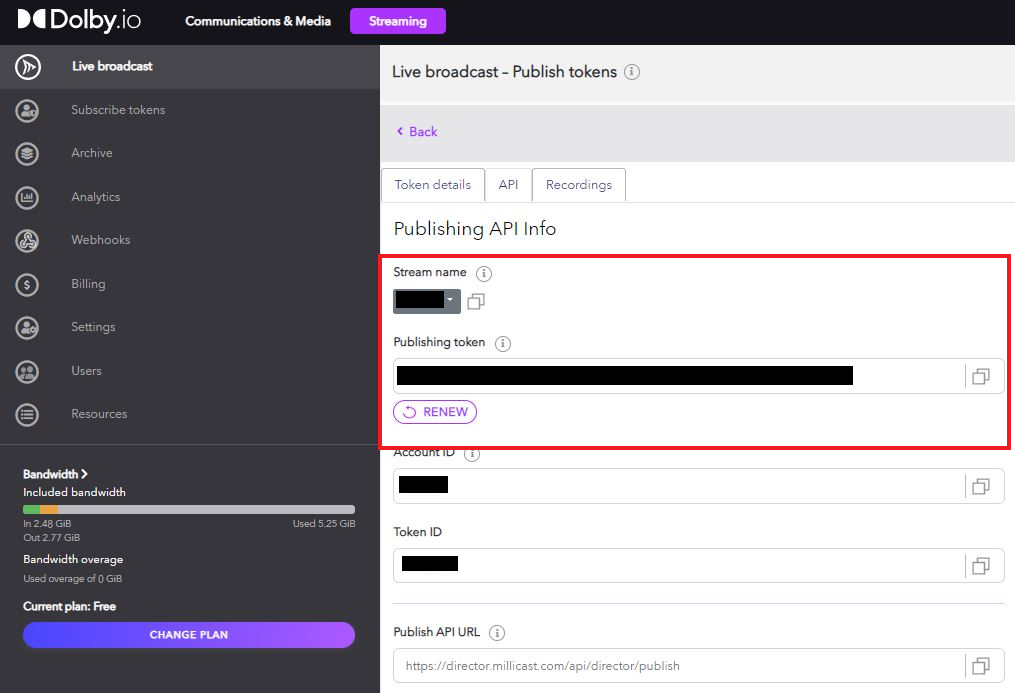
};Since we are using the dolby.io Streaming platform we will need to grab our dolby.io API keys from the dashboard. In this case, we require a Stream name, and a Publishing token which you can find by creating a token, or clicking on a token you’ve already created, and switching to the API tab.
Once you have grabbed your API credentials, import the dolby.io Streaming (Formerly Millicast) JavaScript SDK from jsDeliver into your HTML file.
<script src="https://cdn.jsdelivr.net/npm/@millicast/sdk/dist/millicast.umd.min.js"></script>By importing this package you can now use the dolby.io Streaming JavaScript SDK to stream out your stream capture.
From the SDK we can call the getPublisher function to create a token generator with our API credentials:
const tokenGenerator = () =>
    window.millicast.Director.getPublisher({
        token: "YOUR Publishing Token",
        streamName: "YOUR Stream Name",
    });

const publisher = new window.millicast.Publish("Stream Name", tokenGenerator);
Using the token generator we can create a publish object which we’ll use to stream out our display content.
const publisher = new window.millicast.Publish("Stream Name", tokenGenerator);Finally, with our publisher object created, we can start streaming by calling the connect function.
try {
            await publisher.connect(broadcastOptions);
        } catch (e) {
            console.error("Connection failed, handle error", e);
        }
If the app successfully connects your screen share will be live which you can check using your stream name and account ID from your dashboard.
https://viewer.millicast.com?streamId=<YOUR_ACCOUNT_ID>/<YOUR_STREAM_NAME>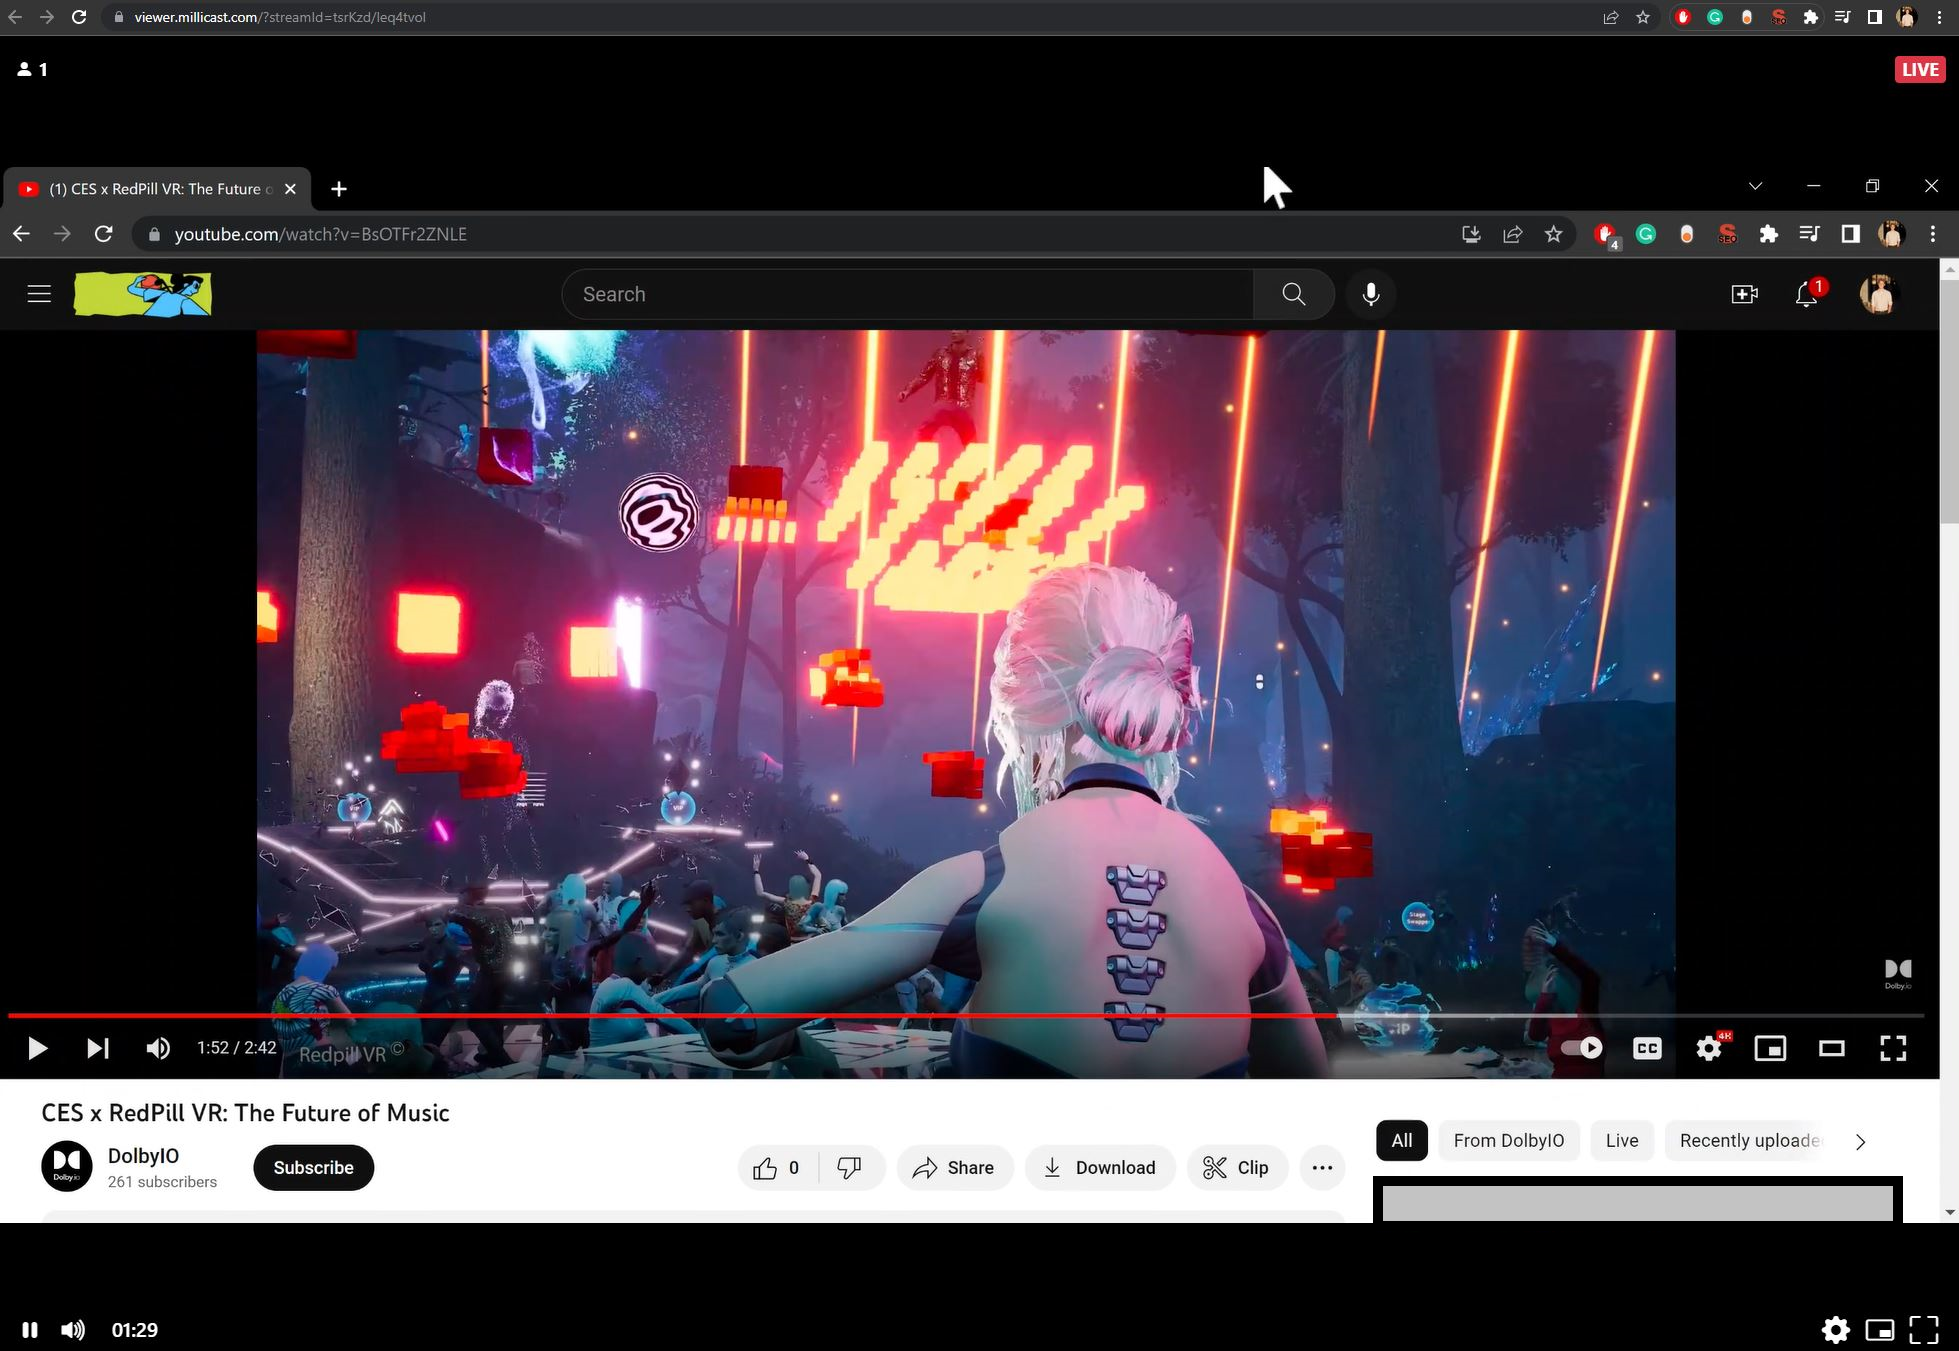
Want to Build More WebRTC Streaming Solutions?
Screen sharing is just the tip of the iceberg for features you can add to your streaming app. Explore the dolby.io Documentation or Blog to learn more about all the different features you can add to your streaming experiences such as Multiview, simulcast, and in-app chat.
Feedback or Questions? Reach out to the team on Twitter, LinkedIn, or via our support desk.


")