


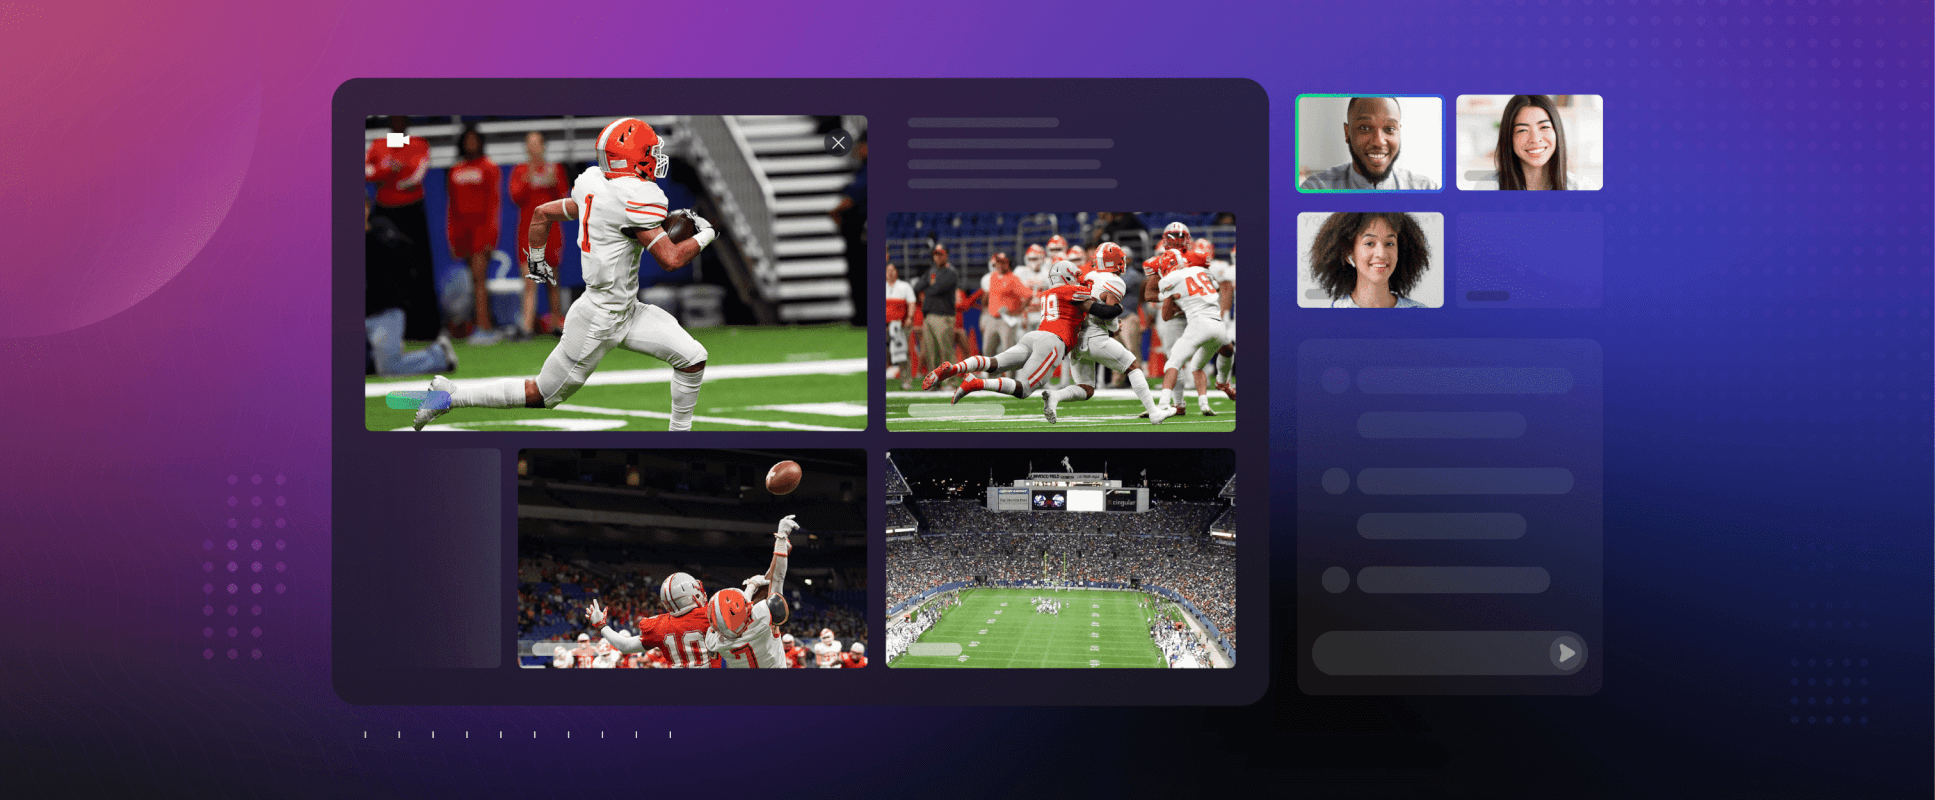
Picture this: A live stream of racecars accelerating around the track, each with different video feeds you can simultaneously watch and switch between. Sounds great right?
Multiview, or rather the ability to stream multiple feeds into a browser and have them rendered in real-time, is an end user’s dream and an engineer’s nightmare. Factors such as maintaining quality, syncing feeds, and accounting for users’ bandwidth can create headaches for even the most seasoned developer. These challenges are exacerbated in use cases where low latency is a priority such as online auctions or online sports betting where audiences can reach into the thousands.
To help enable this service, without it becoming an engineering ordeal, Dolby.io Streaming has added a feature called Multiview. Multiview allows hundreds of thousands of viewers to experience multiple WebRTC live streams simultaneously, in qualities up to 4k and with delays under half a second, all enabled with our JavaScript SDK.
In this guide, we’ll be outlining how you can build your own live stream platform, equipped to display multiple WebRTC live streams in just a few steps.
The Dolby.io WebRTC Live Streaming API
To get started building your Multiview-enabled live stream platform, we first have to set up a free Dolby.io Streaming account here. Dolby.io Streaming (formerly Millicast) is an ultra-low latency platform that provides APIs, SDKs, and game engine integrations for content delivery with a delay of 500 milliseconds or less to anywhere in the world. The free account provides 50 Gigabytes of data transfer a month, which will be plenty for building and testing your JavaScript WebRTC live stream platform.
Once you’ve created your Dolby.io account we can jump in and get building. This guide builds off of the foundations of the Dolby.io Streaming JavaScript SDK which we walked through in an earlier guide here. If this is your first time building with Dolby.io, we recommend starting there.
Note: All code presented in this project is available on GitHub. Feel free to clone the repository and follow along.
Building the WebRTC Multview Live Stream App
Since we already have a working live stream app that we built in an earlier blog (Building a Low Latency Livestream Viewer) we can focus on adding WebRTC Multiview to that existing app. To do this the first step is to help our application decide where we will render the additional views. We can provide this logic in the index.html file by adding a <div> element called feedMain which will be where we render our multiple views. Additionally, we can add a button in the HTML file called switchView which can use later to control which feed is predominately shown in our app.
<button id="switchView" disabled="True" onclick="switchStream()">Switch Stream</button>
<div id="feedMain" class = "remoteMain"></div>
From here we can close out the HTML file and instead switch to our JavaScript file streaming_viewer.js.
There are three main steps and one optional step for adding Multiview functionality inside of streaming_viewer.js
- Store and track incoming feeds.
- Add video elements and render feeds.
- Remove video elements and feeds.
- (Optional) Switching between feeds.
Store and Track Incoming Feeds
Unlike the single stream live stream viewer we built in our other live stream viewer blog, this viewer needs to account for multiple streams and sources. Hence we need to add two data structures:
- A set for storing the sources we ingest.
- A map to capture the relationship between
sourceIDand the transceiver.
const activeSources = new Set();
const sourceIdTransceiversMap = new Map();
Hence, whenever a stream is added, we need to update the set with the incoming sourceID. To do this we listen for active broadcast events and update the source.
await millicastView.on("broadcastEvent", (event) => {
        const { name, data } = event;

        switch (name) {
            case "active":
                activeSources.add(data.sourceID);
...
};
Add Video Elements and Feeds
Once activeSources has been updated we can call a function addStreamToYourVideoTag. In this function we create a media stream and add the stream as a remote track twice, once for the audio track, and once for the video track. We then pair our newly created transceivers to the sourceID and update our Map object sourceIdTransceiversMap.
const addStreamToYourVideoTag = async (sourceID) => {
        const mediaStream = new MediaStream();
        const videoTransceiver = await millicastView.addRemoteTrack("video", [mediaStream]);
        const audioTransceiver = await millicastView.addRemoteTrack("audio", [mediaStream]);

        sourceIdTransceiversMap.set(sourceId || "main", {
            videoMediaId: videoTransceiver.mid,
            audioMediaId: audioTransceiver.mid,
        });

        createVideoElement(mediaStream, sourceID);

...
};
Next, we can pass mediaStream and sourceID to another function createVideoElement which creates a <video> element, sets it’s srcObject to mediaStream, and appends it to the feedMain <div> in our HTML file.
const createVideoElement = (mediaStream, sourceID, vidCount) => {

        const feedMain = document.getElementById("feedMain");
        const video = document.createElement("video");
        video.id = sourceID || "main";
        video.srcObject = mediaStream;

        video.autoplay = true;
        video.muted = true;

        feedMain.appendChild(video);
    };
The last step to get the stream running is to connect the feed to the video element by using the project function included with the SDK which takes in the streamID and an array containing the video and audio media streams as the remoteTrack objects videoTransceiver and audioTransceiver.
...

await millicastView.project(sourceID, [
            {
                trackId: "video",
                mediaId: videoTransceiver.mid,
                media: "video",
            },
            {
                trackId: "audio",
                mediaId: audioTransceiver.mid,
                media: "audio",
            },
        ]);};
Remove video elements and feeds
At this stage, we can now ingest and display multiple streams, however, if any of these streams are disconnected our video elements won’t update. To fix this we can add a function unprojectAndRemoveVideo which is triggered once a stream becomes inactive.
Inside unprojectAndRemoveVideo we remove the sourceID from the map and drop the video element from feedMain.
const unprojectAndRemoveVideo = async (sourceId) => {
const video = document.getElementById(sourceId);
const sourceTransceivers = sourceIdTransceiversMap.get(sourceId);
sourceIdTransceiversMap.delete(sourceId);
await millicastView.unproject([sourceTransceivers.videoMediaId, sourceTransceivers.audioMediaId]);
document.getElementById("feedMain").removeChild(video);
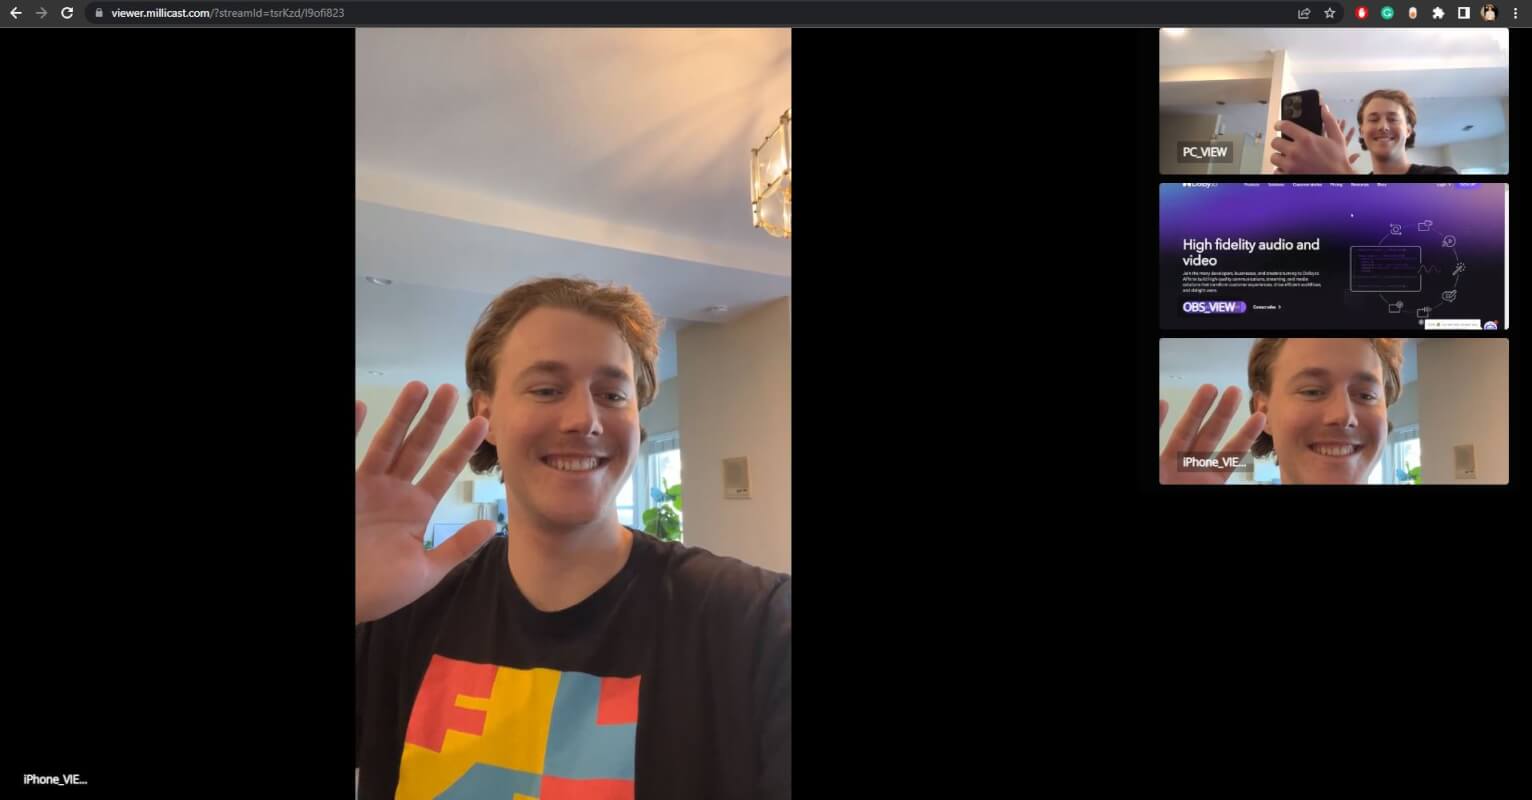
};From here we have a working live stream app with Multiview. As multiple feeds become active they are added to the UI. Whilst this is a great start, each feed will share the same amount of space on the screen which may limit the viewer’s ability to focus on a particular feed. To remedy this we can add functionality to switch between feeds.
Switching between streams
The easiest way to switch between feeds is to create two CSS classes, one for our enlarged focus feed and one for our smaller feed. We can revisit our createVideoElement function to add the logic for assigning these classes.
...
        // If feed is the first to be added default it to main view
        if (vidCount == 1) {
            console.log("main");
            video.className = "vidBox"; //Main view css class
        } else {
            switchView.disabled = false;
            console.log("sub");
            video.className = "subVidBox";// Sub view css class
        }
...
};
Each class just specifies a different limit to the viewer size.
.vidBox {
    background-color: black;
    border-style: solid;
    border-width: 10px;
    border-color: black;
    width: 80%;
}
.subVidBox {
    background-color: black;
    border-style: solid;
    border-width: 10px;
    border-color: black;
    width: 20%;
}
Next, we can add a function called switchStream which is controlled by the Switch View button we added to our HTML page earlier. When clicked this switchStream function pops off the top video and adds it to the bottom of the <div>. It then reassigned the classes making the video element at the top of the <div> enlarged.
function switchStream() {
    const feedMain = document.getElementById("feedMain");
    var temp = feedMain.children[0];

    temp.className = "subVidBox";
    feedMain.removeChild(feedMain.children[0]);
    feedMain.appendChild(temp);

    feedMain.children[0].className = "vidBox";
}
Testing out the WebRTC Live Streaming Demo
To test the Multiview WebRTC live stream app we first need to create a multisource stream. This can be done by starting a broadcast inside the Dolby.io dashboard, enabling multisource, and adding a unique source ID.
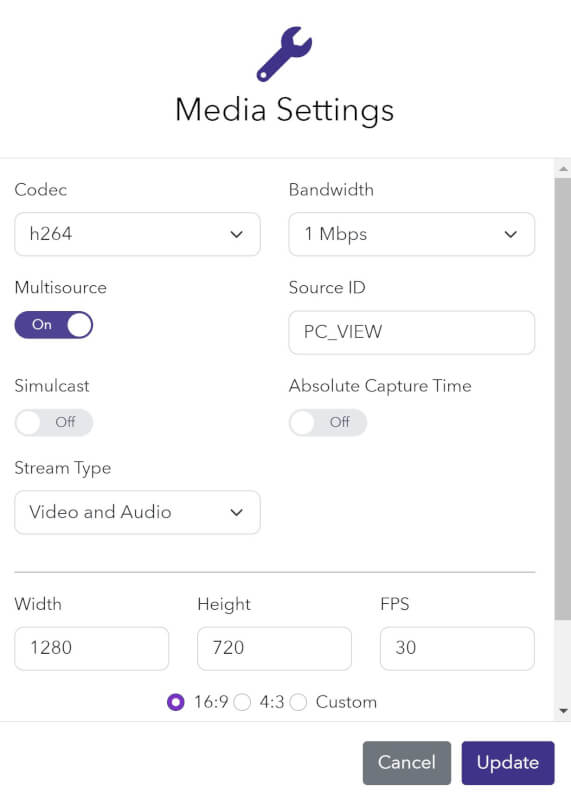
This can be repeated depending on how many streams you want to test with Multiview. We also have a guide, Enabling Multiview for a Dolby.io Livestream, which goes into more detail on how you can create multisource streams.
It’s important to note that there are some limitations to Multiview. Dolby.io streaming allows you to deliver as many tracks to the viewer as you like, however, there is a 4mbps limit that the viewer can receive. Hence, it is important to throttle your feeds appropriately so that the end user remains under this threshold. In the example at the beginning of the blog, I limit each feed to 1mbps by using the Bandwidth parameter.
From here we can just launch our app by opening our index.html file in browser.
Conclusion
Multiview is a compelling and engaging feature to include in live streaming experiences because it allows the user to control which view they want, maximizing their experience. This is especially useful if viewers are looking to make informed decisions based on the video and audio feeds for things like live virtual auctions or online sports betting. If you are interested in learning more about Multiview check out our documentation or explore some of our other useful features such as simulcast or integrating viewer events.
Feedback or Questions? Reach out to the team on Twitter, LinkedIn, or reach out to our sales team.


")