


Chat functionality in some form has become ubiquitous with polished live stream experiences, allowing viewers to interact with each other and the content creator in real-time. Unfortunately for many stream participants, delays in the stream break the immersion of real-time interaction, limiting the relationship between the content creator and the viewer to intervals of 15 seconds or more. This is where Dolby.io Real-Time Streaming offers a natural synergy with real-time technology providers such as PubNub, allowing app builders to quickly build and deploy interactive audience engagement features (e.g. on/offline detection, live lobby counts, audience reactions, full-featured chat, CTA overlays, live polls, etc.) that improve engagement, drive a sense of community, increase time spent in-app, and even provide incremental inventory for monetization.
In this guide, we’ll be showing how you can add PubNub In-App Chat to a Dolby.io Real-Time Stream with just a few lines of JavaScript.
How to Build with PubNub In-App Chat and Dolby.io Streaming
To get started building with PubNub and Dolby.io you first must have an active account with both platforms. Both PubNub and Dolby.io offer a “Free” tier for signing up allowing you to get started building, without having to input a credit card.
For this project, we’ll be building off of an earlier project Building a Low Latency Livestream Viewer where we demonstrated how to use the Dolby.io Streaming JavaScript SDK to build out a WebRTC live stream viewer app.
Note: All code for this project is available here on GitHub. Feel free to clone the repository and follow along.
Adding a Chatroom to a Live Stream App
The easiest way to get started adding a chat feature to your live stream app is to import the PubNub JavaScript SDK into your HTML file alongside any other SDKs you might be using such as the Dolby.io Streaming JavaScript SDK (formerly Millicast). If you are building on top of the Low Latency Livestream Viewer project you can add the PubNub JavaScript SDK to the head of the index.html file.
<head>
...
    <script src="https://cdn.jsdelivr.net/npm/@millicast/sdk@latest/dist/millicast.umd.js"></script>
    <script src="https://cdn.pubnub.com/sdk/javascript/pubnub.7.2.1.min.js"></script>
...
</head>
By leveraging the SDK we can simplify common chat-related actions such as adding messages to the chat room and syncing with messages sent by other users. In addition to importing the SDKs, we also need to lay out the structure of our chatroom inside our HTML file. This is done in the body and should include a section for rendering sent messages, a section for inputting messages, and a submit button for sending the message.
<body>
...
    <div id="chatBox" class="chatBox" hidden="True">
        <div id="outputDiv" class="outputBox"></div>
        <input id="inputChat" class="messageBox" placeholder="" />
        <button class="enterButton" id="enterButton">Submit</button>
    </div>
...
</body>
With the SDK imported and our chat widget structured, we are done with the HTML file, and can now switch over to our JavaScript file to handle the functionality of the chat feature.
Authenticating and Connecting to the PubNub API
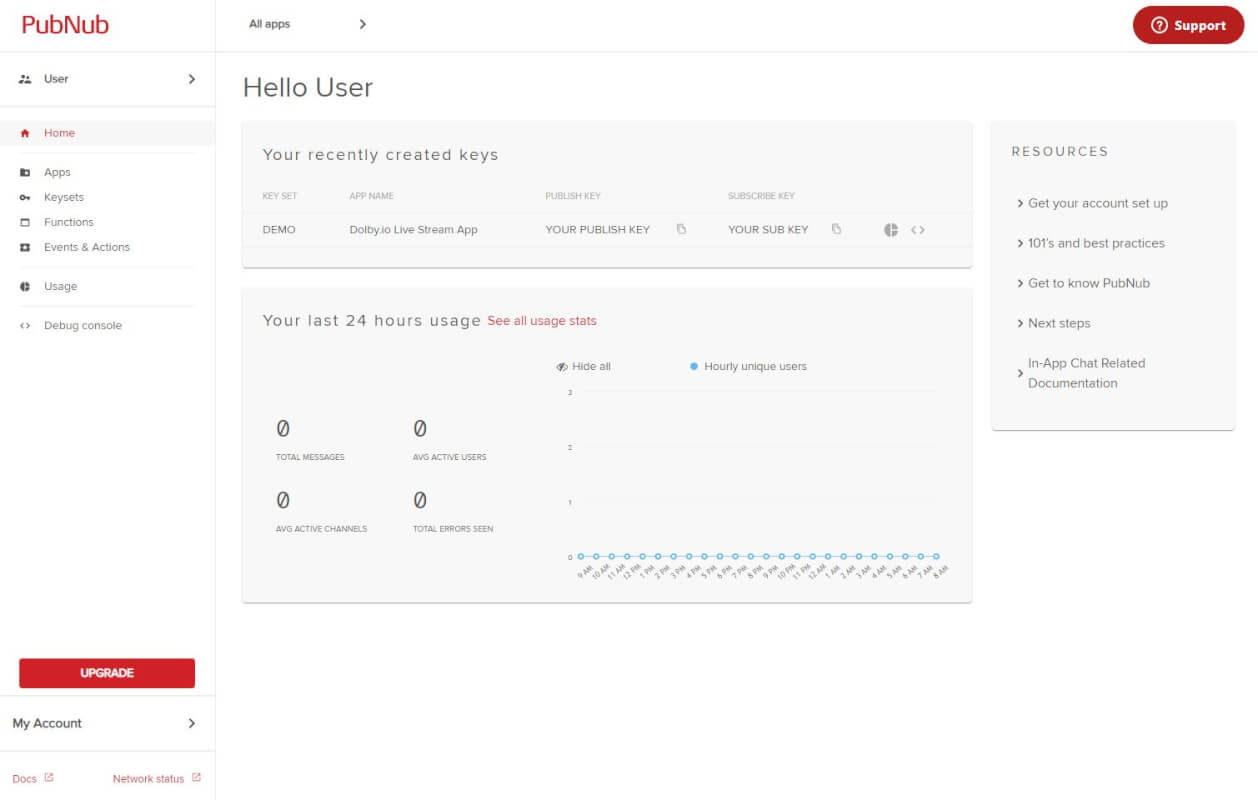
In order to add in-app chat to your live stream app we need to authenticate and connect to the PubNub servers. To connect to the servers let’s first grab our Publish_Key and our Subscribe_Key from the PubNub dashboard.
Next, we want to define these publish keys within our JavaScript file so we can authenticate and connect to the server.
const PUBNUB_PUBLISH_KEY = "your_publish_key";
const PUBNUB_SUBSCRIBE_KEY = "your_subscribe_key";
Note: API keys should NOT be exposed to the public. If you are interested in a best practices guide for API key management click here.
With our keys defined we next need to define a username to connect with. This username will be what other participants see when interacting in the chat room and hence should be user-defined and human-readable. In our example app, we capture the username as the user connects logs into the live stream app via the usrName input tag. With these three parameters, we can call the PubNub SDK and create an authentication object.
let usrName = document.getElementById("usrName").value;

var pubnub = new PubNub({
            publishKey: PUBNUB_PUBLISH_KEY,
            subscribeKey: PUBNUB_SUBSCRIBE_KEY,
            userId: usrName,
        });
Now that we have a valid authentication object we can subscribe to the chat stream. PubNub organizes chatrooms by channel where depending on the scope of your streaming app you might like to have multiple separate chatrooms. In this case, we will only use one chatroom, dlb_stream.
pubnub.subscribe({ channels: ["dlb_stream"] });Finally, we can add an event listener using the pubnub object, that listens for new messages and updates the UI accordingly. The UI is updated with a function called newChat, which takes in the message and the publisher ID to update the UI with the new message.
chatBox = document.getElementById("outputDiv"),
pubnub.addListener({
    message: function (m) {
        chatBox.innerHTML += newChat(m.message, m.publisher);
    },
});
Before we explore the functionality of newChat and how messages are organized and rendered in the UI, let’s add two more event listeners required for building a functional chat room.
Sending Messages with the PubNub API
In order to send messages we must have a way of “listening” to when the user is ready to send a message. One way to do this is to wait for the enter button to be pressed inside the inputText field. This can be done with keypress listener, which triggers when the enter key has been pressed. Once the listener triggers it calls the pubnub.publish function and delivers the message to the other users.
var inputText = document.getElementById("inputChat");

inputText.addEventListener("keypress", function (e) {
            (e.keyCode || e.charCode) === 13 &&
                inputText.value != "" &&
                pubnub.publish({
                    channel: channel,
                    message: inputText.value,
                    x: (inputText.value = ""),
                });
        });
Since all users are different we want our chatroom to cater to the individuals that prefer to click a button instead. In addition to listening for the enter button, we can also add a listener that waits for the Submit button to be clicked.
inputButton.addEventListener("click", function (e) {
            inputText.value != "" &&
                pubnub.publish({
                    channel: channel,
                    message: inputText.value,
                    x: (inputText.value = ""),
                });
        });
Great so now we have all of the triggers in place let’s take a closer look at the newChat function, and explore how it updates and manages the UI.
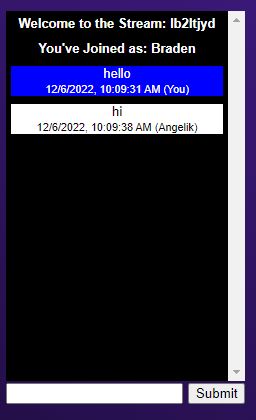
Updating the Streaming App UI as Messages are Added
The newChat function handles how messages and users appear in the UI. Messages in the UI can be divided into two groups, messages sent by the user, and messages received by the user. We want messages sent by the user to appear a certain way so that it is easier to review what they sent, and messages received by the users to appear another way. This can be done with two CSS classes, messageSent and messageReceived, which distinguishes between the messages by color.
.messageSent{
    margin-top: 8px;
    background-color: blue;
    color: white;
}
.messageReceived{
    margin-top: 8px;
    background-color: white;
    color: Black;
}
In addition to dividing messages into two classes, we also want to add some metadata to the messages such as who sent the message and at what time they sent the message. In order to distinguish this meta information from the actual message we can add a third class for this information called messageTime.
.messageTime{
    font-size: smaller;
}
With our classes defined we can now organize our newChat function to format messages accordingly. Messages received by the user should include the publisher’s messages, followed by a second line containing who sent the message and the date and time they sent the message at. Additionally, the message should be formatted with the appropriate class. Once fully formatted, the message can be returned to the event listener, which adds it to the chat box.
function newChat(message, publisher) {
       var youId = "";
       var messageClass = "messageSent";
       var messageChat = ("" + message).replace(/[<>]/g, "");
       var date = "<br><span class='messageTime'>" + new Date().toLocaleString() + "</span>";

     if (usrName === publisher) {
           youId = "<span class='youText'> (You)</span>";
           messageClass = "messageSent";
       else {
           youId = "<span class='youText'> (" + publisher + ")</span>";
           messageClass = "messageReceived";
       }
       return "<div class='" + messageClass + "'>" + messageChat + date + youId + "</div>";
   }
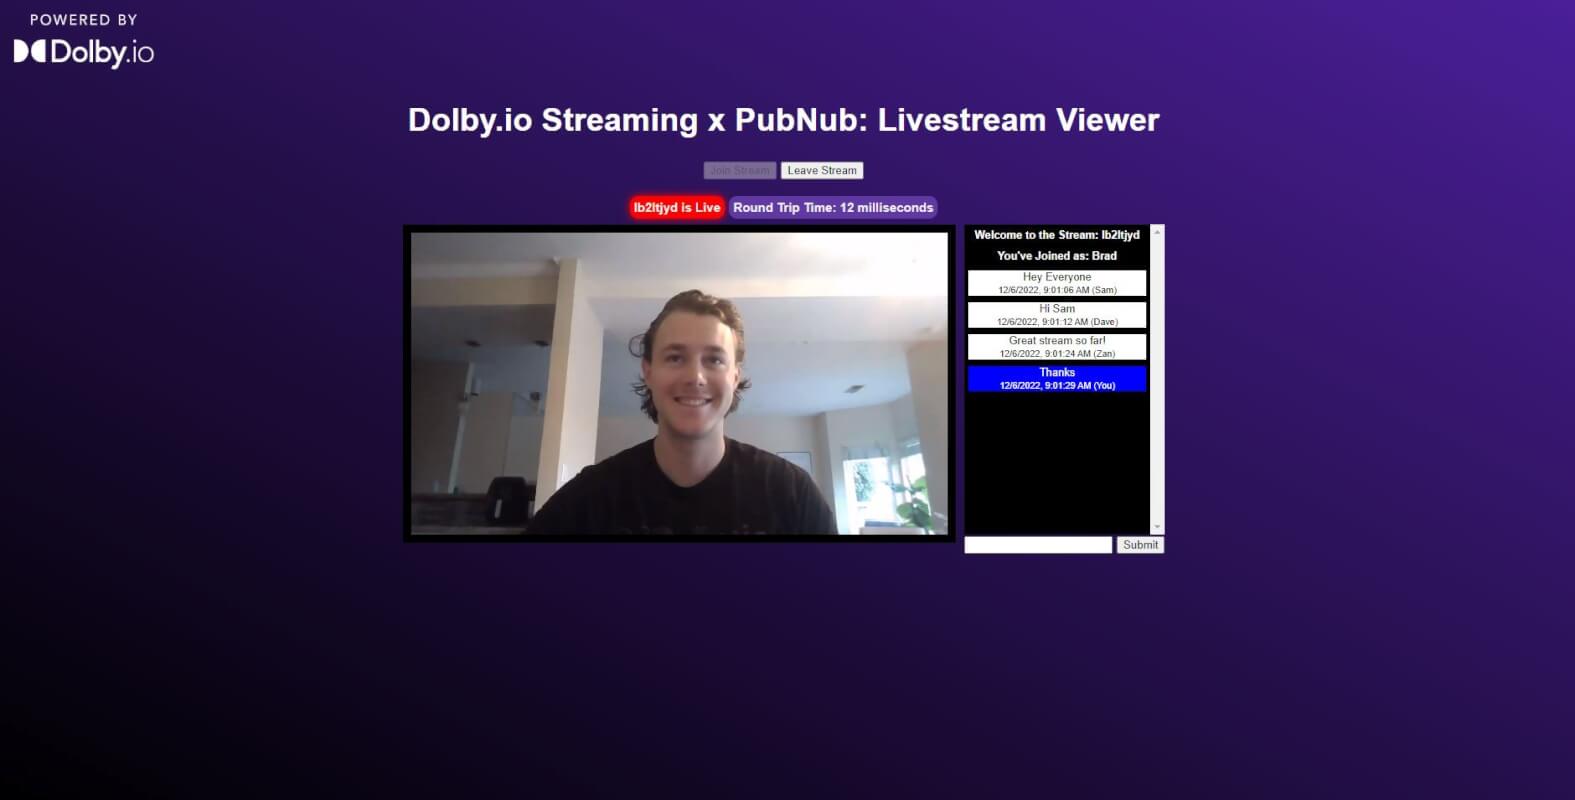
Try out the WebRTC Live Stream App with PubNub In-App Chat
The app highlights a fully functional WebRTC stream with under half a second delay alongside a chat app that allows users to communicate with each other and the streamer, all in real-time.
Note: All code for this project is available here on GitHub. Feel free to clone the repository and launch the demo yourself.
In conclusion, adding PubNub In-App Chat to a Dolby.io Streaming app can greatly enhance the user experience by providing a way for viewers to interact and engage with each other in real time. Integrating PubNub into the Dolby.io platform is a simple and effective way to add a social element to any live stream. Whether you are streaming a live event, auction, or just having a virtual hangout with friends, a chat room can add a whole new level of excitement and engagement. If you are interested in learning more about Dolby.io check out some of our other content such as adding WebRTC Multiview to a live stream app or how you can add simulcast for greater viewer stability.
Feedback or Questions? Reach out to the team on Twitter, LinkedIn, or reach out to our sales team.


")