


Streaming, especially the low latency kind, has become a popular medium to engage with an audience, host live events, and connect people virtually. For developers building streaming apps, however, there is just one issue. If we are interested in connecting to a wide audience we need to develop for a wide range of platforms such as Android, iOS, Web, and even desktop native apps, which can quickly become a heavy lift for any team. This is where Flutter 3 comes in, released in May of 2022, Flutter 3 takes cross-platform to the next level allowing users to “build for any screen” from a single code base. Hence, rather than building 3 separate apps for iOS, Android, and Web, you can build just one. To further sweeten the deal, Dolby.io has recently released their WebRTC real-time streaming SDK for Flutter, allowing users to build cross-platform streaming apps that combine scalability and ultra-low delay.
In this guide, we’ll be exploring how to build a cross-platform real-time streaming app that works on Android, iOS, Desktop Native, and Web using theDolby.io Streaming SDK for Flutter.
Getting Started with the Real-Time Streaming SDK
Before we begin you need to make sure you have the latest version of Flutter installed and set up on your machine. To get started with building a streaming app we need to install the Dolby.io Streaming SDK for Flutter 3 via the terminal.
flutter pub add millicast_flutter_sdkThen run the following command in terminal to download the dependencies:
flutter pub getWith the Flutter Streaming SDK installed, you can start by creating a vanilla Flutter app and add the most recent version of flutter_webrtc to your project’s pubspec.yaml. You should also see that the Dolby.io Millicast flutter SDK has been automatically added.
flutter_webrtc: ^x.x.x
millicast_flutter_sdk: ^x.x.x
Then inside main.dart you just import flutter_webrtc alongside any other dependencies your project may have.
import 'package:flutter_webrtc/flutter_webrtc.dart';In addition to installing the SDK, you’ll also need to create a free Dolby.io Account. The free account offers 50 Gigabytes of data transfer a month, which will be plenty for building and testing out the real-time streaming app.
Interested in following along with a project that already has the SDK installed and set up? Check out this GitHub repository which contains a completed version of this app.
Building the Real-Time Streaming App with Flutter
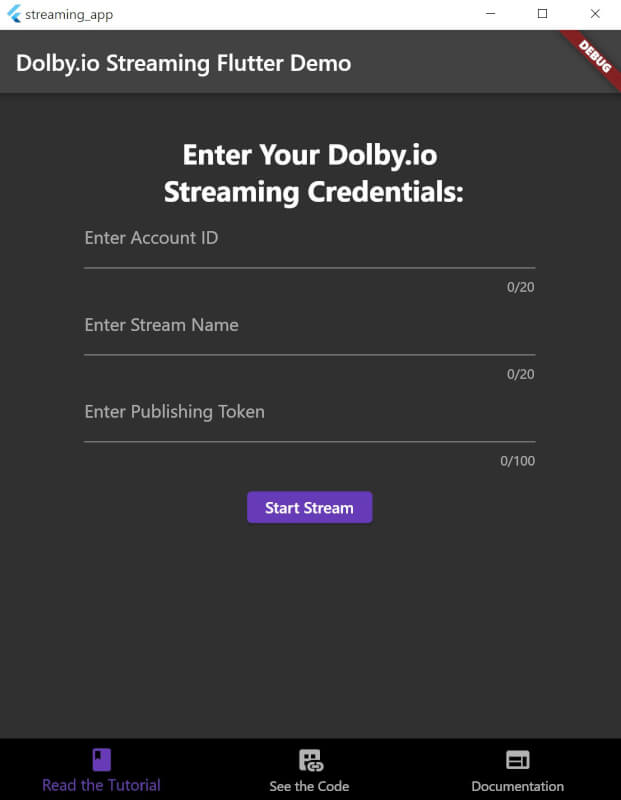
Building a WebRTC Flutter streaming app can be complicated, so to get started we first need to divide the app into a series of features that come together to support a real-time streaming experience. In order for the app to connect to the Dolby.io servers, we must include a way for the user to input their streaming credentials and tokens in order to authenticate and use the Dolby.io servers.
Taking in the WebRTC Stream Credentials
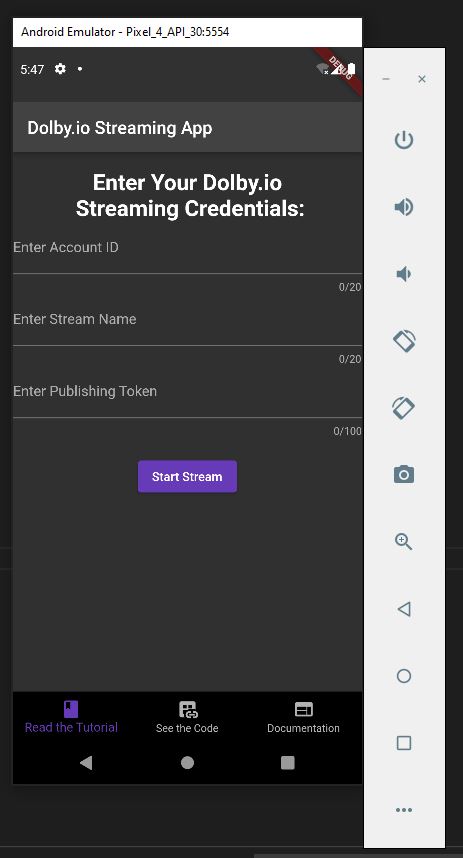
To publish and view a WebRTC stream with the Dolby.io Flutter SDK we need three things: an account ID, a stream name, and a publishing token. These credentials can be found on your Dolby.io dashboard and need to be input by the user which we can capture with the TextFormField widget, where the widget, on change, updates a TextEditingController variable.
Container(
    width: MediaQuery.of(context).size.width,
    constraints: const BoxConstraints(
        minWidth: 100, maxWidth: 400),
    child: TextFormField(
      maxLength: 20,
      controller: accID,
      decoration: const InputDecoration(
        labelText: 'Enter Account ID',
      ),
      onChanged: (v) => accID.text = v,
    )),
Note: In production, you don’t need to have users input these credentials, instead you could use a custom login and serve the users a temporary login token. For learning more about Dolby.io tokens check out this blog on creating and securing tokens.
Because we need three inputs to publish a WebRTC stream to the Dolby.io server, we can repeat this code for each input.
Container(
     width: MediaQuery.of(context).size.width,
     constraints: const BoxConstraints(
         minWidth: 100, maxWidth: 400),
     child: TextFormField(
       maxLength: 20,
       controller: accID,
       decoration: const InputDecoration(
         labelText: 'Enter Account ID',
       ),
       onChanged: (v) => accID.text = v,
     )),
Container(
     width: MediaQuery.of(context).size.width,
     constraints: const BoxConstraints(
         minWidth: 100, maxWidth: 400),
     child: TextFormField(
       maxLength: 20,
       controller: streamName,
       onChanged: (v) => streamName.text = v,
       decoration: const InputDecoration(
         labelText: 'Enter Stream Name',
       ),
     )),
 // Publishing Token Input
 Container(
     width: MediaQuery.of(context).size.width,
     constraints: const BoxConstraints(
         minWidth: 100, maxWidth: 400),
     child: TextFormField(
       controller: pubTok,
       maxLength: 100,
       onChanged: (v) => pubTok.text = v,
       decoration: const InputDecoration(
         labelText: 'Enter Publishing Token',
       ),
     )),
Additionally, we can add an ElevatedButton for the user to press once they have added their credentials.
ElevatedButton(
  style: ElevatedButton.styleFrom(
    primary: Colors.deepPurple,
  ),
  onPressed: publishExample,
  child: const Text('Start Stream'),
),
Authentication and Publishing Streams from Flutter
You’ll notice that the Elevated button triggers a function via its onPressed parameter. This function, called publishExample, checks if the credentials are valid and authenticates the stream. First, the function checks that a user has input a value for each input.
void publishExample() async {
    if (pubTok.text.isEmpty || streamName.text.isEmpty || accID.text.isEmpty) {
      ScaffoldMessenger.of(context).showSnackBar(const SnackBar(
        backgroundColor: Colors.grey,
        content: Text(
            'Make sure Account ID, Stream Name, and Publishing Token all include values.'),
      ));
    }
Then the function calls publishConnect, an asynchronous function that takes in streamName, pubTok, and a third object called localRenderer. localRendered is a RTCVideoRenderer object included with the flutter.webrtc package.
final RTCVideoRenderer localRenderer = RTCVideoRenderer();
publish = await publishConnect(localRenderer, streamName.text, pubTok.text);
Using these three parameters we have everything we need to authenticate and begin publishing a stream. Inside of the publishConnect function, we need to generate a temporary publishing token using the streamName and pubTok:
Future publishConnect(RTCVideoRenderer localRenderer, String streamName, String pubTok) async {
  // Setting subscriber options
  DirectorPublisherOptions directorPublisherOptions =
      DirectorPublisherOptions(token: pubTok, streamName: streamName);

  /// Define callback for generate new token
  tokenGenerator() => Director.getPublisher(directorPublisherOptions);

...
}
With the temporary publishing token created, we then can use it to create a publish object. Using this publish object we could start the stream, however, we wouldn’t be able to see or hear anything, this is because we haven’t specified what kind of stream we are creating or which devices we will connect to. To do this we need to specify if the stream will include audio, video, or audio and video, then we need to pass these constraints into the getUserMedia function which will map the constraints to the default audio capture device and the default video capture device.
{
...
Publish publish =
      Publish(streamName: 'your-streamname', tokenGenerator: tokenGenerator);

  final Map<String, dynamic> constraints = <String, bool>{
    'audio': true,
    'video': true
  };

  MediaStream stream = await navigator.mediaDevices.getUserMedia(constraints);

...
}
Using this stream object, we can also provide a feed to the user in the form of a viewer. To do this we need to assign our input devices to localRender as sources.
{
...

localRenderer.srcObject = stream;

...
}
Finally, we can map the stream object and pass it as an option to the connect function, which is inherited from publish.
{
...
//Publishing Options
  Map<String, dynamic> broadcastOptions = {'mediaStream': stream};

  /// Start connection to publisher
  await publish.connect(options: broadcastOptions);
  return publish;
}
With our stream connected, we can now look at setting up the viewer using localRender.
In-App WebRTC Stream Viewer
Now that our stream is authenticated and publishing we need to add a viewer object so the streamer can see themselves streaming. This can be done with a RTCVideoView object which takes in our localRender object and is constrained by a container.
Container(
  margin: const EdgeInsets.all(30),
  constraints: const BoxConstraints(
      minWidth: 100, maxWidth: 1000, maxHeight: 500),
  width: MediaQuery.of(context).size.width,
  height: MediaQuery.of(context).size.height / 1.7,
  decoration:
      const BoxDecoration(color: Colors.black54),
  child: RTCVideoView(localRenderer, mirror: true),
)
Sharing the Real-time Stream
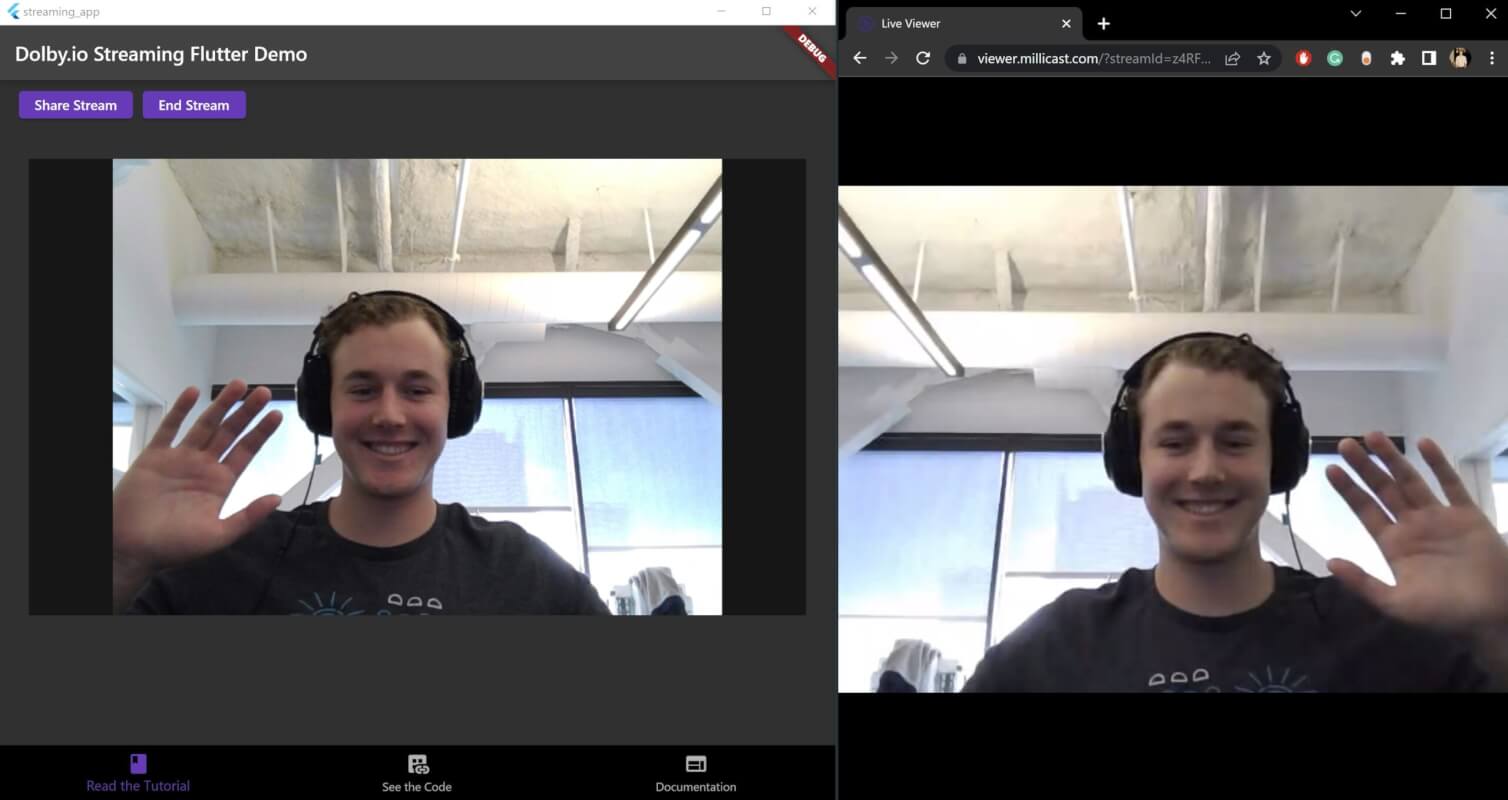
With the stream authenticated and live, we want to share our content with the world. We can do this via a URL formatted with our streamName and our accountID which we collected as inputs. Using the example app as a template we can create a function called shareStream which formats the URL to share and copies it to the clipboard.
void shareStream() {
    Clipboard.setData(ClipboardData(
        text:
            "https://viewer.millicast.com/?streamId=${accID.text}/${streamName.text}"));
    ScaffoldMessenger.of(context).showSnackBar(const SnackBar(
      backgroundColor: Colors.grey,
      content: Text('Stream link copied to clipboard.'),
    ));
  }
Unpublishing a WebRTC Stream
To unpublish the stream we can call the publish object returned from our asynchronous publishConnect function to stop, killing the connection with the Dolby.io server.
publish.stop();Flutter 3 is Truly Cross Platform
The power of Flutter is taking one code base and having it work across multiple platforms. Here we can see examples of the app working for Android, Windows, and Web:
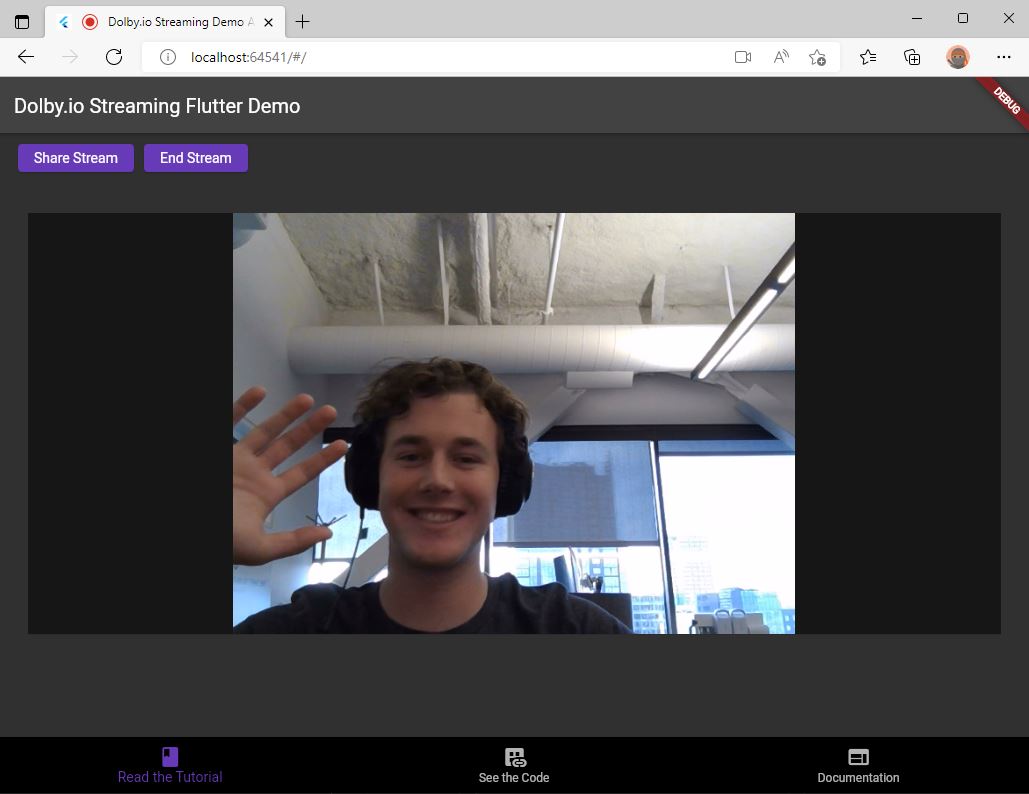
Building in this cross-platform framework saves both time and resources, allowing you to get started building real-time streaming apps without having to worry about which platform works for your users. These apps are perfect for streaming live events and virtual events to the widest range of audiences allowing for high-quality interactive experiences. If you are interested in learning more about our Flutter streaming SDK check out our documentation and play around with the full project on this GitHub repository.
Feedback or Questions? Reach out to the team on Twitter, LinkedIn, or via our support desk.


")