


I don’t know if this has happened to you, but let me paint the picture: You visit a place outside your home country and open up Netflix. You see unknown movies you have never heard of, or even the MCU Spider-Man movies show up, which they don’t if you are based in the US. So, you get used to this library and save a couple of movies to watch later. You don’t have time to get to all of them, and then you are back in your country, and they are gone!
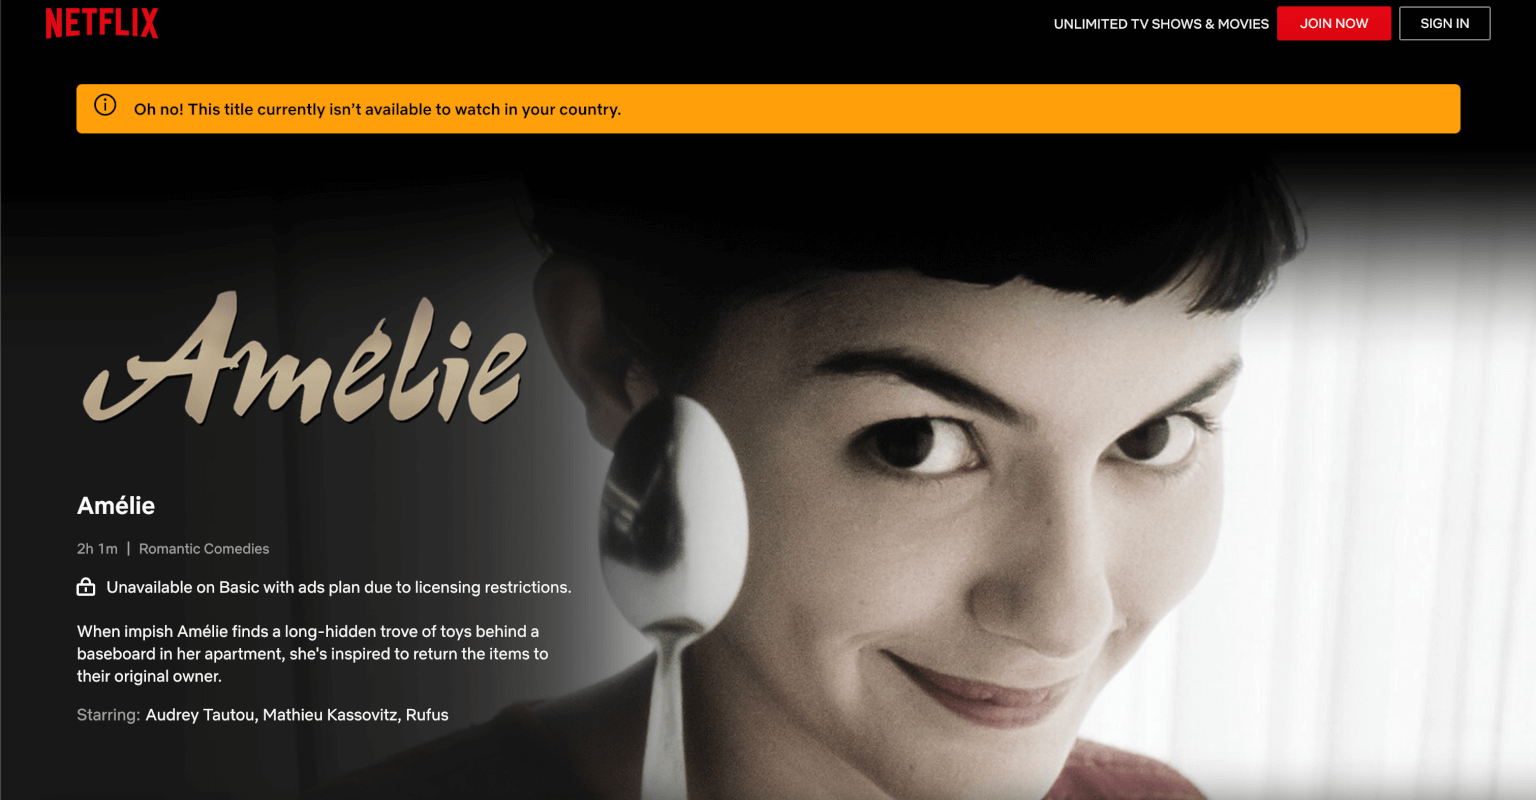
No more Amélie! No more Dolor y Gloria! No more doc series by Orelsan!
It is sad! Many of you might be wondering why this happens in general, and honestly, the best way to explain it is due to copyrights. Your library differs in each country because the companies hold distinct content rights depending on location. Other times, a streaming service might not exist yet in a foreign country, and an ‘XYZ’ streaming competitor might have acquired the rights for only said country. This is why Rick and Morty appears on Hulu in the US but on Netflix in Spain!
Another question you might have is: why can’t they hold the rights for all countries?
And the reason is that it is expensive; as simple as that.
If the streaming service didn’t produce the content themselves, they must pay the filmmakers the distribution rights, which grows in price the more countries you want to cover. It is what Netflix did when they hosted the MCU before Disney+ ever existed.
Back to the original premise, if you have ever experienced this, then it is caused by geo-blocking. Geo-blocking is the blocking of content depending on your IP address’s location. An IP address is a unique identifier of every device on the internet. Using this, geo-technology looks up the location details of the IP and checks if the detected country is allowed or not to view said content. If yes, you can continue with the experience, but if the answer is no, you will receive a warning message explaining why you are being blocked.
And fret not! You, TOO, can do geo-blocking on your stream (pretty quickly too)!
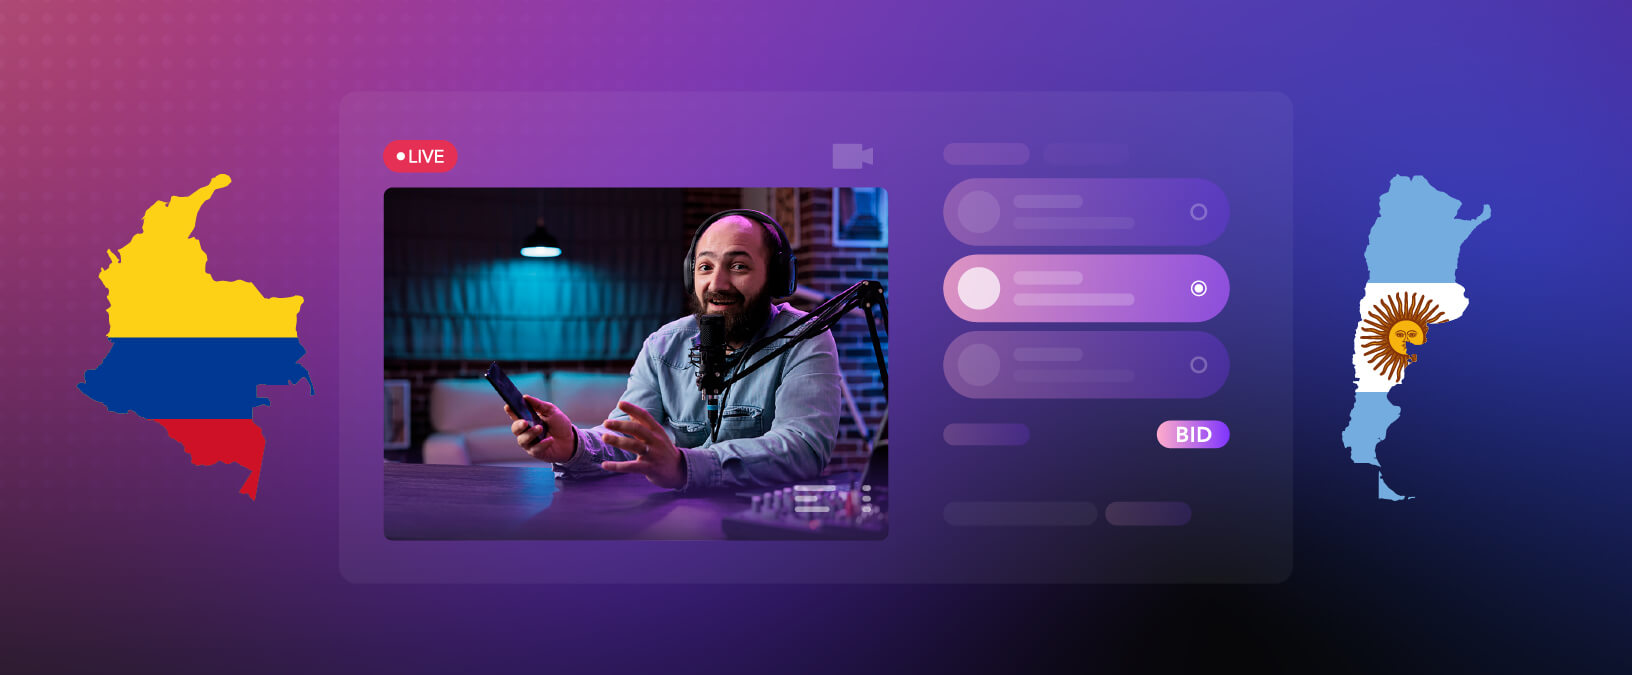
Using Dolby.io Real-Time Streaming APIs, you could disallow an entire country from your stream or permit specific IP Addresses. A good reason why you might want this is for an auction! Sounds very oddly specific but stay with me… let’s say that you are hosting an NFT online event to auction off your precious collection. You did the marketing, but the word has spread, and you specified how only Colombia and Argentina could access your stream. Geo-blocking!
In this scenario, you might also have special guest stars, so you ask for their computer’s IP or register all IPs within a certain network, i.e., an office, and register those before the stream even goes live. Then, they can be added to the allowed list as exceptions!
Now, how is this done?
Option 1. Allowing/Blocking Per Countries
You know what I am about to say. Log into your Dolby.io account; if you haven’t created one, here is the sign-up page. Once you are logged in, ensure you are in the Streaming dashboard, highlighted in the top bar. On the landing page, you should see the “Live Broadcast – Stream Tokens,” which exhibits all the streaming tokens to broadcast from your account. On the top right, there is a plus button; click on it to create your token.
Change the Token Label to the name you would like to give this broadcast. If you want to record the broadcast to publish later on your social media, click on the grayed-out “Recoding Disabled” to activate the recording. Along with that, you might want to secure your stream, which is the same step; click on the grayed-out “No Restriction .” This will turn the stream into requiring every user with the viewing link to enter a specific token.
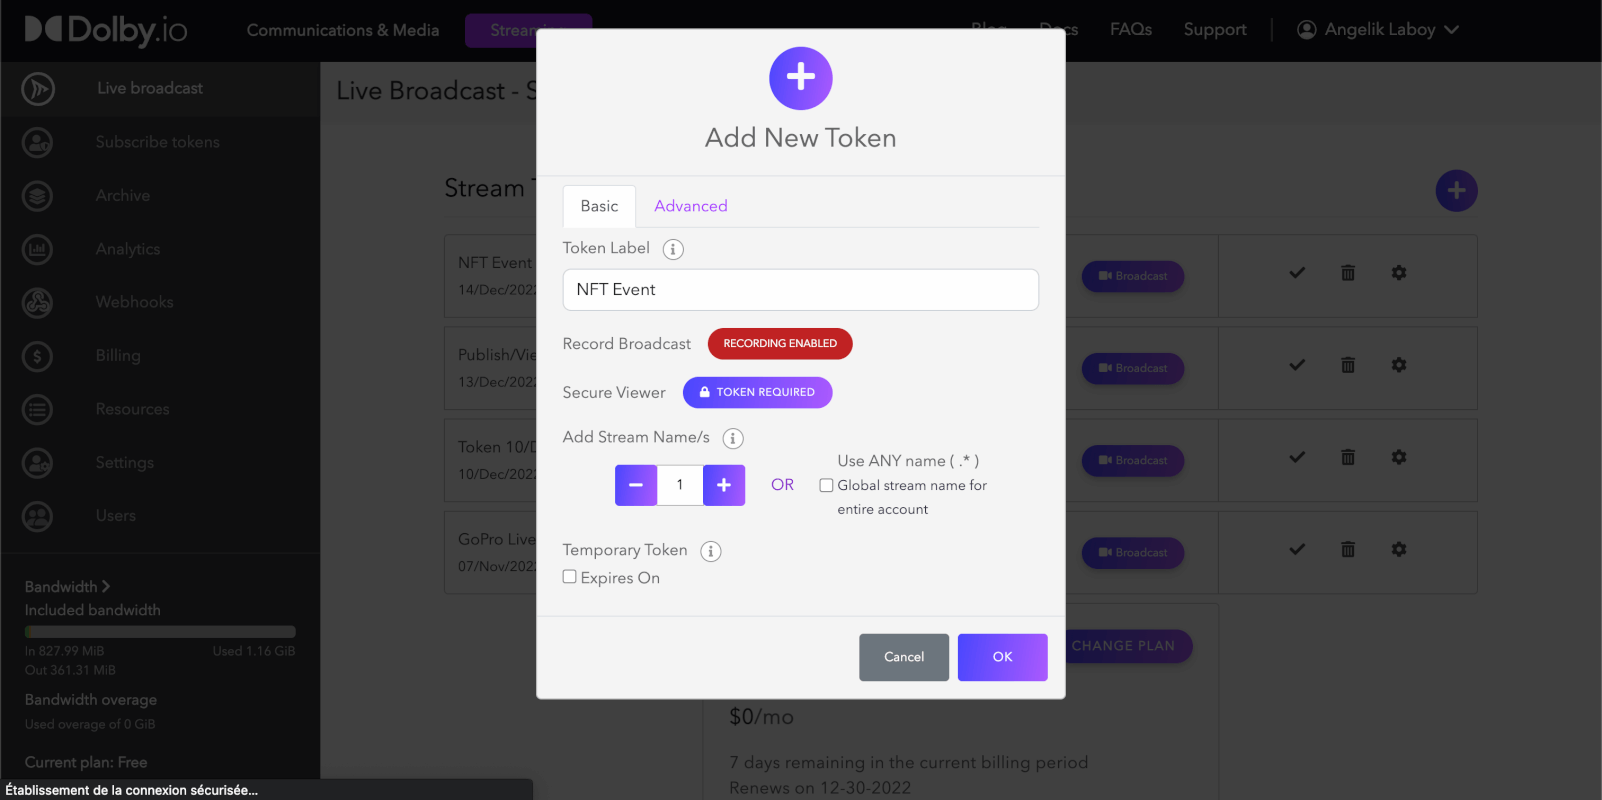
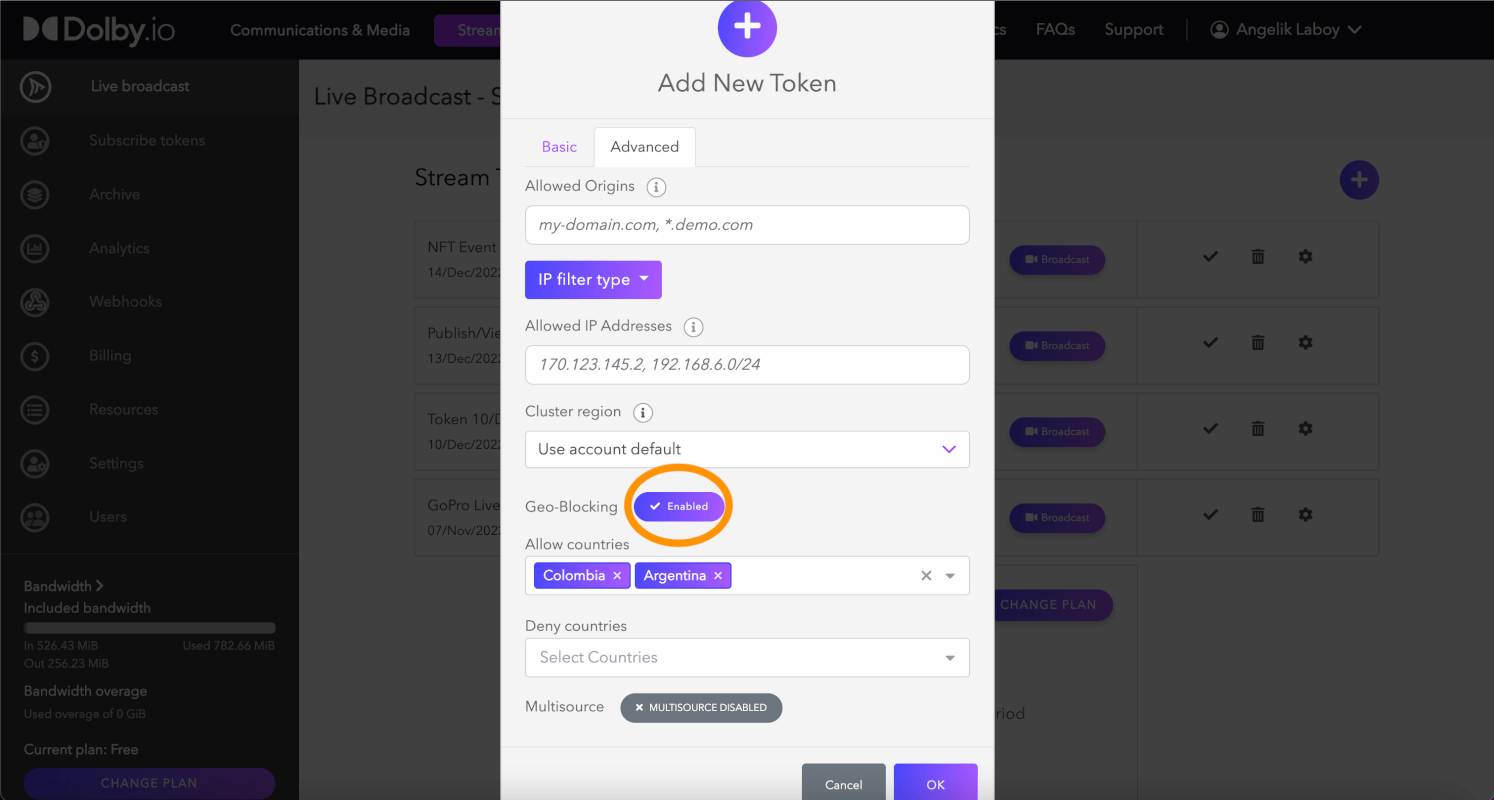
Before finalizing this token, go into the Advanced tab. Inside here, at the bottom, it says Geo-Blocking disabled. By confirming that you want it enabled, you can select the country you want to allow or deny. When you add countries to the allowed list, it blocks off any of the ones not included. Likewise, if you deny a specific country, all other countries will have access except the blocked off. Click ok when finalizing your list!
Here is an example of allowing only Colombia and Argentina:
Option 2. Adding Specific IP Addresses
In the same location (under the Advanced tab), you will see the “Allowed IP Addresses .”This is the other option to restrict users from entering your stream. Again, you can specify a specific IP or a range of IP addresses to be allowed.
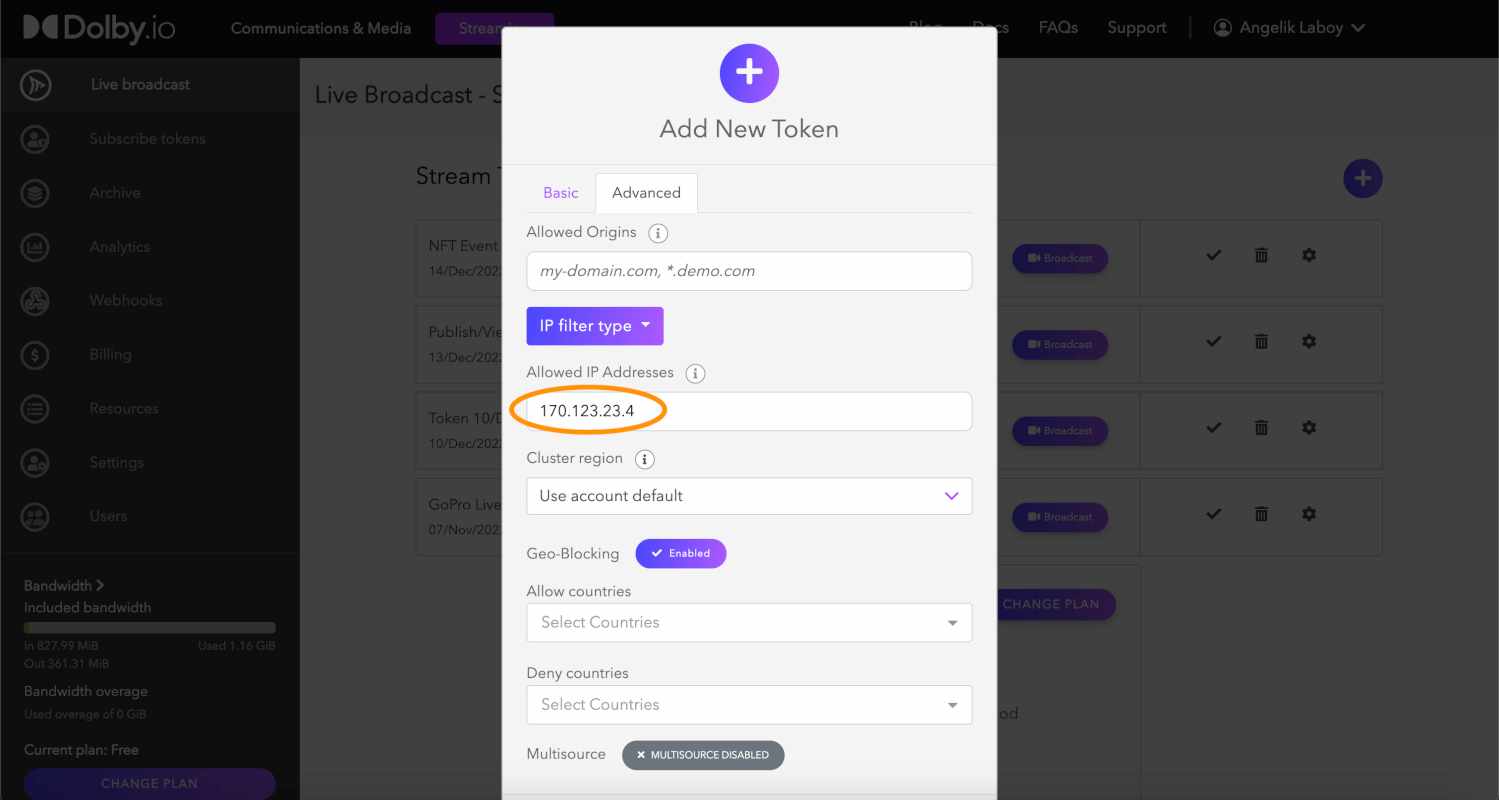
*Note: If the user with the allowed IP changes their network resulting in a different IP, they will, of course, be rejected. Simply update to their newest address. A good way to solve this would be to temporarily use static IP instead of dynamic.
The Geo-Blocking button doesn’t need to be enabled for this functionality to work. However, similar to before, if one IP address is added, all other ones are denied. I will leave this link for more information on managing the publish and subscribe tokens with the REST API.
Bonus: Securing Your Stream
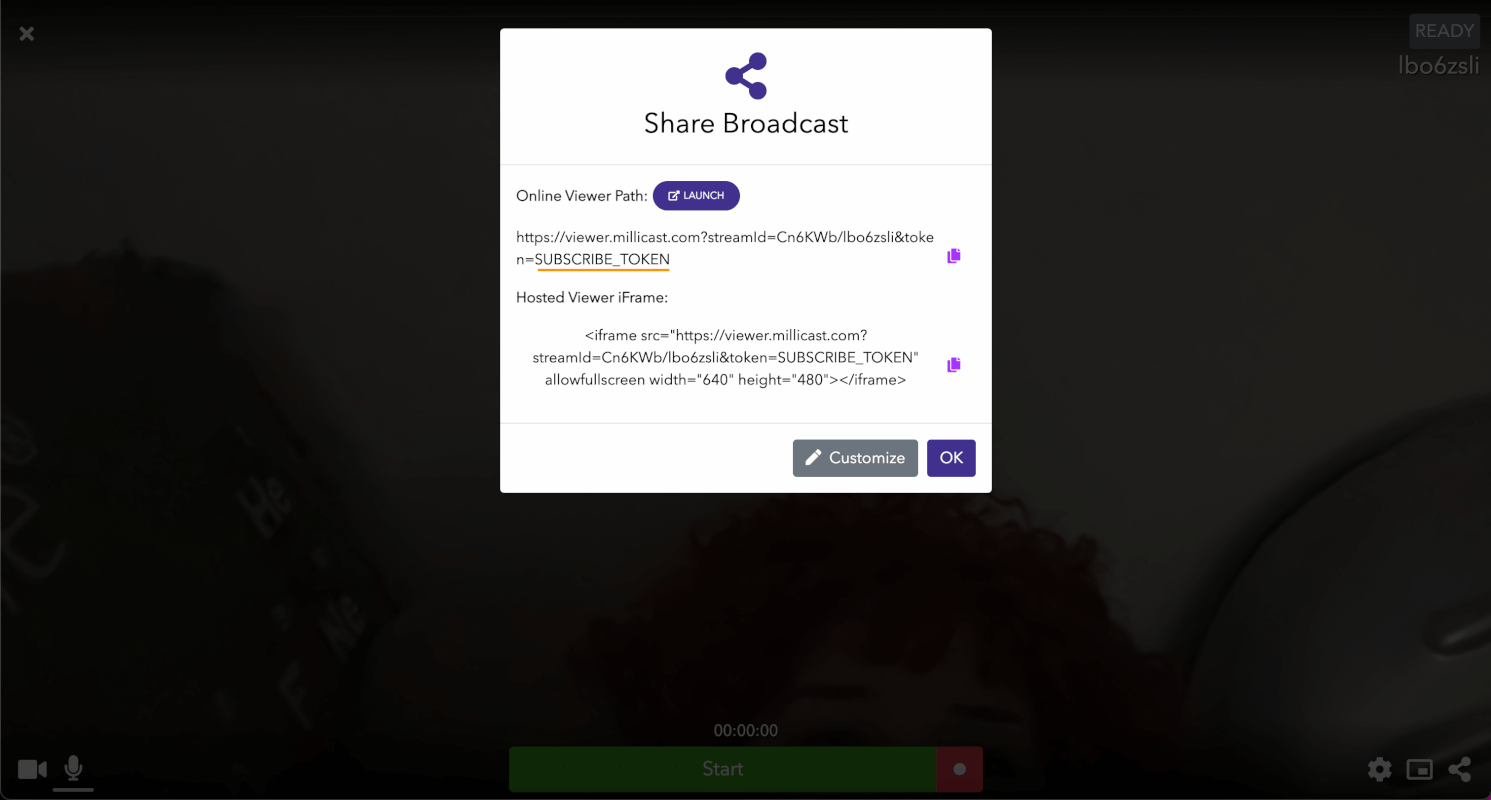
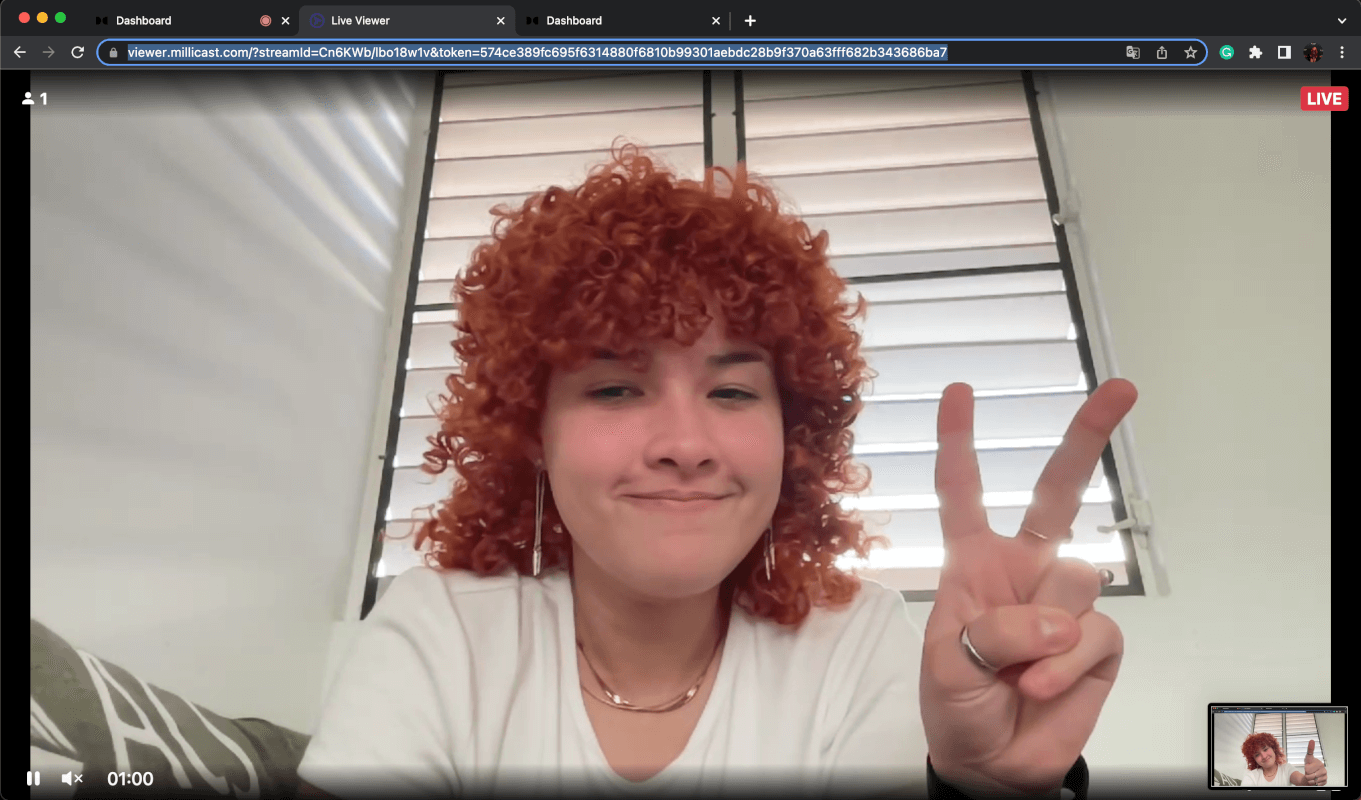
Now that the stream token has been created, start broadcasting! Once inside the streaming viewer, you will see the ‘Start’ button (and the record icon if enabled). On the lower right, there is the sharing icon, which will present the online viewer path. Copy the viewer path URL to see how it looks from a viewer’s perspective. If you have been following along with what I have been doing, you enabled the secure stream, which means that your URL says “SUBSCRIBE_TOKEN” at the end. This is to add another level of protection to your stream.
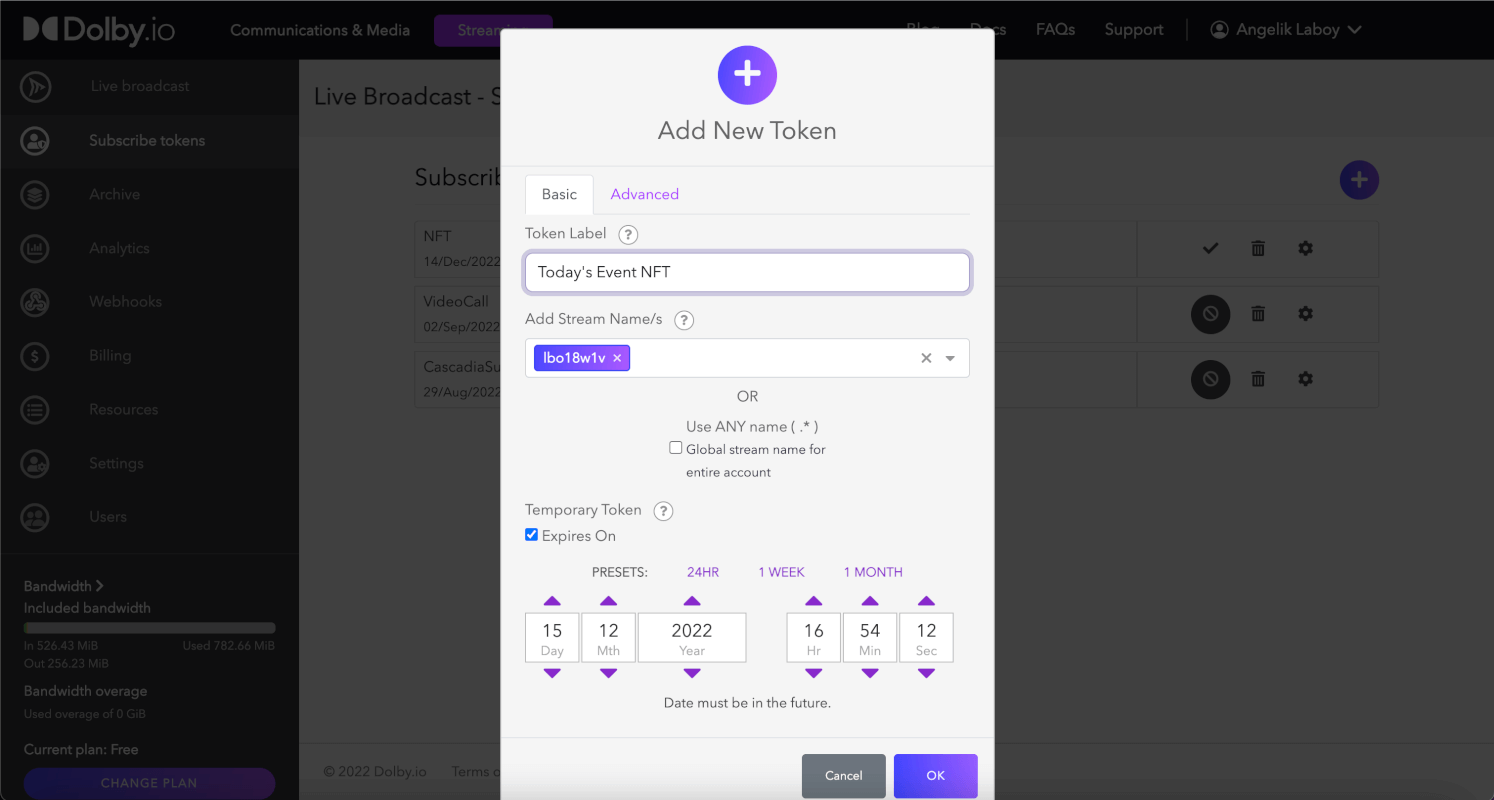
To add a subscribe token, go to your left-hand side under the “Live broadcast,” and you will see “Subscribe tokens .”Click on it, press the Add button, and name your token. Underneath it, in “Add Stream Name/s,” select the name of your stream token.
You can set this token to expire after a specific date, which I will enable and set to destroy after 24hrs (it will make a clock appear next to the token symbolizing its inability).
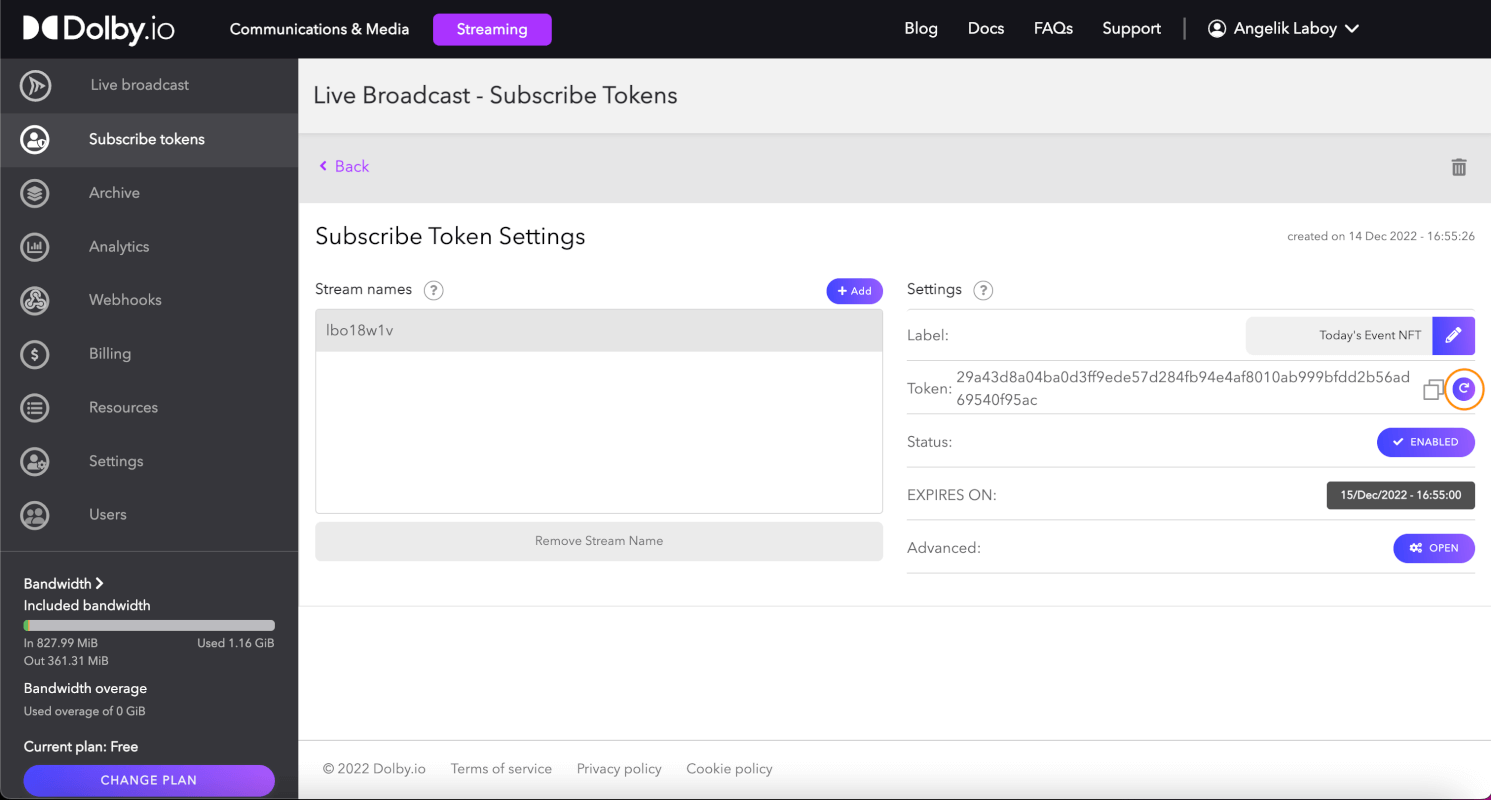
Press Ok, and you should see it now in the dashboard. You have the ability to delete or disable it from here. By pressing on it, you will see the token! Copy the token, as it needs to be shared with viewers to access your stream.
*Note: If you feel your token has been exposed to individuals you wish not to access your stream, simply click on the refresh button next to it.
Returning to the viewer URL, replace the “SUBSCRIBE_TOKEN” with the copied string, and happy streaming! Also, if secure tokens are something you are more interested in exploring, then here is the perfect place to check more of it out as well as how to do them through API calls.


Checking It Works
To test if geo-blocking is working, don’t add your country to the allowed list; instead, add any other country. You will not be able to see anything; however, if you go back and switch the list to include your current country, the viewer will load.
In the end, we accomplished activating geo-blocking by either writing in the allowed/denied countries or by specifying IP addresses. Using a secure viewer, your stream takes double security measurements as only those in the allowed list can access it. Even if everybody receives the link to the event, they won’t be allowed to see it if they don’t have the subscribe token. For a more visual walkthrough, I created a video showcasing how to activate both options for your stream. Until the next!


")