


Educational content is hard to run quality assurance on, since content like seminars or lectures can be quite long in length. Today, pre-recorded educational content is become more prevalent, as more people are working and studying from home. Combining this with low resources means that it is becoming less likely that educational videos are undergoing a proper quality assessment before being released.
Luckily, Dolby.io can help automate the quality assurance process by using media processing APIs – specifically the Diagnose API. In this tutorial, you will learn how to use the Diagnose API and interpret its results. There are two main parts:
- Submitting the video to Dolby.io and waiting for the result.
- Collecting the result and interpreting them.
Note: To follow along, you can find the application in this GitHub repository.
Prerequisites
This tutorial assumes you have the following setup:
- The system requirements for Next.js
- A Dolby.io account
- An S3 bucket or other storage provider that contains educational video(s)
Setting Up
Dolby.io
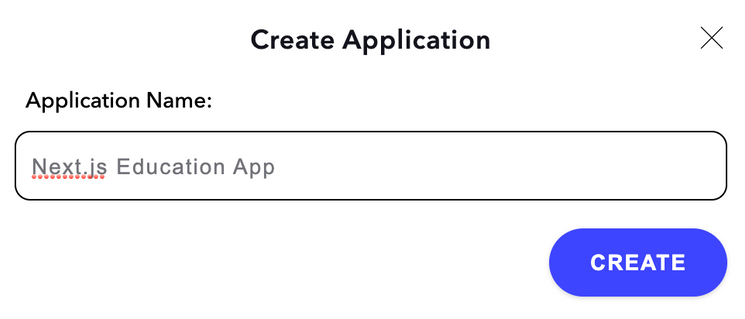
First, you’ll want to login to your Dolby.io account. If you haven’t already, create an app for this project (see image). Once created, take a note of the Media Processing API key – you’ll be needing this for calling the Diagnose API later on.
Next.js
The next (pun intended) step is to setup the Next.js project. Next.js provides a CLI installation wizard called create-next-app to help you get a project up and running quickly.
The cool thing about create-next-app is that you can add the -e flag to tell it to use a starter project. A starter project is essentially a template project someone else has published. You can use a published starter for this tutorial called next-dolbyio-edu-platform-starter.
npx create-next-app {YOUR_PROJECT_NAME} -e https://github.com/dolbyio-samples/blog-nextjs-edu-platform-starter
#or
yarn create next-app {YOUR_PROJECT_NAME} -e https://github.com/dolbyio-samples/blog-nextjs-edu-platform-starter
If you’re interested in using Typescript, you can also add the --typescript flag. For the purposes of this tutorial however, this tutorial will be using Javascript only. Interested in learning more about Next.js? Their documentation is a fantastic resource for exactly that! Visit it here.
Once create-next-app has finished, navigate to the project and run npm install or yarn install. The starter project isn’t too different from the default project you get from running create-next-app. The key differences are:
pages/example.jsxroute that contains an example call to the API.- A
Loadercomponent which shows a nice loader while API requests are being made.
Starting the Dev Server
You can start the dev server by running npm run dev (or yarn equivalent). When you navigate to localhost:3000, you should see something like this.
Making A Sample Request
Using the starter app, you can try making your first request to Dolby.io. The pages/example.js file contains the minimum working code you need to create a request to the Analyze API. The most important thing to note is how to authenticate the request:
const apiKey = process.env.NEXT_PUBLIC_API_KEY || "";This will set the apiKey with the environment variable called NEXT_PUBLIC_API_KEY or an empty string, if one isn’t found. One advantage of Next.js is that the framework allows you to add secrets very easily. Create a .env.local file in the root directory and add your Dolby.io API key:
NEXT_PUBLIC_API_KEY={<DOLBYIO_MEDIA_API_KEY>}When you run npm run dev, Next.js will load this as an environment variable, which is available in the process.env object. To read more about handling environment variables, you can read the Next.js documentation.
An important thing to note here is that prepending NEXT_PUBLIC_ to a variable tells Next.js to allow this variable to be seen in a browser. This is an insecure way to authenticate the API; in reality, you should be using an OAuth token ( see here for a tutorial). For the purposes of this tutorial, this method is out of scope.
Once you’ve added the NEXT_PUBLIC_API_KEY to the .env.local file, you should be set up to make a request to Dolby.io. Start the server with npm run dev, navigate to localhost:3000/example and open the developer console (for information on how to do this, visit the Chrome or FireFox documentation). When the page loads, you’ll be able to see that a job was created, and its jobID has been logged:

Well done on making your first request to Dolby.io! Moving forward, our plan is to utilise this request structure to submit jobs on the education platform.
Submitting the Video
First, let’s create a module that handles all of the Dolby.io requests in lib/dolby-io.js. The first method you will need is one that sends requests to Dolby (essentially a browser fetch API wrapper):
// lib/dolby.io
// Send a request to Dolby.io
async function fetchApi(api, method, payload = "") {
  const url = `https://api.dolby.com/${api}`;
  const options = {
    method,
    headers: {
      Accept: "application/json",
      "Content-Type": "application/json",
      "x-api-key": getAuthCredentials(),
    },
    body: method === "POST" ? payload : null,
  };

  const response = await fetch(url, options);
  const data = await response.json();
  return data;
}
Here, getAuthCredentials() is a helper function that gets the appropriate authentication credentials.
// lib/dolby.io.js
// Get the Dolby.io authentication credentials
function getAuthCredentials() {
  return process.env.NEXT_PUBLIC_API_KEY || "";
}
Next, add some constants to help define what APIs we can call and what the expected states of a job are:
// lib/dolby.io.js
const APIS = {
  diagnose: "media/diagnose",
};

const JOB_STATES = {
  submitted: "submitted",
  inProgress: "inProgress",
  complete: "complete",
};
Now that we are able to make API calls, let’s write a function to submit a job and return its ID:
// lib/dolby.io.js
// Submit a job to Dolby.io and return its job ID
async function submitJob(api, inputUrl) {
  const payload = JSON.stringify({
    input: inputUrl,
  });
  const { job_id } = await fetchApi(api, "POST", payload);
  return job_id;
}
You’ll also want the functionality to query the job given it’s ID. This function will get the current job details (such as progress and status):
// lib/dolby.io.js
// Get the current progress and status of a job
async function getJobProgress(api, jobId) {
  const data = await fetchApi(`${api}?job_id=${jobId}`, "GET");
  return data;
}
Finally, export the functions and variables we want to expose:
export { JOB_STATES, APIS, submitJob, getJobProgress };Creating the UI
Now that we have generic functions to call, let’s create the UI for submitting a job. Ideally, we would like to have a small form that enables the user to enter the URL of the educational video and submit it to Dolby.
Let’s create a component called SubmitJobForm in a components folder. For now, the component should be pretty simple – submitting the form should not do anything:
// components/SubmitJobForm.jsx
import { useState } from "react";
import styles from "../styles/Form.module.css";
export default function SubmitJobForm() {
const [inputUrl, setInputUrl] = useState("");
const handleSubmit = async (event) => {
event.preventDefault();
};
return (
<form className={styles.group} onSubmit={handleSubmit}>
<label className={styles.label}>
Input URL:
<input type="text" name="input" onChange={(event) => setInputUrl(event.target.value)} />
</label>
<input type="submit" value="Submit" />
</form>
);
}
To see this component on the home page, add it to index.jsx:
// index.jsx
import SubmitJobForm from "../components/SubmitJobForm"
// ...
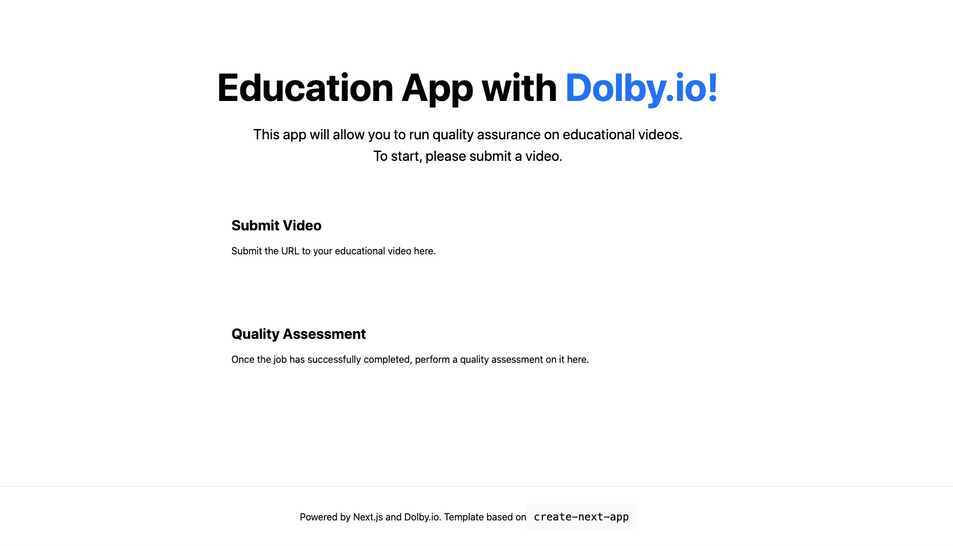
<section className={styles.section}>
<h2>Submit Video</h2>
<p>Submit the URL to your educational video here.</p>
<SubmitJobForm />
</section>When you run the dev server, you should see this:

Now the form is setup, let’s add the submit job functionality. Using React hooks, we should store the job state and it’s status (i.e. the stage of the job lifecycle it is in), as well as any errors we may encounter. Note, if you are unfamiliar with React hooks, the React documentation is a great resource for learning more.
// components/SubmitJobForm.jsx
import { useEffect, useState } from "react";
import { JOB_STATES, APIS, submitJob, getJobProgress } from "../lib/dolby-io";
import styles from "../styles/Form.module.css";
import Loader from "./Loader";

export default function SubmitJobForm() {
  const [inputUrl, setInputUrl] = useState("");
  const [error, setError] = useState("");
  const [jobState, setJobState] = useState("");
    const [jobId, setJobId] = useState("");

  const handleSubmit = async (event) => {
    event.preventDefault();
    setJobState(JOB_STATES.submitted);

    try {
      const job = await submitJob(APIS.diagnose, inputUrl);
      setJobId(job);
      setJobState(JOB_STATES.inProgress);
    } catch (err) {
      const { title } = JSON.parse(err.message);
      setError(title);
      setJobState("");
    }
  };

  // ...
}
Essentially, in the handleSubmit function, we submit a job to the Diagnose API with the inputURL that the user has provided. Once it has been submitted, update the jobID and jobState variables to reflect the current state the form is in. If any error comes up, set the error variable.
Now that some state is set, we can add more UI to update the user on the state of the job:
// components/SubmitJobForm.jsx
// ...
if (error) {
return (
<p>
Job failed: <b>{error}</b>
</p>
);
}
if (jobState === JOB_STATES.submitted) {
return <Loader />;
} else if (jobState === JOB_STATES.inProgress) {
return (
<>
<Loader />
<p>
Job submitted successfully. Your job ID is <b>{jobId}</b>
</p>
<p>
Status: <b>{jobInfo.status}</b>
</p>
<p>
Progress: <b>{jobInfo.progress}</b>
</p>
</>
);
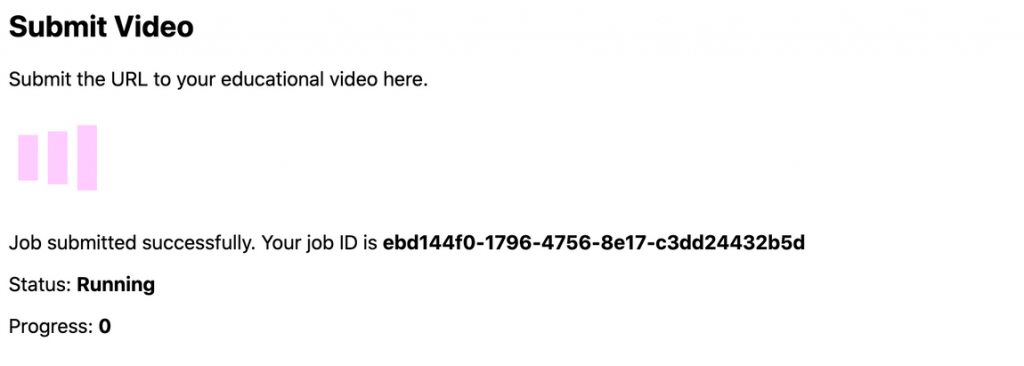
}
// ...Navigating back to your browser, try submitting a job. You should see something like this:
If the job fails, you should see an error message come up:

Once the job has finished, we should ensure the form’s state has been updated as well. If we call a useEffect function every time the jobState is updated, we can call the getJobProgress function to get the most up to date information on the job. We can also add a jobInfo state variable to store the job information:
export default function SubmitJobForm() {
// ...
const [jobInfo, setJobInfo] = useState({ progress: 0, status: "Pending" });
// ...
useEffect(() => {
async function updateJobInfo() {
const jobInfo = await getJobProgress(APIS.diagnose, jobId);
if (jobInfo.status !== "Pending" && jobInfo.status !== "Running") {
setJobState(JOB_STATES.complete);
}
setJobInfo(jobInfo);
}
if (jobState === JOB_STATES.inProgress) {
updateJobInfo();
}
});
// ...
if (jobState === JOB_STATES.submitted) {
// ...
} else if (jobState === JOB_STATES.complete) {
if (jobInfo.status === "Failed") {
setError(jobInfo.error.title);
}
return (
<>
<p>
Job <b>{jobId}</b> is complete.
</p>
<p>
Status: <b>{jobInfo.status}</b>
</p>
<p>
Progress: <b>{jobInfo.progress}</b>
</p>
</>
);
}
// ...
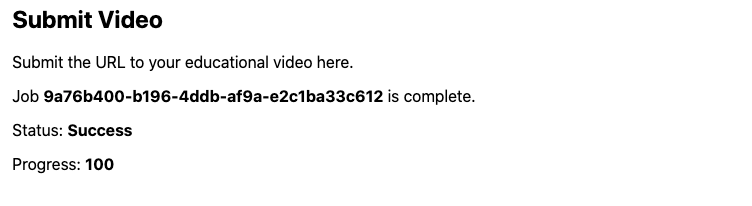
}You should now be able to see the job progress updating. This is what will be shown if the job completes successfully:
Interpreting the Results
Once a job is complete, the user should be able to populate a second form that fetches the results of the Diagnose API and calculates a quality assessment on it. The first step in this process would be to add a QA function in the dolby-io.js library:
// lib/dolby.io.js
// Create a quality assessment report based on the results of a Diagnose API job
async function getQualityAssessment(jobId) {
  const { result } = await getJobProgress(APIS.diagnose, jobId);
  return {
    duration: result.media_info.container.duration,
    audioQuality: result.audio.quality_score.average,
    worstSegment: result.audio.quality_score.worst_segment,
    speechQuality: result.audio.speech.percentage,
  };
}
For the Diagnose API, when progress is 100 and status is Success, a result object will be returned. This object contains useful information on the video. Some key values are:
duration– how long the video was (in seconds).quality_score.average– the average quality score of the video, out of 10quality_score.worst_segment– the section that had the worst quality score. This would be useful for creators to know what to edit to immediately improve the quality of their video.speech.percentage– the percentage of video that the API detected as speech
To learn more about the results returned from the API, visit here.
Creating the UI
To display the results to the user, you’ll need to make a QualityAssessment component, similar to the previous one we made. This time, you’ll add the getQualityAssessment function.
// components/QualityAssessment.jsx
import { useState } from "react";
import { getQualityAssessment } from "../lib/dolby-io";
import styles from "../styles/Form.module.css";

export default function QualityAssessment() {
  const [jobId, setJobId] = useState("");
  const [assessment, setAssessment] = useState(undefined);

  const handleSubmit = async (event) => {
    event.preventDefault();
    const qa = await getQualityAssessment(jobId);
    setAssessment(qa);
  };

  return (
    <form className={styles.group} onSubmit={handleSubmit}>
      <label className={styles.label}>
        Job ID:
        <input type="text" name="input" onChange={(event) => setJobId(event.target.value)} />
      </label>
      <input type="submit" value="Submit" />
    </form>
  );
}
If you add this component to the index.jsx page:
// pages/index.jsx
<section className={styles.section}>
<h2>Quality Assessment</h2>
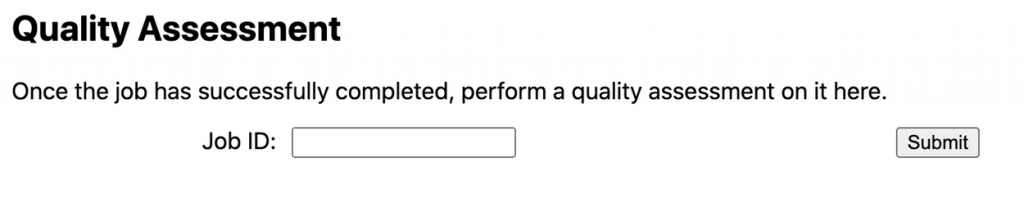
<p>Once the job has successfully completed, perform a quality assessment on it here.</p>
<QualityAssessment />
</section>On the browser, you should see this:
Finally, add the UI for the report:
// components/QualityAssessment.jsx
// ...
if (assessment !== undefined) {
return (
<>
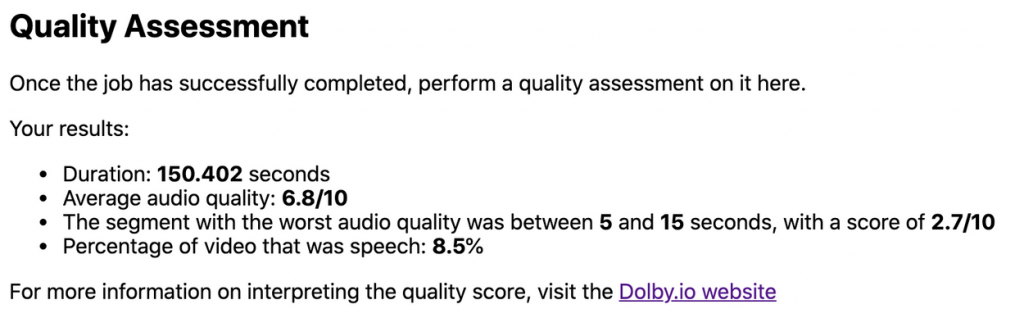
<p>Your results:</p>
<ul>
<li>
Duration: <b>{assessment.duration}</b> seconds
</li>
<li>
Average audio quality: <b>{assessment.audioQuality}/10</b>
</li>
<li>
The segment with the worst audio quality was between <b>{assessment.worstSegment.start}</b> and <b>{assessment.worstSegment.end}</b> seconds, with a
score of <b>{assessment.worstSegment.score}/10</b>
</li>
<li>
Percentage of video that was speech: <b>{assessment.speechQuality}</b>%
</li>
</ul>
<p>
For more information on interpreting the quality score, visit the{" "}
<a href="<https://docs.dolby.io/media-processing/docs/audio-quality#how-to-interpret-the-quality-score>">Dolby.io website</a>
</p>
</>
);
}
// ...And it should look like this:
Conclusion
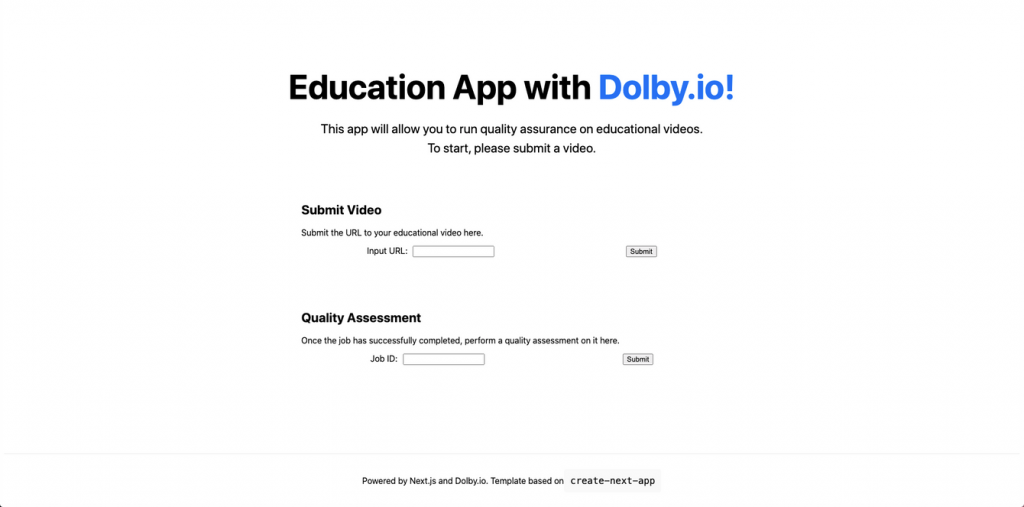
Well done on making it through the tutorial! The website should now look something like this:
Wondering where to go from here? Some ideas could include:
- Allowing a user to upload their video with the Dolby.io Input API
- Storing the
jobIdas a cookie so the user can navigate away from the page and not lose the job ID. - Try using different media processing APIs, such as Speech or Diagnose.
Interested in learning what else you can do with Dolby.io? See our blog posts for tutorials that use different languages and services.


")