


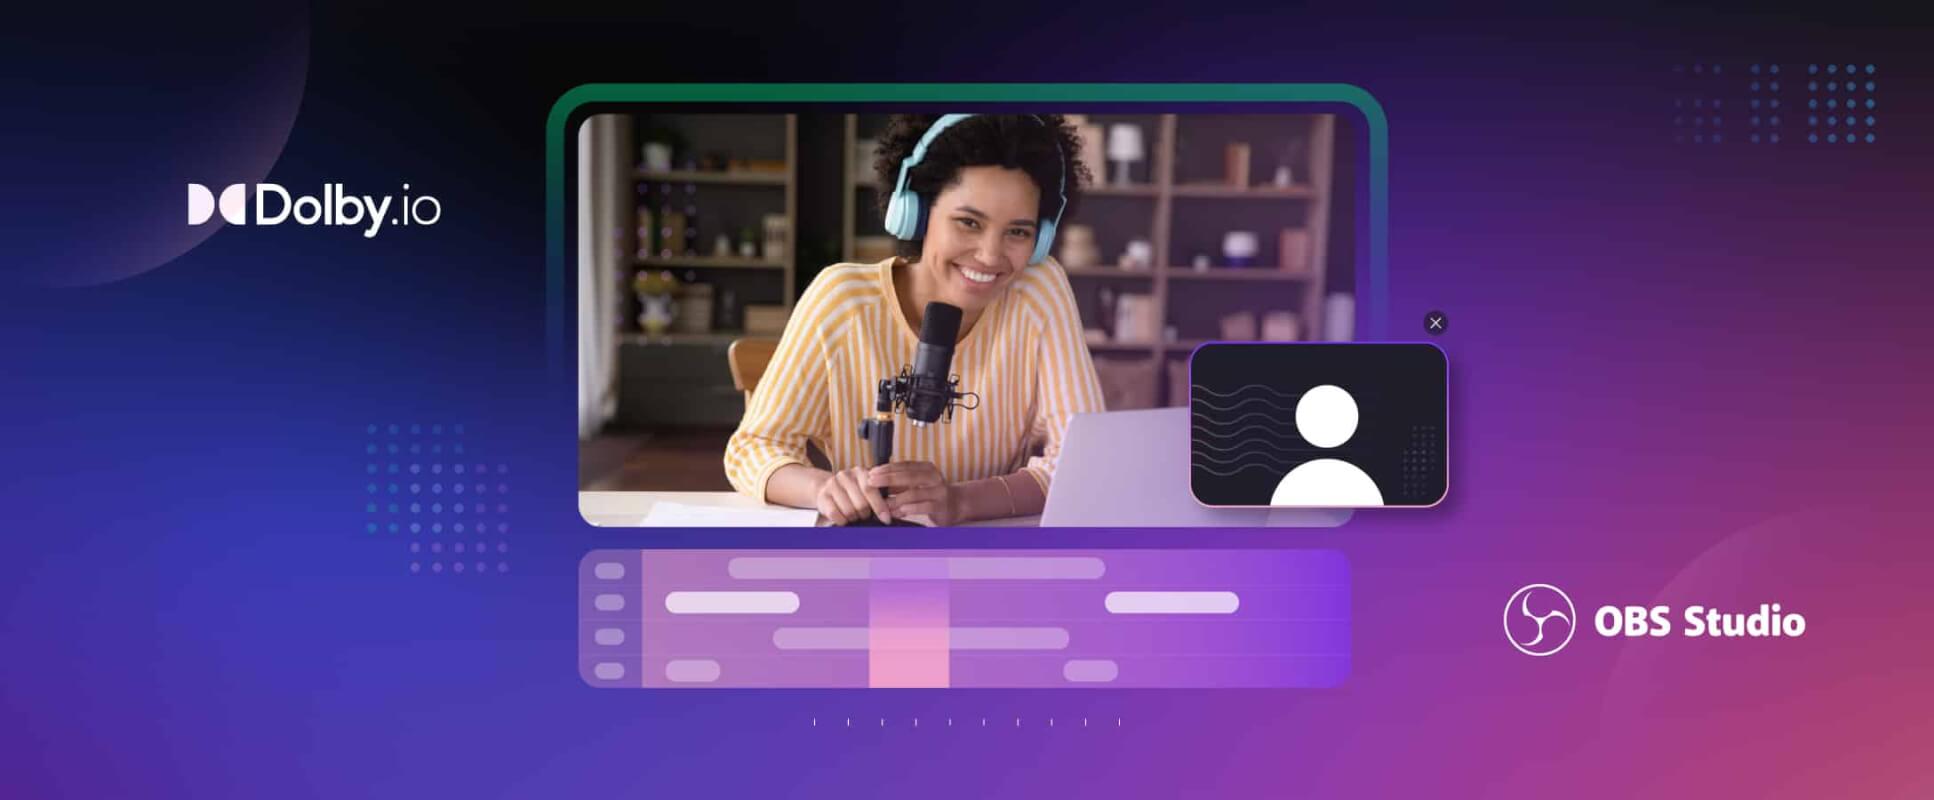
When live streaming an auction, often there will be a need to share screen time of the main broadcast between the auctioneer, and the lot being auctioned off. To better replicate what an in-person auction might look like, one might want to show both at the same time. This provides both the value of knowing what the lot looks like, but also keeps the engagement brought from the presence and personality of the auctioneer. This blog will guide through the steps to create these types of feeds in your live stream using OBS-WebRTC, powered by Dolby.io Live Streaming API.
Downloading OBS-WebRTC
OBS-WebRTC is a fork of OBS Studio that uses WebRTC to power the streaming protocol. The benefits of this include being able to stream at a much lower latency than conventional live streaming, hitting under 500ms of latency in worst case scenarios. As a fork, it uses much of the same UI components as OBS Studio does, making it easy to transition over to the software, and makes all of the next steps still applicable to the original version as well. To download OBS-WebRTC, visit the GitHub page and download the correct binary for your operating system. Then proceed to install the package as instructed by your OS.
- If you are using macOS, download the .dmg file.
- If you are using Windows, download the .msi file.
- if you are using Linux, download the appropriate .deb file.
Note that OBS WebRTC might prompt you to update your NDI runtime, clicking yes downloads an installer which you should run, this is required for using OBS WebRTC. Please follow the link within the popup to download the NDI runtime, as manual installations from other sources are not guaranteed to work.
Additionally, if you already have OBS Studio installed, ensure you are using the intended version. OBS Studio will show up separately to OBS-WebRTC and can be installed and used in parallel.
Managing your scenes
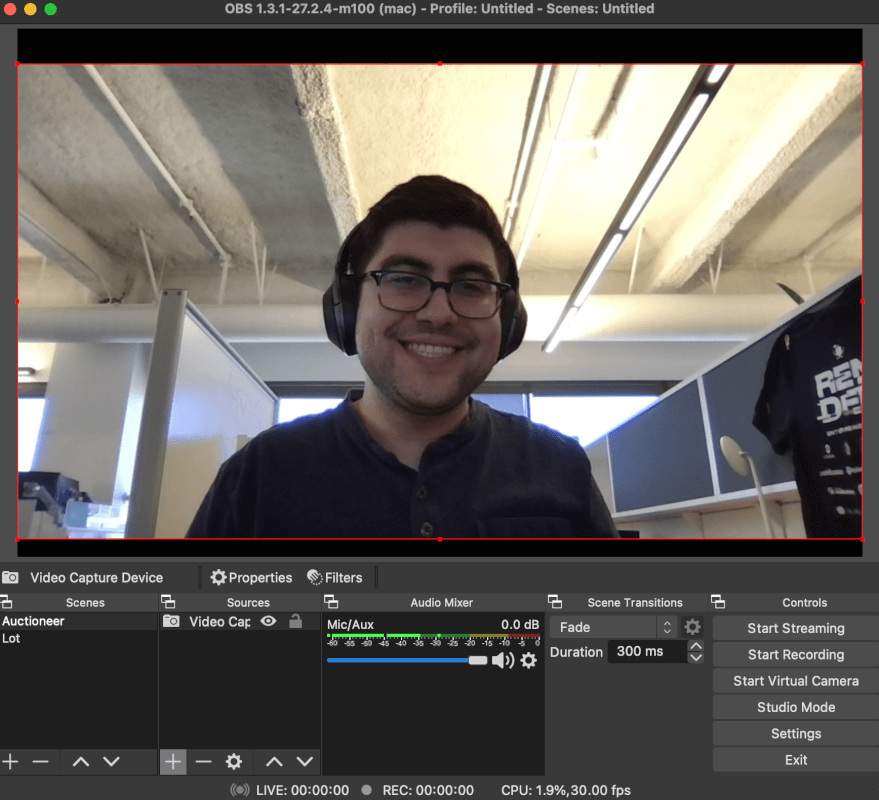
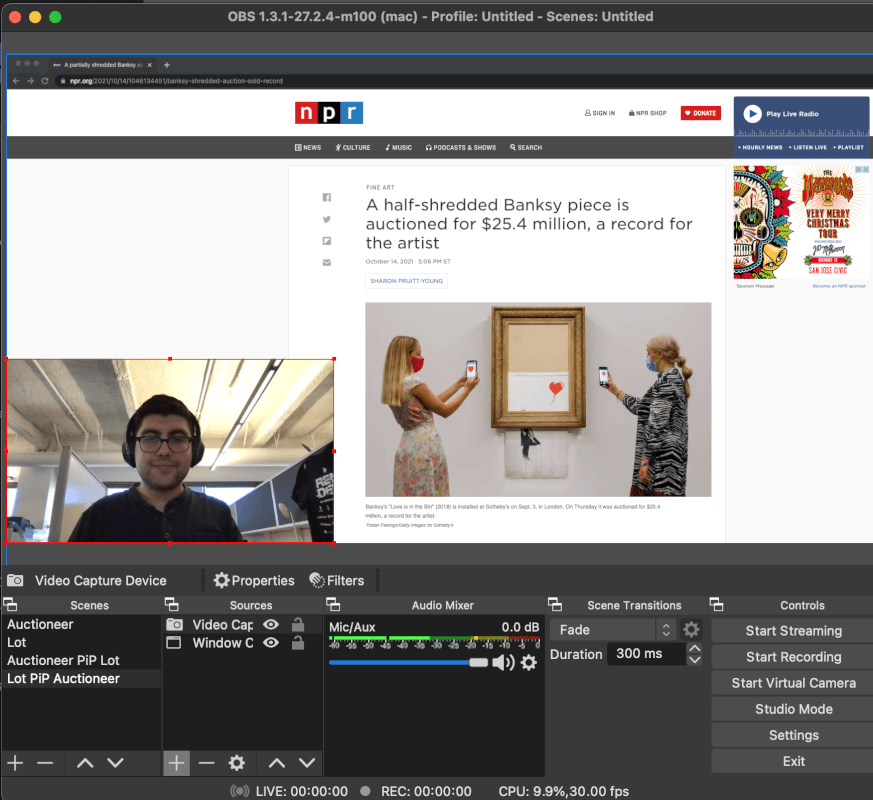
Now that we have OBS installed, lets set up our scenes. The obvious two scenes we want to have are 1. Only the Auctioneer and 2. Only the Lot. These are the simplest, where we can use the “+” button under scenes and create two scenes named “Auctioneer” and “Lot”. Let’s start with Auctioneer.
For the auctioneer scene, we only need to use a Video Capture device under “Sources”. This can be a webcam, or any camera connected to the streaming device, livestock, DSLR, etc. Stretch out the feed to fit the screen and that’s it! Now is also a good time to ensure that your microphone works.
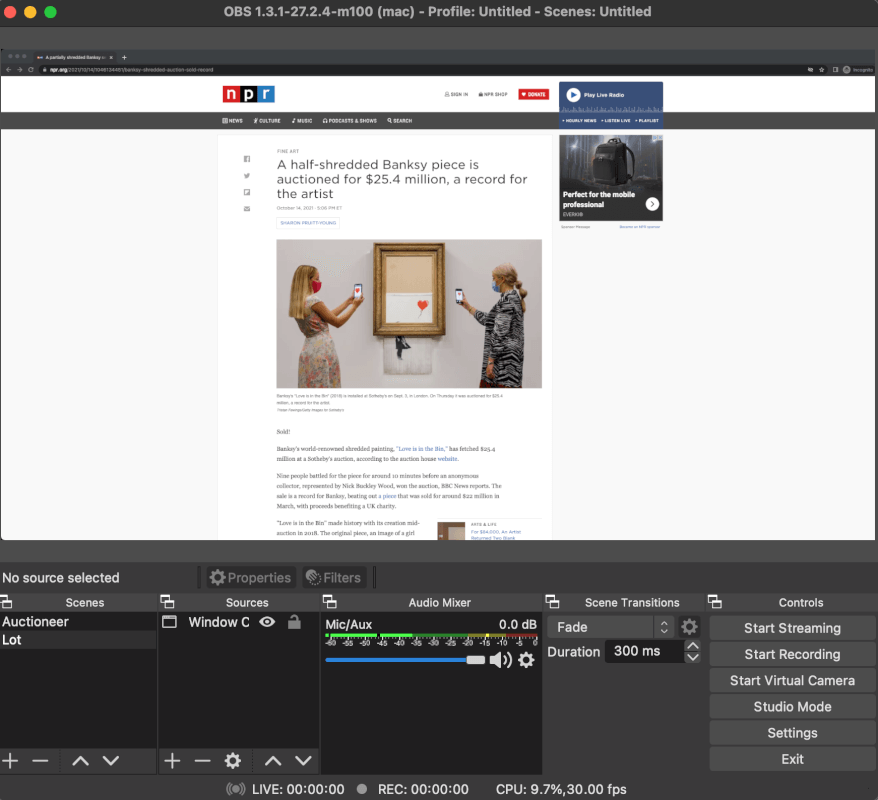
For the lot scene, we want to choose a difference source. This might be a camera feed, but for virtual actions, it might be a screen share. For this we will add a new Window Capture to capture our browser window. Note that you might need to give OBS permissions to view your screen if you are on MacOS. You can then stretch and zoom in your browser as desired and showcase the feed. Make sure no sensitive information is present on this browser window. We suggest keeping any auction notes in a separate window to prevent confidential notes being shown to the entire audience.
Overlaying Sources Together
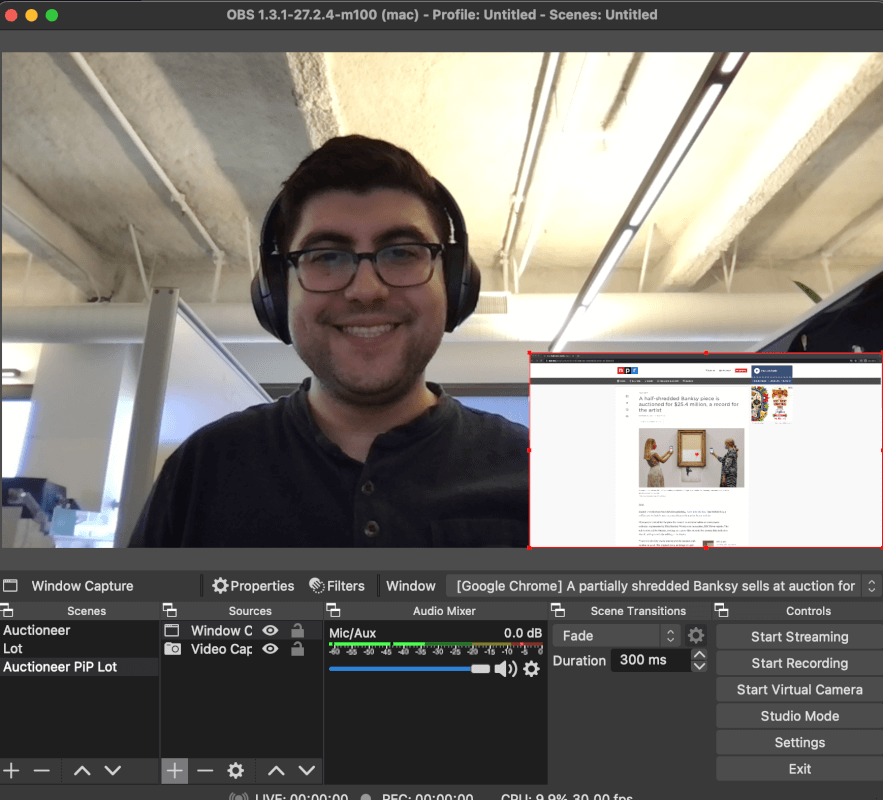
We have two scenes with two sources, so lets merge them together for a picture in picture effect. For this, we want to create another new Scene, which we will title Auctioneer PiP Lot. Then we can add in two new Sources, the Video Capture from the Auctioneer scene we made, and the Window Capture from the Lot scene. as we already have made these sources, make sure to choose “Add Existing” to use the same sources we created earlier. We can then resize the Window Capture to fit into one of the corners of the scene.
We can do the reverse process for a Lot PiP Auctioneer Scene too for when we want the lot to be the focus instead of the auctioneer.
Automating The Process
Now that we have these scenes, we will want to be able to switch between them seamlessly. While manual clicking will work, often broadcasters will want more seamless, foolproof ways to swap between different feeds. For that, we can use OBS’ Hotkeys functionality to assign keyboard shortcuts to for scene switching. This is accessed in the Settings window on the left. In the example below, we assigned hotkeys to specific scenes with Auctioneer PiP Lot to “Shift + A” and Lot PiP Auctioneer to “Shift + L”. This will now make it easy to swap between the scenes to show off what needs to be highlighted as the streamer sees fit.

We encourage you to get creative with your difference scenes and hot keys to make the auction process as professional and intuitive as possible for your audience.
Conclusions
In this post we went through installing OBS-WebRTC, setting up the scenes for auction overlays, and setting up hotkeys for easy scene switching. Now that that is done, we suggest following this guide to learn how to start streaming directly with Dolby.io Streaming on OBS-WebRTC. This will make your remote auctions all the more interactive with the low-latency between live feed and broadcast.
To build an amazing auction platform, check out this post on how to make a viewer for your audience to see everything on. And if you haven’t already Sign Up for a free Dolby.io Account today!


")