


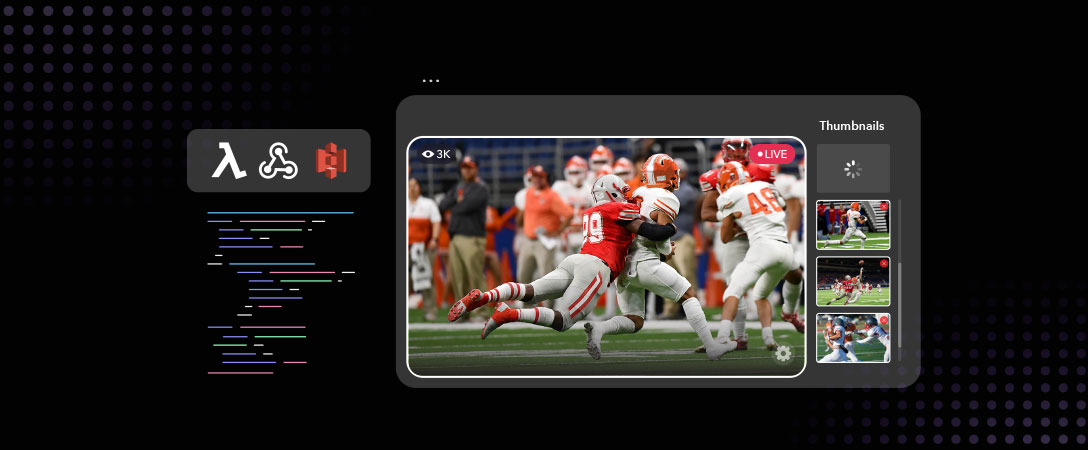
Live streaming has become an increasingly popular way for people and businesses to connect with their audience. With Dolby.io‘s Real-time Streaming, users can now utilize thumbnails to receive frames from live stream feeds every 30 seconds. One of the significant advantages of live stream thumbnails is that they can save bandwidth for both viewers and creators. Instead of having to stream the entire content to provide a preview, a thumbnail image can be used, especially for websites that want to display one or more live streams on a single page. In this blog post, we’ll explore how to use AWS’s serverless tools to process and store the thumbnails that were sent by Dolby.io using webhooks.
1- Set Up a Webhook
What is a webhook?
A webhook is an endpoint that a source application (in this case Dolby.io) can send event notifications to for the purpose of communication between applications. In our example, we will create a hook from the Dolby.io Real-time Streaming application and have it send a thumbnail image to our AWS endpoint every 30 seconds. We can then use a Lambda function to process and upload the image to an S3 bucket.
How do we build our webhook on AWS?
We will set up an API gateway that will “host” and provide a public-facing URL for our endpoint. Whenever it receives a request, it will trigger a Lambda function. The Lambda function will handle the POST request that was sent to the webhook URL. The body of the webhook payload we receive has a Content-Type of image/jpeg and contains our thumbnail — a JPEG image (encoded in base64 format). The following HTTP headers are on the request to identify stream details:
X-Millicast-Timestamp: timestamp of the generated thumbnailX-Millicast-Feed-Id: feed idX-Millicast-Stream-Id: stream idX-Millicast-Signature: SHA1 signature using the hook configured secret (same signature mechanism than the other hooks)
You can set up your AWS serverless services using either AWS Management Console or AWS Serverless Application Model (AWS SAM) CLI. AWS SAM might be a better option if you want to develop more complex projects, using API Gateway’s suite of extra features, since you’ll be able to change and deploy the code from your CLI. For a step-by-step guide and a sample code for SAM, check out this repository. For this blog we will use Lambda Function URLs from AWS Management Console, since it is a simpler option if you needed a quick way to expose your Lambda function to the public internet.
Use AWS Web Management Console to Set Up a Lambda Function URL
Function URLs provide a dedicated HTTP(S) endpoint for your Lambda function without setting up a dedicated API gateway. It’s worth noting that Function URLs lack many of the more advanced features the API gateway provides, so it’s not a replacement service, but an alternative solution for basic use cases such as ours. In this article I’ll walk through the process of building out the Lambda function to receive webhook events from Dolby.io, using Function URLs rather than API gateway.
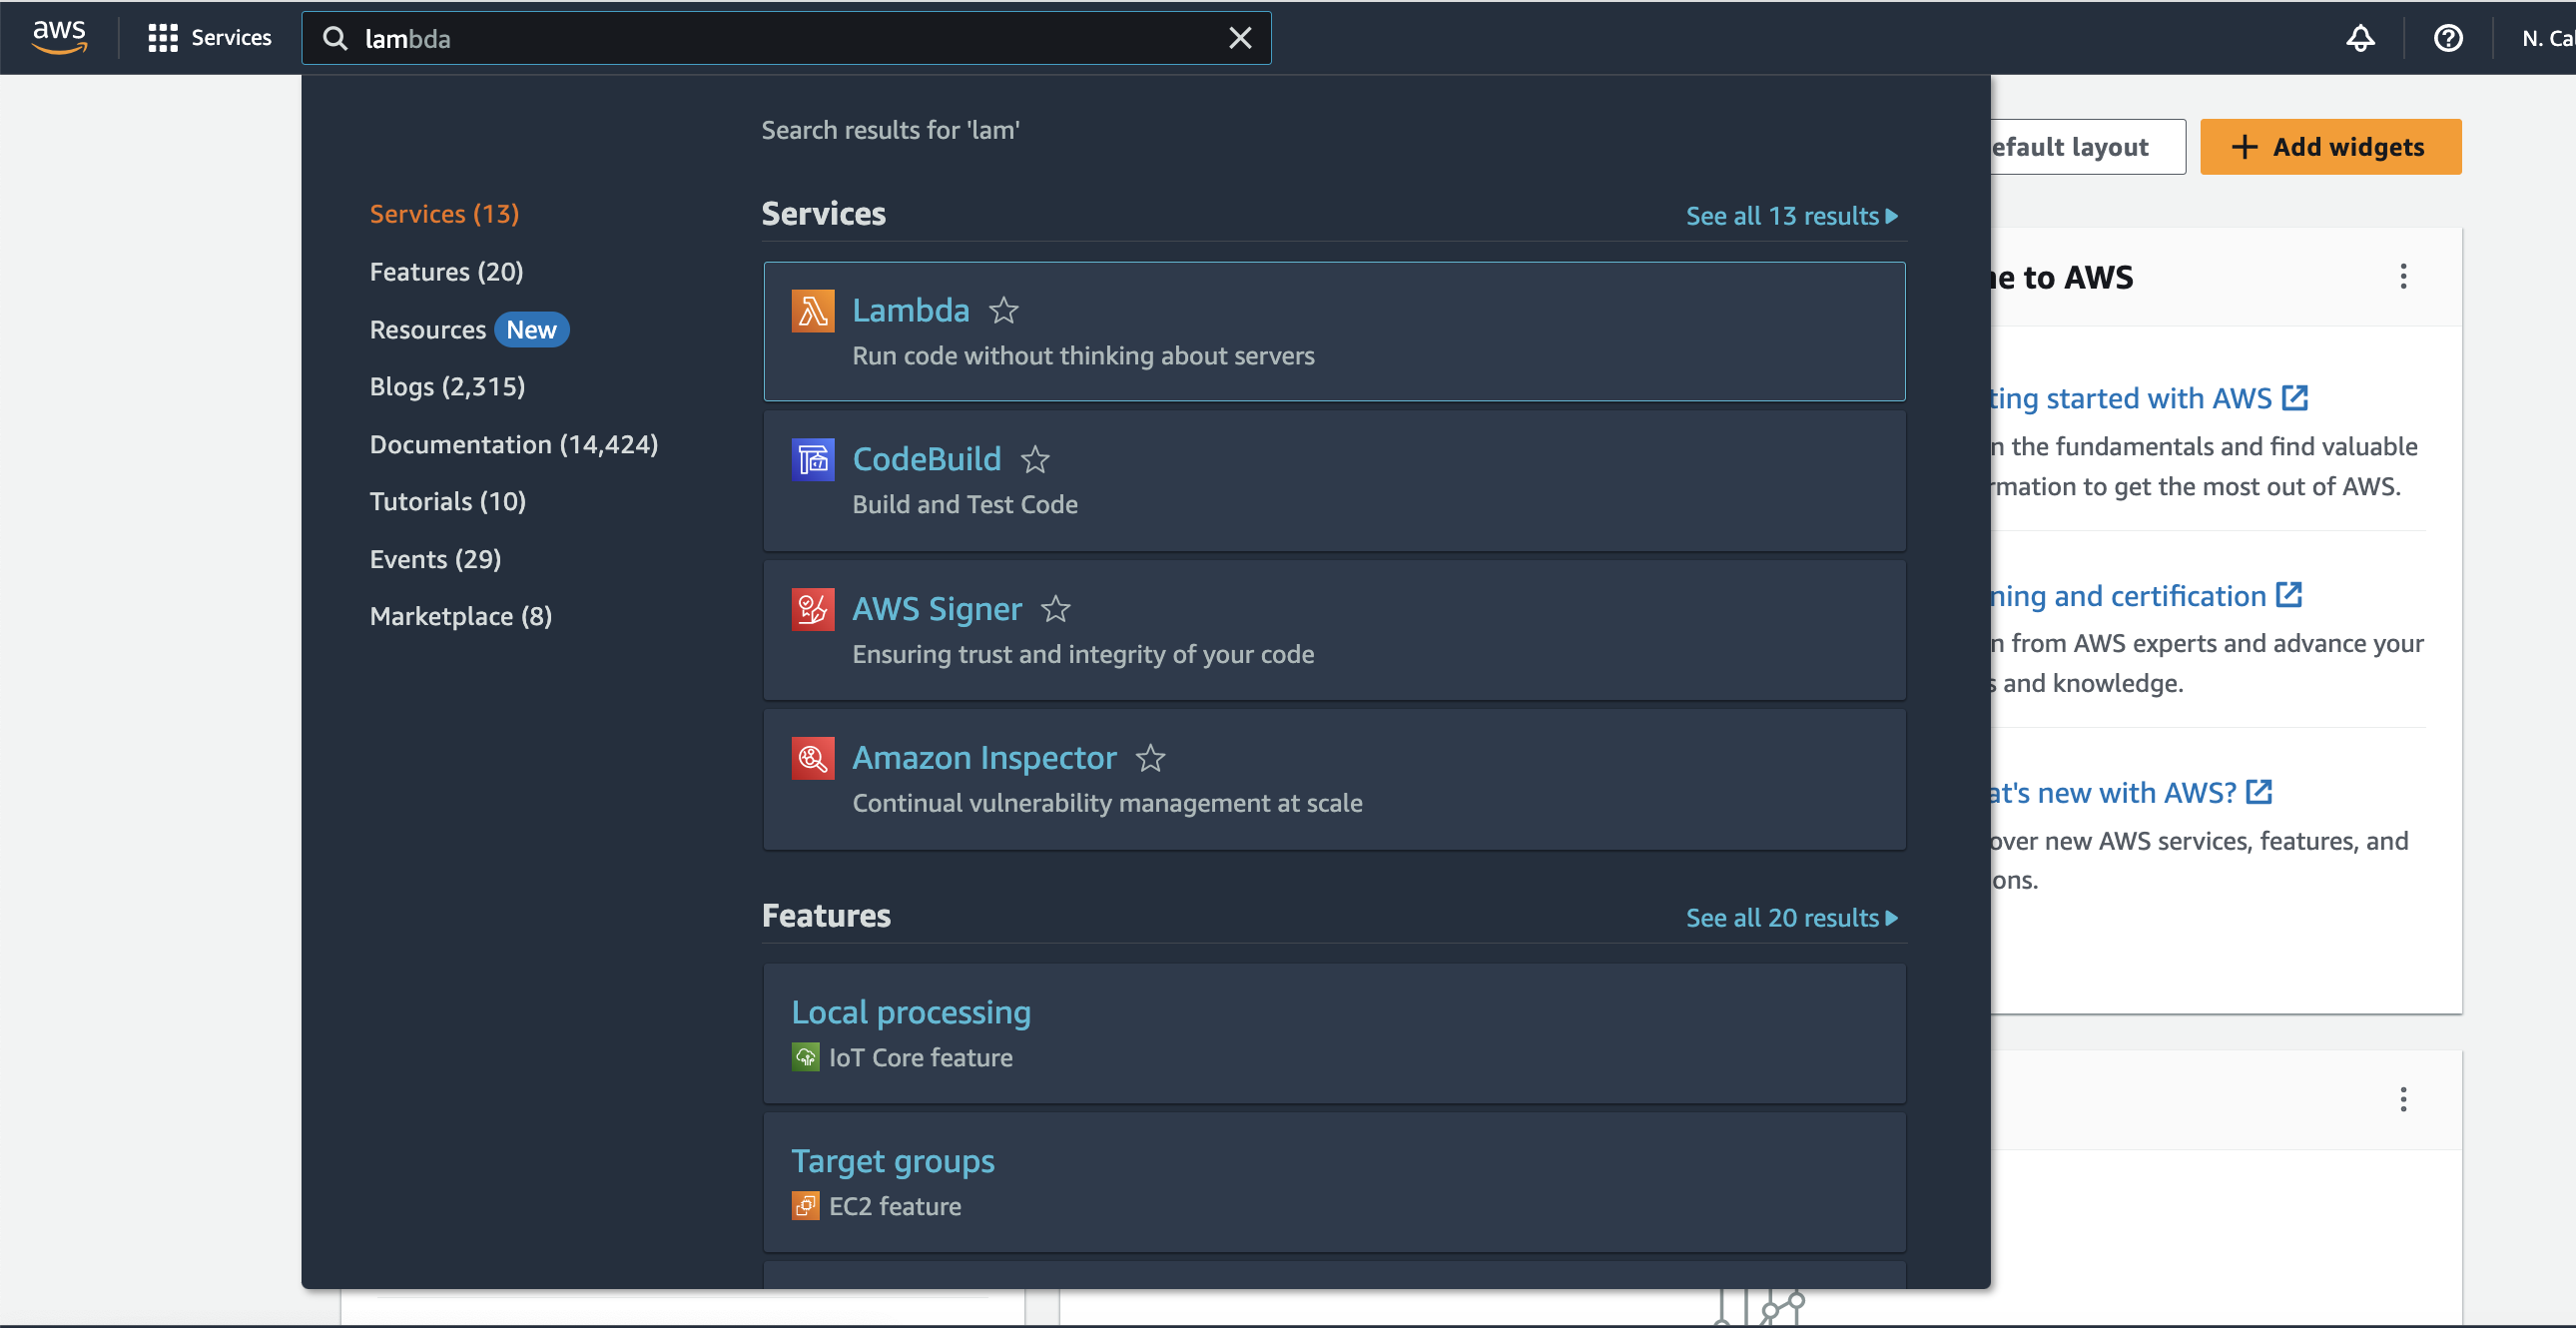
– Open the Lambda Management Console which can be found in the Services menu under “Compute” or by using the search bar.
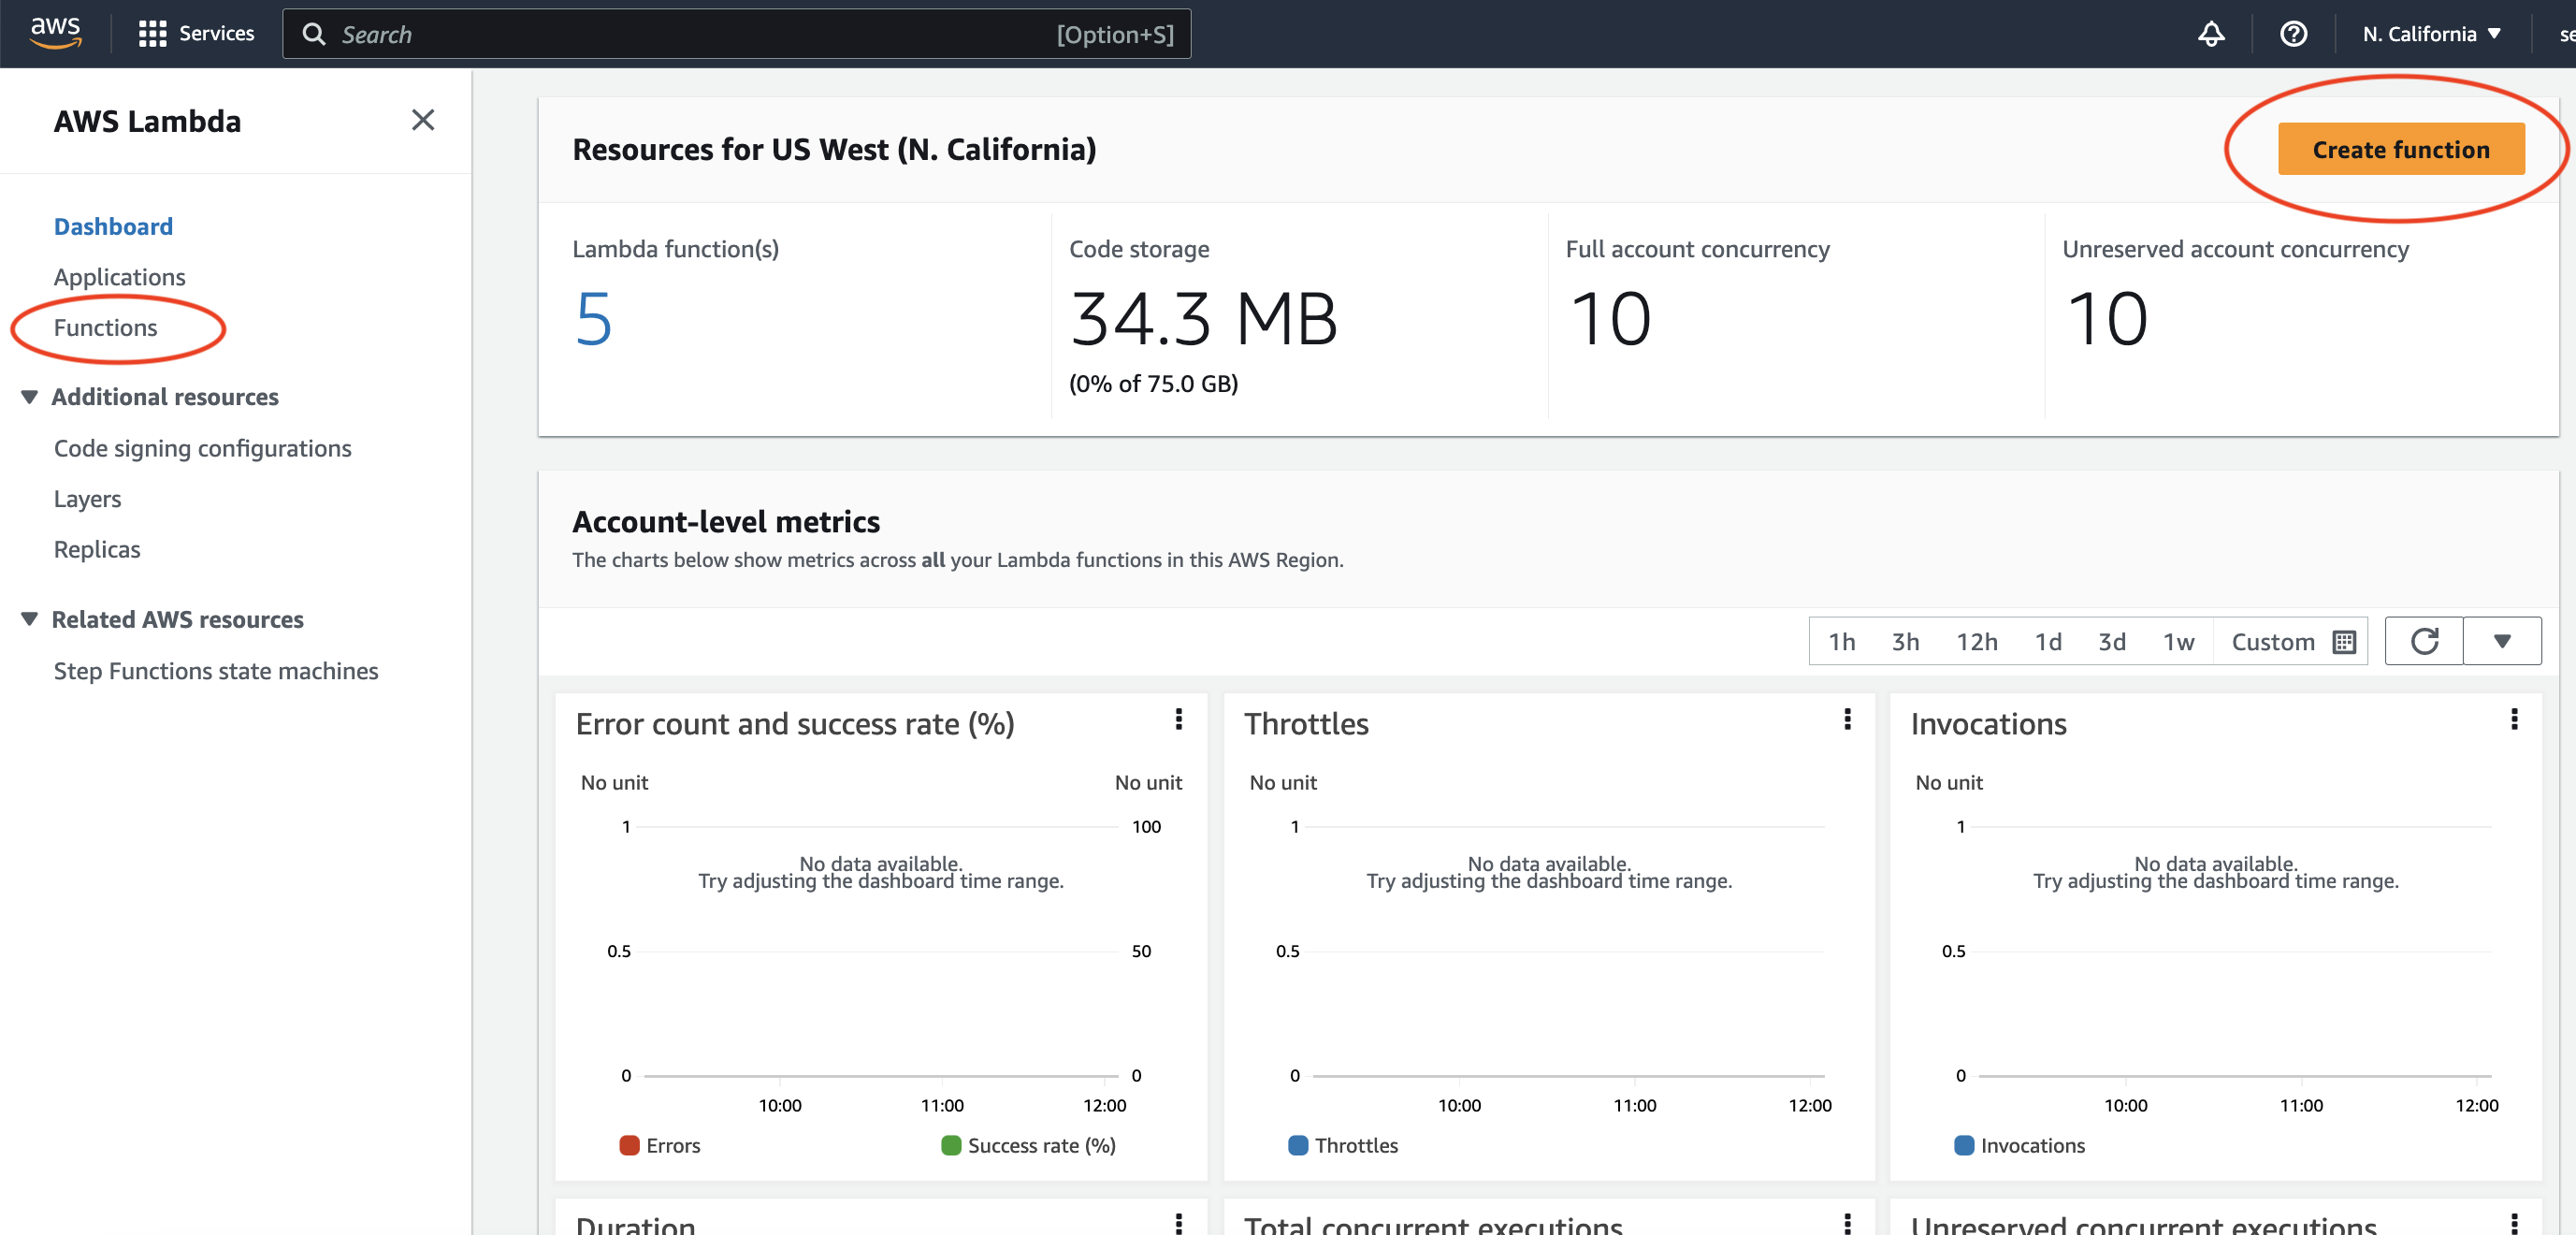
– From our Dashboard view, click the “Create Function” button located on the top right of the page. You can also find it via the “Functions” section listed on the left-hand side of the page.
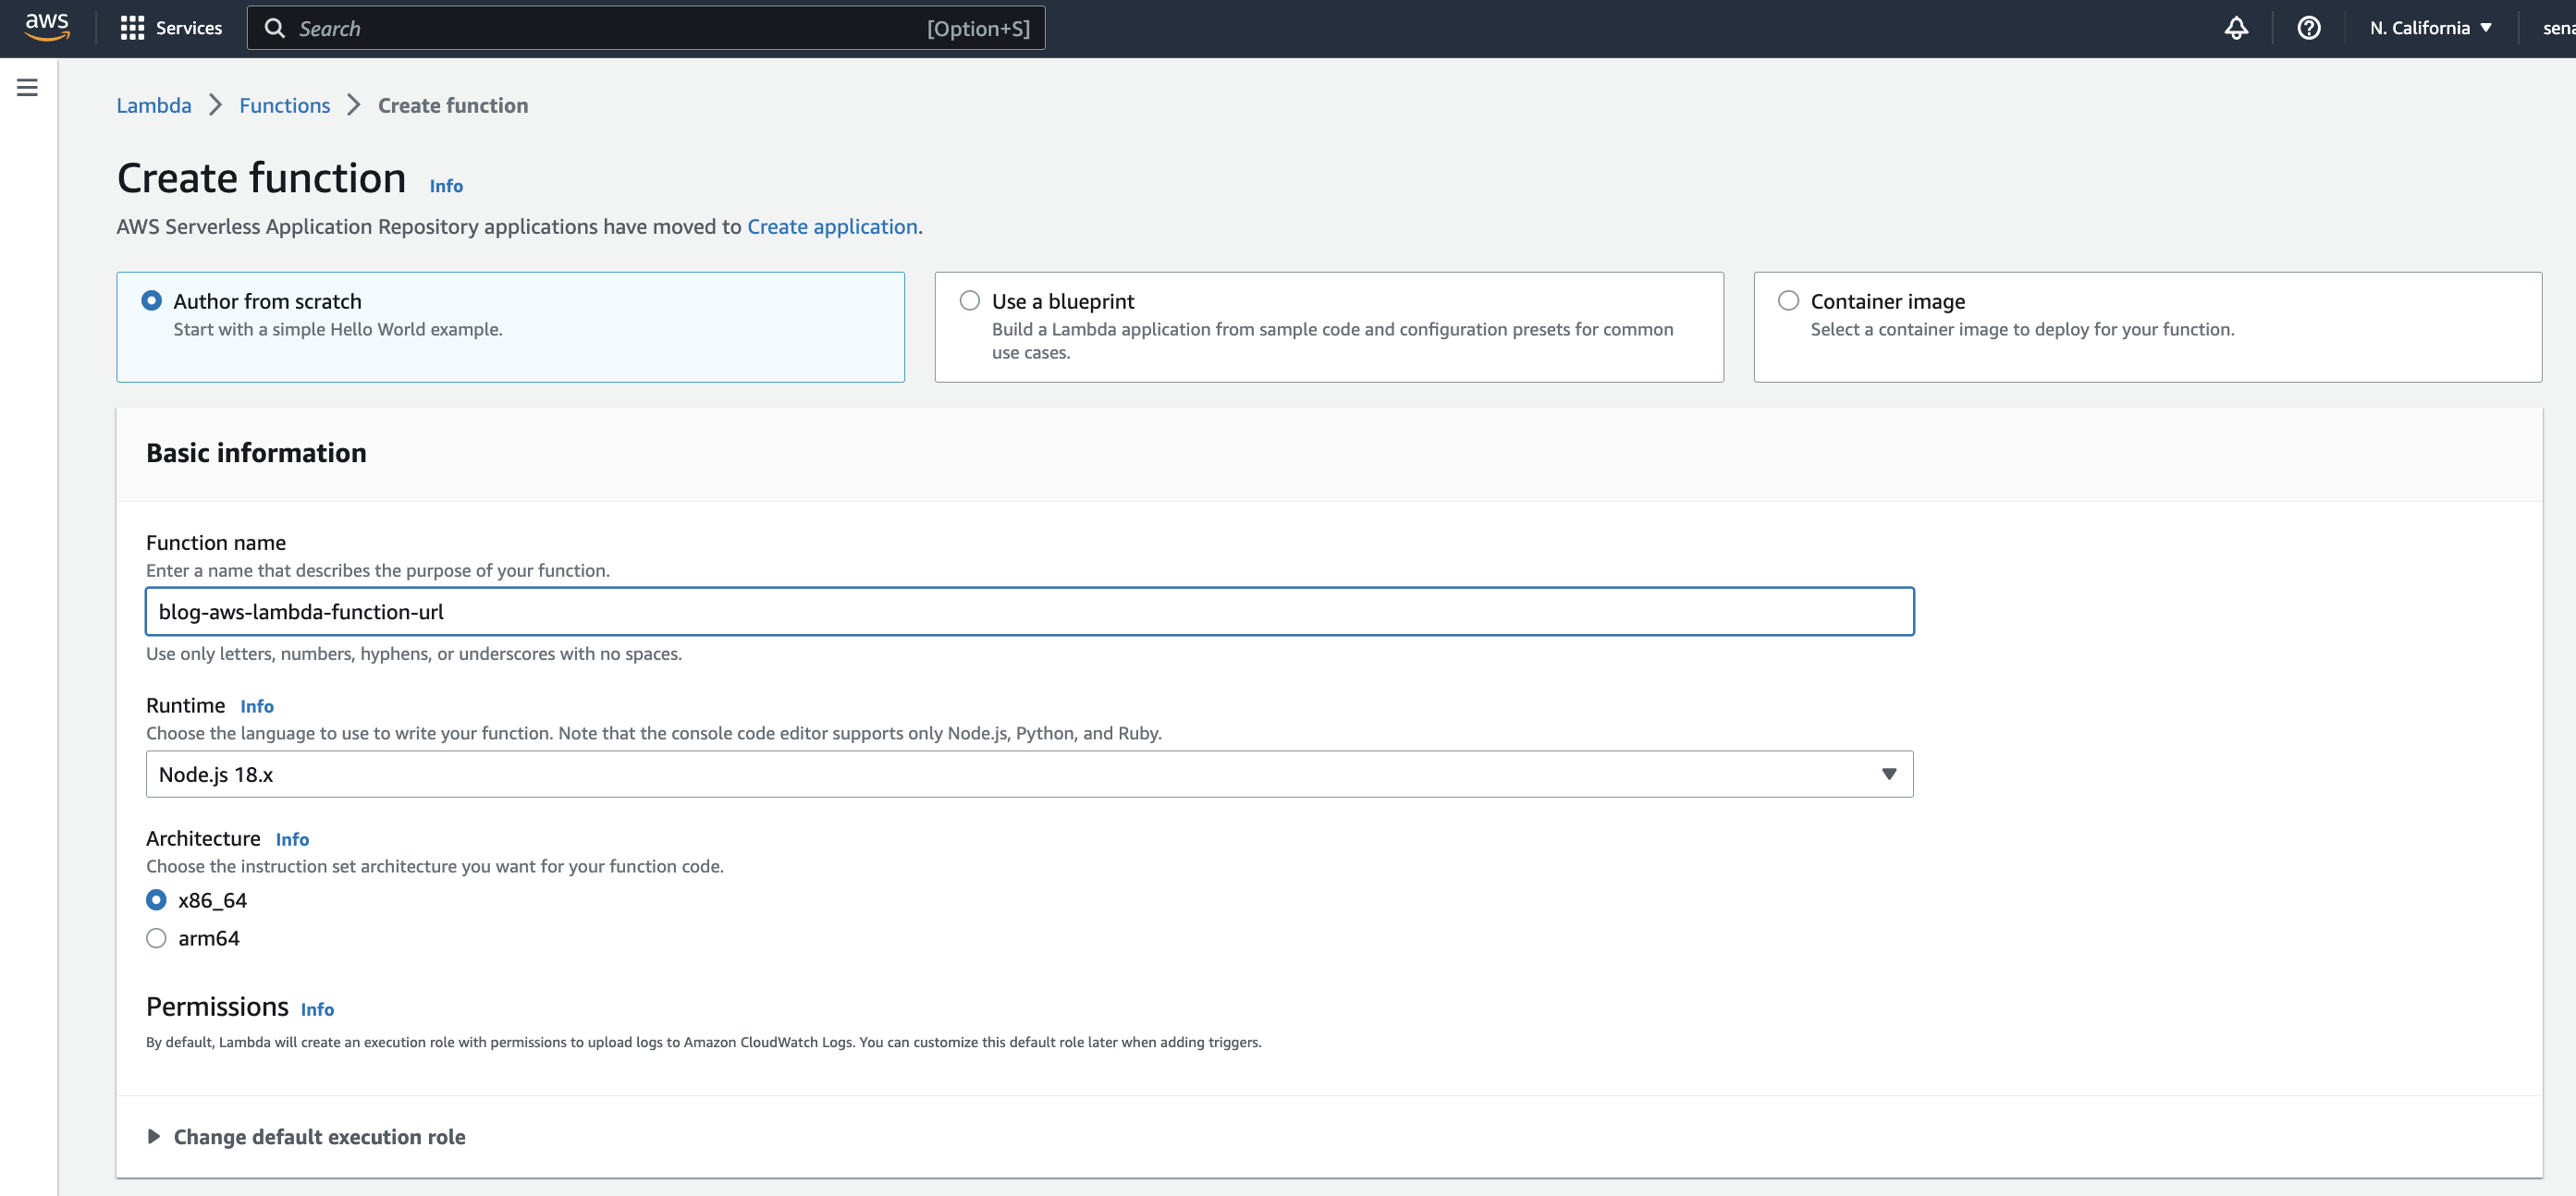
– Next, give our function a name and define the runtime. For the purposes of this example, we’ve used the name blog-aws-lambda-function-url and we’ll write it in “Node.js 18.x”.
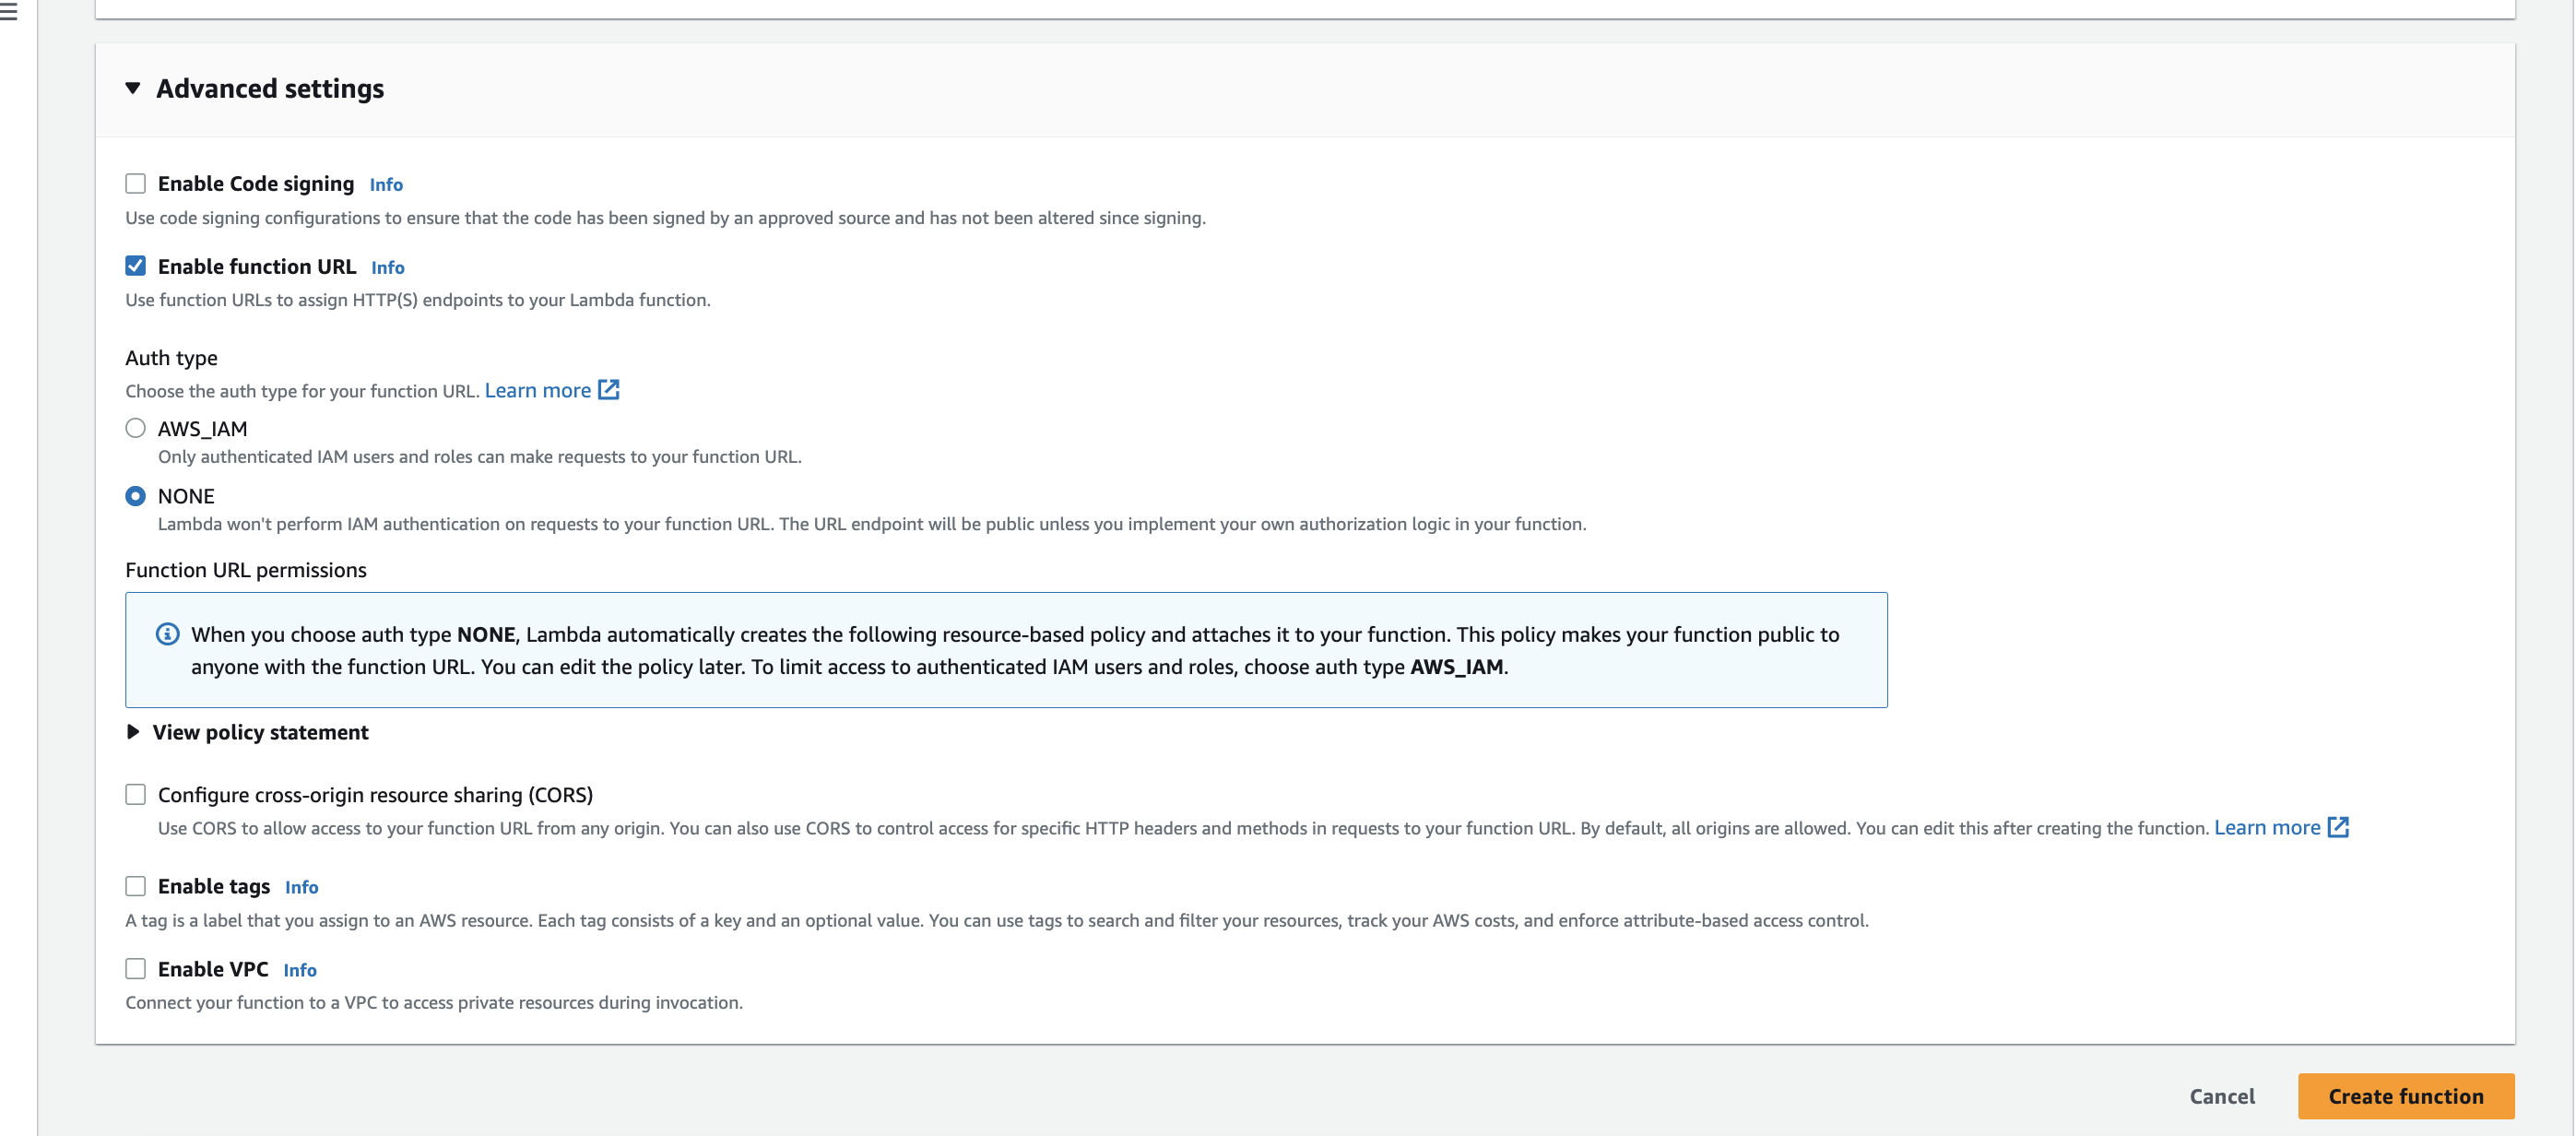
– From the Advanced Settings drop-down menu click “Enable function URL” and set the Auth type to “NONE”. Once all of this is defined we can click “Create Function” (again, for the purposes of the example we are leaving all other settings at their default).
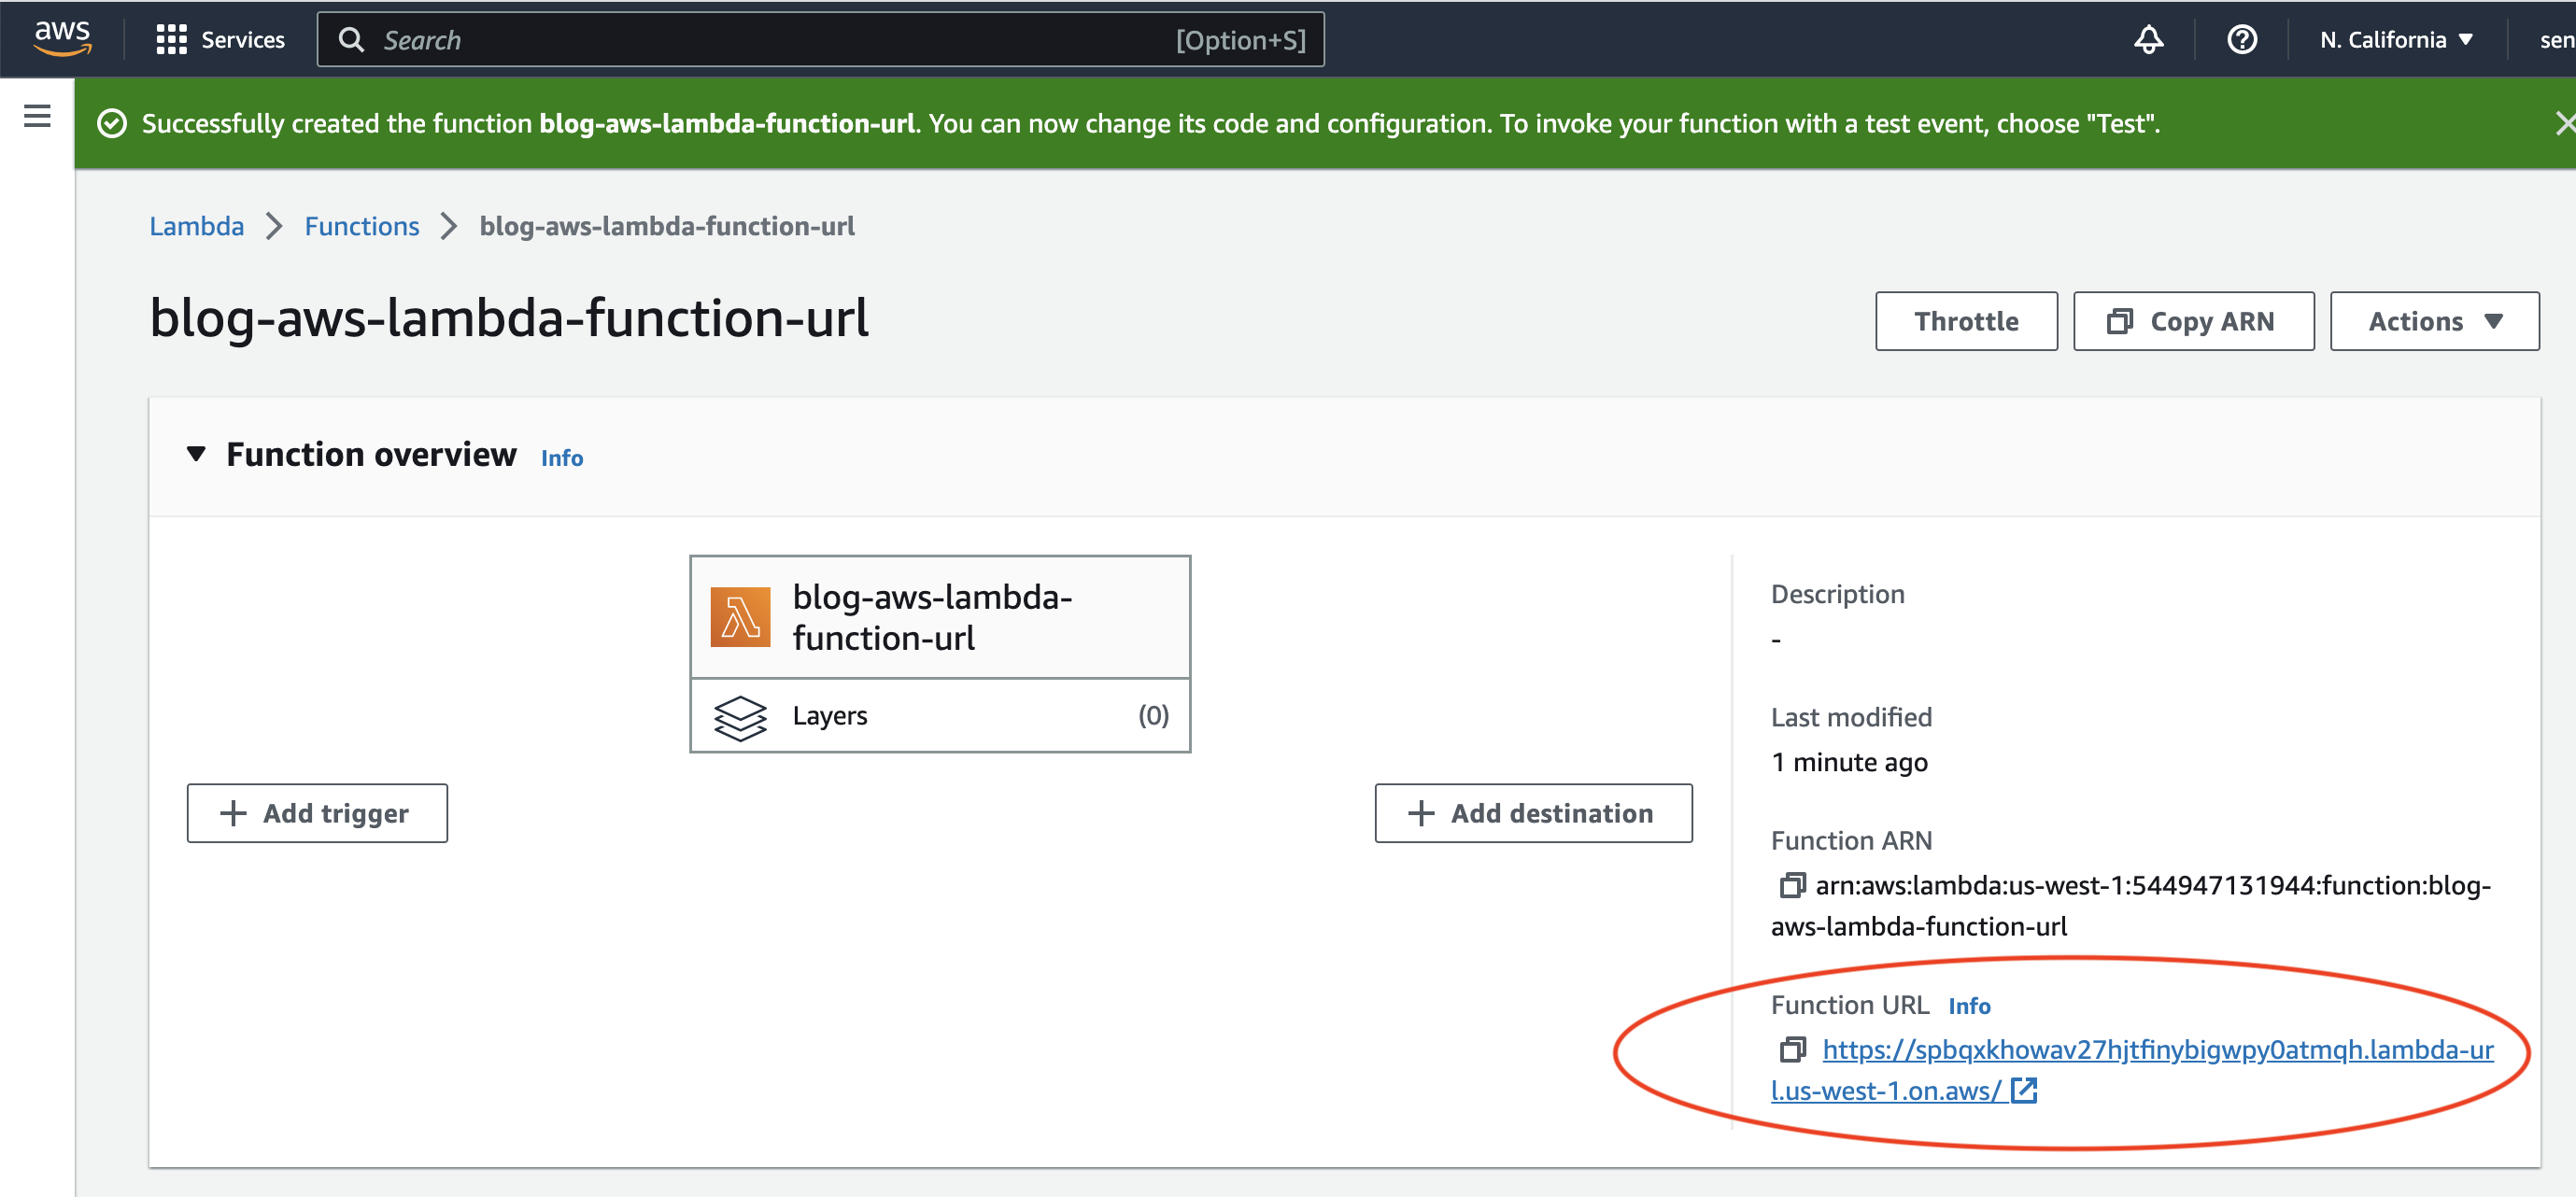
– Now, we can copy and use the “Function URL” to receive webhook events.
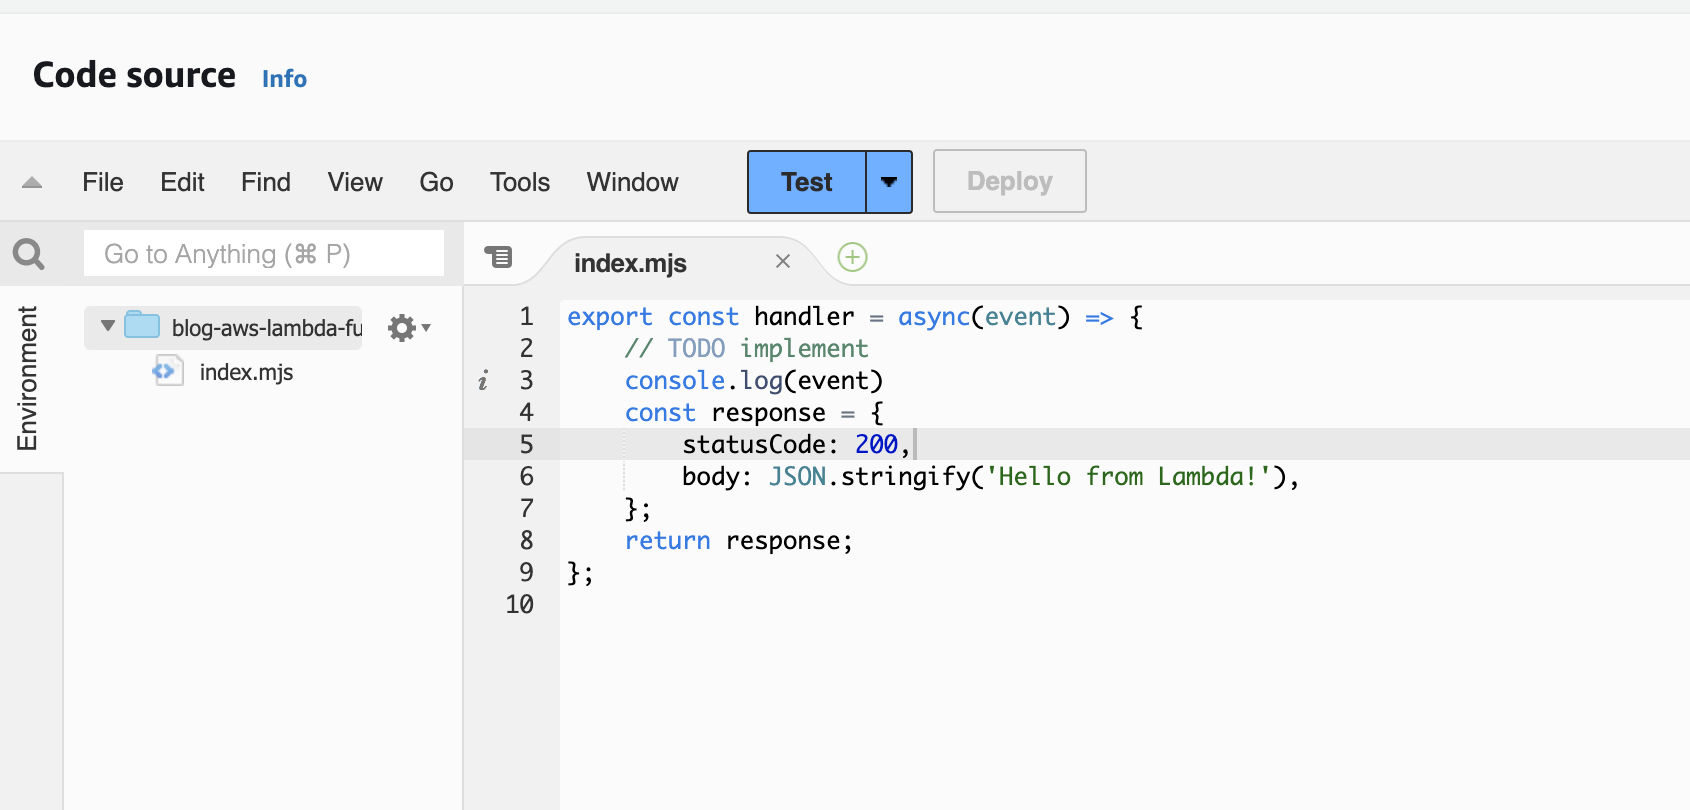
– To test your Lambda Function URL, you can log the event by adding a console.log(event) from the code editor. This enables us to tell if the Lambda function receiving events sent from Dolby.io via webhook.
2 – Set Up Dolby.io to Use the Webhook
After we successfully create a webhook using AWS, we need to set up Dolby.io Real-time Streaming to send the thumbnail images to our endpoint every 30 seconds.
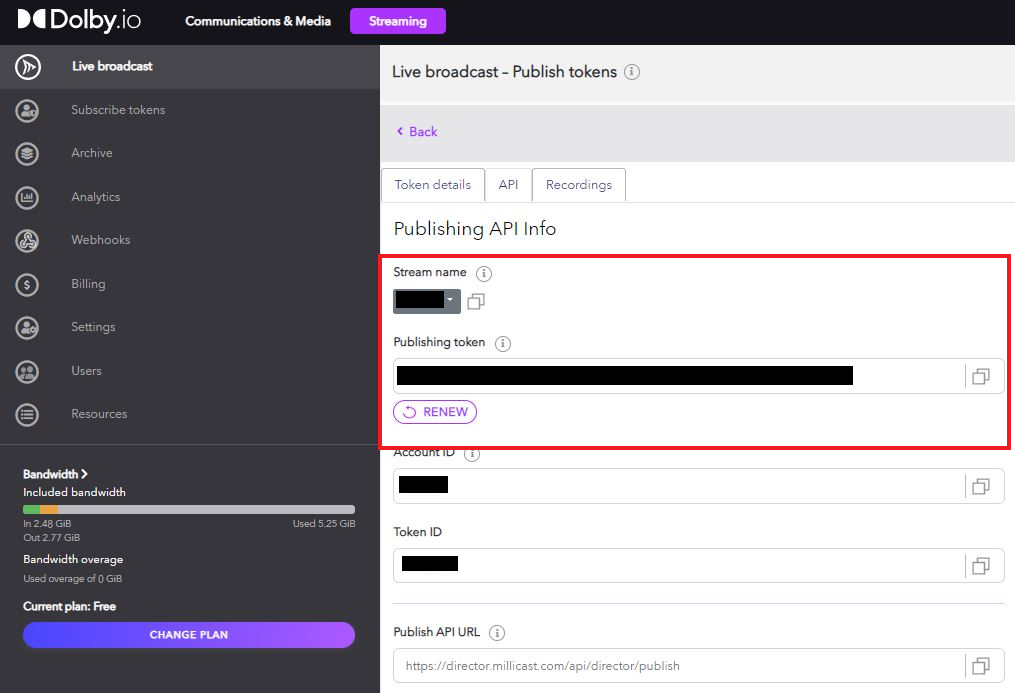
1. Create a publish token either via Dolby.io Streaming Dashboard or using API. Here’s an example cURL command to create a token using the Create Token REST API. The bearer can be found under Settings as the API Secret. You can set any string value for streamName and label fields. In addition, to cURL, you can use the programming languages that are available in the API Playground.
curl --request POST
     --url https://api.millicast.com/api/publish_token
     --header 'accept: application/json'
     --header 'authorization: Bearer {YOUR_API_SECRET}'
     --header 'content-type: application/json'
     --data '
{
  "streams": [
    {
      "isRegex": false,
      "streamName": "test"
    }
  ],
  "subscribeRequiresAuth": false,
  "record": false,
  "multisource": false,
  "enableThumbnails": true,
  "label": "thumbnails"
}
'
Now, you should see the new token you created under your Streaming Dashboard.
2. The next step is adding a webhook to your account either via Dashboard or Streaming REST API Playground. Here’s an example cURL command to add a new webhook using the URL we got from AWS in the previous steps:
curl --request POST
     --url https://api.millicast.com/api/webhooks
     --header 'accept: application/json'
     --header 'authorization: Bearer {YOUR_API_SECRET}'
     --header 'content-type: application/json'
     --data '
{
  "isThumbnailHooks": true,
  "isRecordingHooks": false,
  "isFeedHooks": false,
  "url": "{YOUR_FUNCTION_URL}"
}
'
3. Now head over to Dashboard again to check the webhook you added under the Webhooks menu. Then, go to the Live Broadcast menu and start a Broadcast from the website using the button.
4. When you click the start button in the stream publisher, you’ll get the event details every 30 seconds in your Lambda function. To check if you’re receiving the event, go to AWS Lambda → Functions and find your function name. Then from the related function go to the Monitor menu and and click the “View CloudWatch logs” button to open a new tab with log streams, where you can see the details of the event you’re receiving.
3 – Set Up an S3 Bucket
Now, all we need is to set up an S3 bucket to upload our thumbnail images. First, we need to create an S3 bucket. Then we will set up a policy that allows uploading objects to our S3 bucket and attach that policy to the Lambda function we created. Remember to change the Bucket name accordingly in your index.mjs code under params to match the name you just chose for your own S3 bucket!
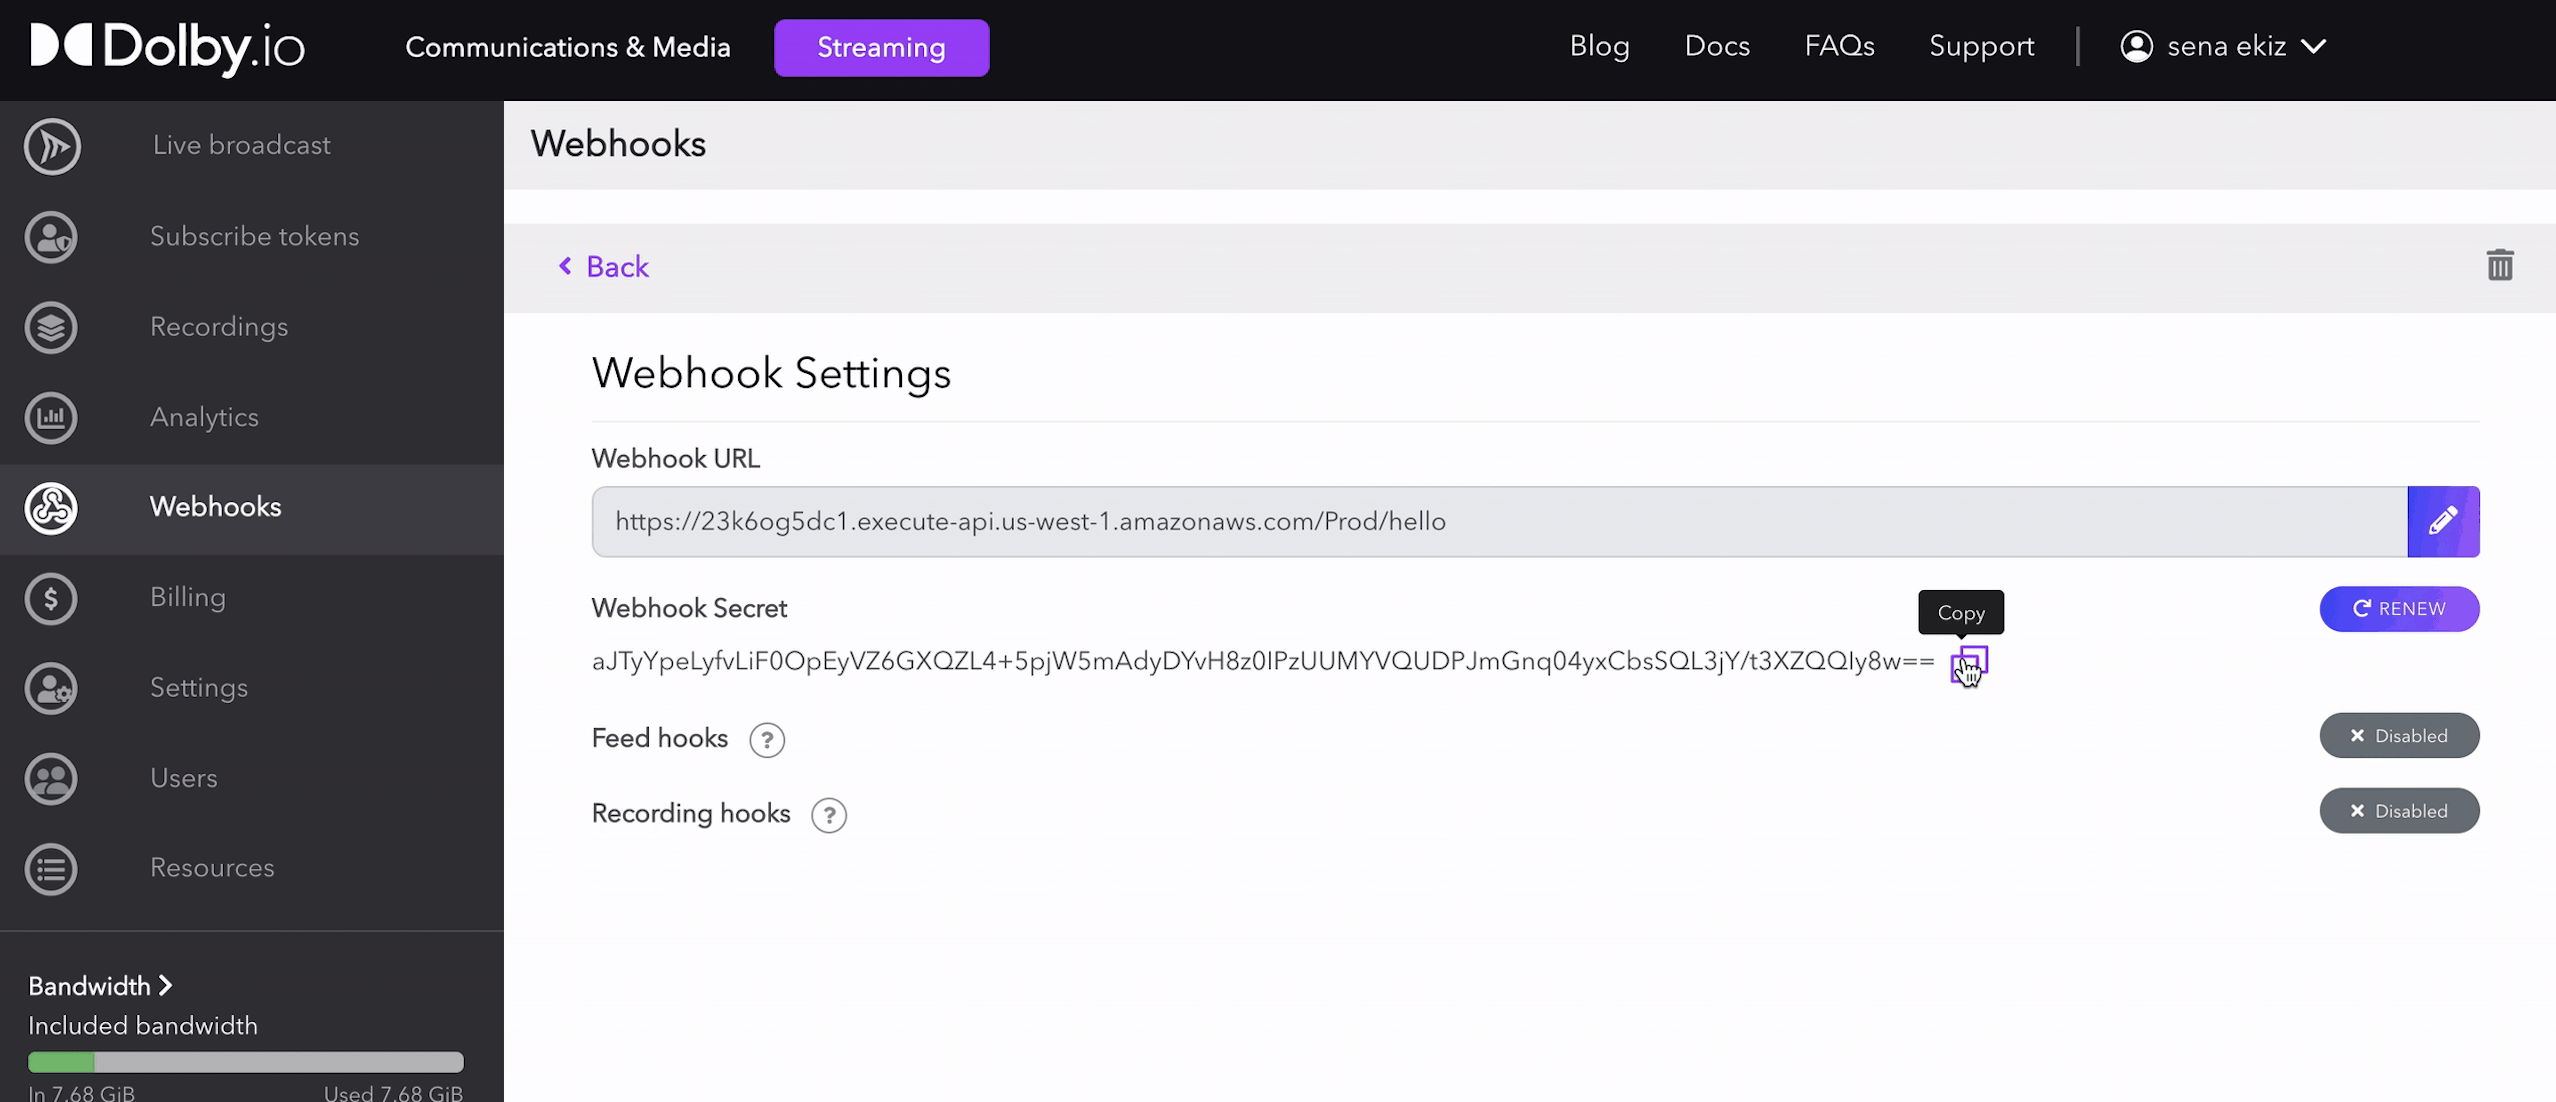
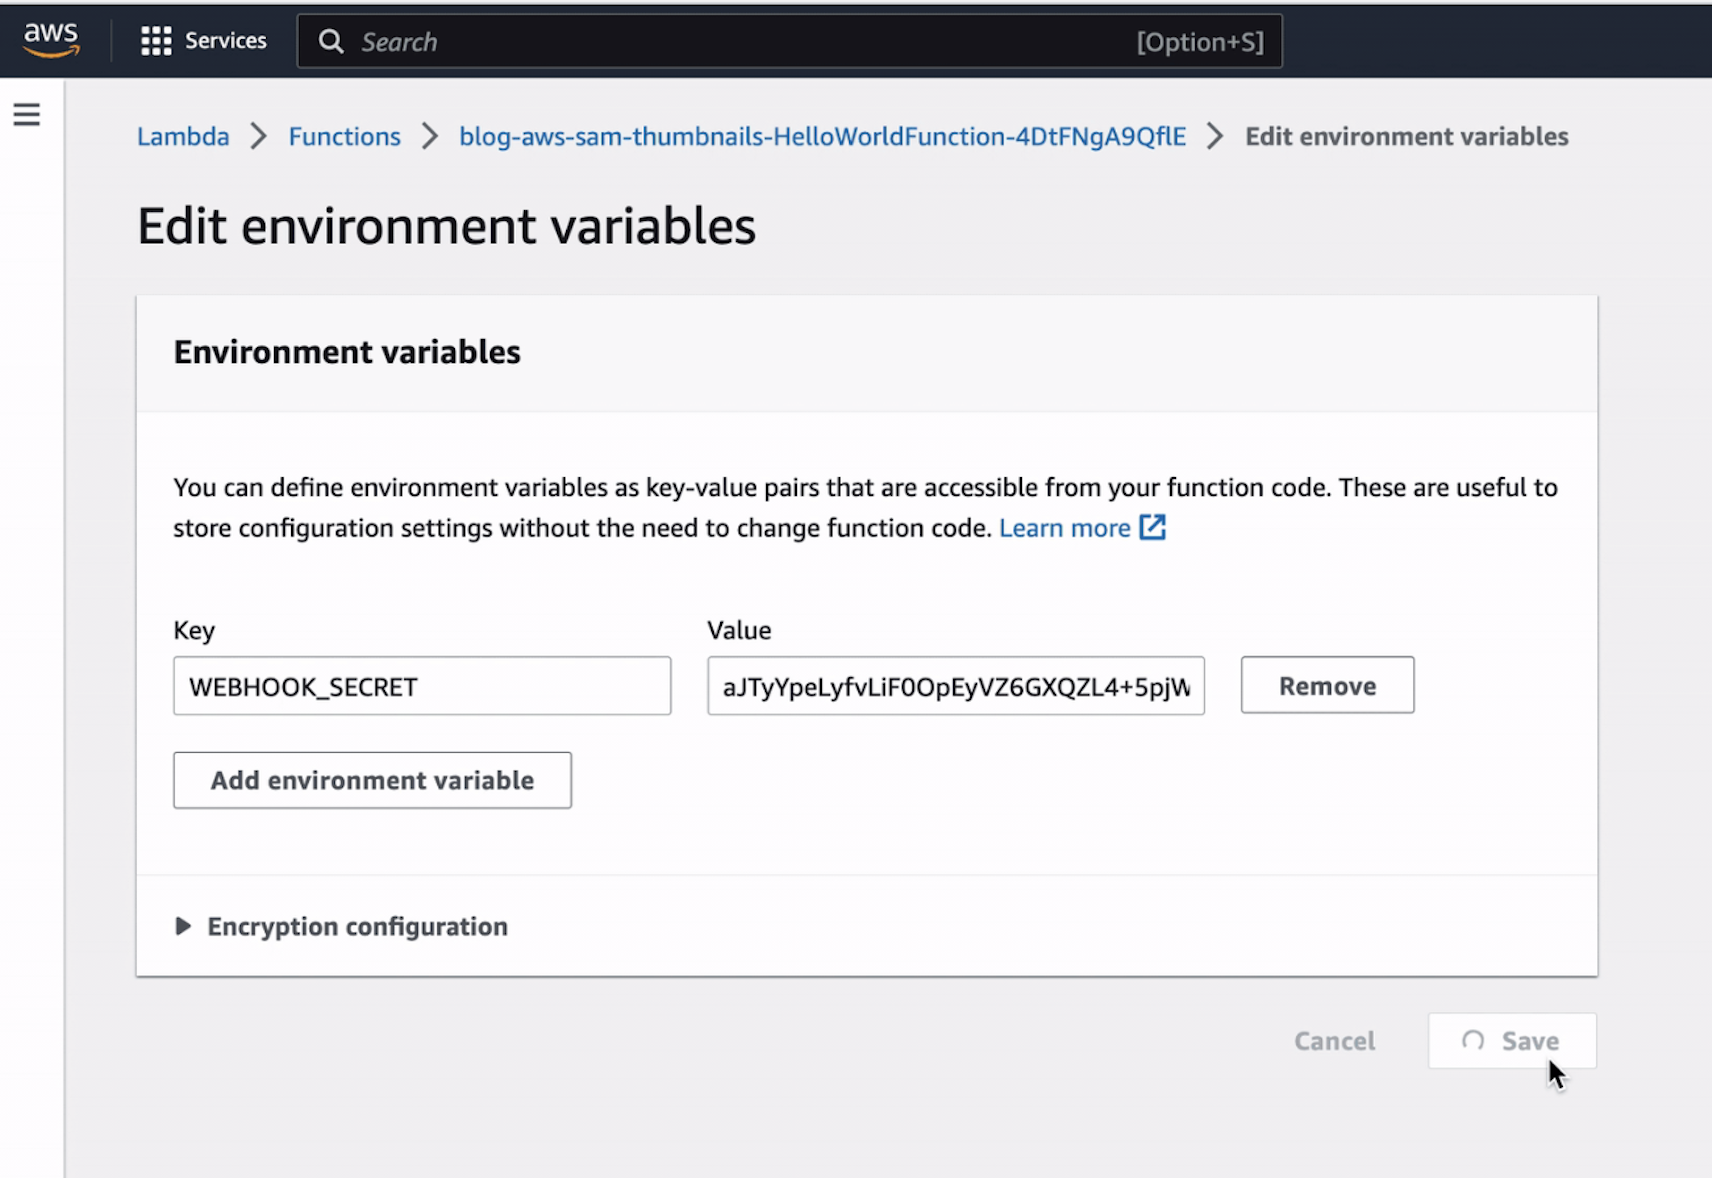
4 – Add the Webhook Secret
We need to add the WEBHOOK_SECRET from your Dolby.io Dashboard Webhook settings to AWS Lambda Configuration Menu → Environment Variables. While you can just directly use the WEBHOOK_SECRET string in your code, it’s a better practice to keep sensitive credentials in environment variables. The Lambda function code will use the WEBHOOK_SECRET to calculate a signature and compare it with the signature received from the event to verify the sent event data is safe.
5 – Implement the Lambda Function
→ You can use the sample code after running npm install locally and create a zip file to upload the project using the same project and S3 bucket name as in the examples. You can also create a new folder and add a index.mjs file with the code below and create a package.json file in your directory changing the name of the project. Don’t forget to update your index.mjs where you specify a bucket name under params if you create a bucket with a name different than blog-thumbnails-bucket.
import Crypto from "crypto";
import AWS from "aws-sdk";

// Get your webhook secret from Streaming dashboard webhook menu and set it as an environment variable in the AWS Console.
const WEBHOOK_SECRET = process.env.WEBHOOK_SECRET;
const AWS_S3_BUCKET_REGION = process.env.AWS_REGION;
const AWS_S3_BUCKET_NAME = process.env.AWS_S3_BUCKET_NAME;

export const handler = async (event) => {
  try {
    const now = new Date();

    // Make sure the content is a jpeg
    if (event["headers"]["content-type"].valueOf() != "image/jpeg".valueOf()) {
      return {
        statusCode: 400,
        body: 'Invalid content!',
      };
    }

    // Compute signature
    const body = Buffer.from(event.body, "base64");
    const webhookSecret = Buffer.from(WEBHOOK_SECRET, "base64");
    const calculatedSignature =  "sha1=" + Crypto.createHmac("sha1", webhookSecret).update(body).digest("hex");
    const headerSignature = event["headers"]["x-millicast-signature"];

    if (calculatedSignature !== headerSignature) {
      console.warn(`Invalid signature - received: ${headerSignature} - calculated: ${calculatedSignature}.`);
      return {
        statusCode: 400,
        body: 'Invalid signature!',
      };
    }

    const thumbTimestamp = Number(event["headers"]["x-millicast-timestamp"]);
    const thumbFeedId = event["headers"]["x-millicast-feed-id"];
    const thumbStreamId = event["headers"]["x-millicast-stream-id"];
    console.log(
      `DeliveredOn: ${now.toISOString()}. ` +
      `GeneratedOn: ${new Date(thumbTimestamp).toISOString()}. ` +
      `FeedId: ${thumbFeedId}. ` +
      `StreamId: ${thumbStreamId}. ` +
      `ThumbnailSize: ${body.length}`
    );

    // Setting up the AWS S3 SDK
    AWS.config.update({ region: AWS_S3_BUCKET_REGION });
    const s3 = new AWS.S3({ apiVersion: '2006-03-01' });

    const params = {
      Bucket: AWS_S3_BUCKET_NAME,
      Key: `${thumbFeedId}_${thumbTimestamp}.jpg`,
      Body: body,
      ContentEncoding: 'base64',
      ContentType: 'image/jpeg',
    };

    // Upload the thumbnail to S3
    const data = await s3.upload(params).promise();
    console.log(`File uploaded successfully -> ${data.Location}`);

    return {
      statusCode: 200,
      body: 'OK',
    };
  } catch (err) {
    console.log(err);

    return {
      statusCode: 500,
      body: 'An error occurred!',
    };
  }
};
→ Don’t forget to change the name of the project in the package.json if you have a different project name and type npm install crypto util aws-sdk to install the packages that our code uses. It’ll create a package-lock.json file and a node_modules folder.
{
    "name": "blog-aws-lambda-function-url",
    "version": "1.0.0",
    "description": "",
    "main": "index.mjs",
    "scripts": {},
    "author": "",
    "license": "MIT",
    "dependencies": {
        "aws-sdk": "^2.1442.0"
    }
}
After setting up an S3 bucket and editing the name of the bucket in your code, and having index.mjs, package.json, package-lock.json, and node_modules in your project go to the root directory and create a zip file of your project folder and upload it to lambda functions code area.
Note: You might be having an issue if you tried to zip the file using Mac’s built-in compression function in Finder. If you’re a Mac user, like me, you should run the following script in terminal when you are in the root directory of your project (folder containing your index.mjs, node_modules, etc. files).
zip -r ../yourfilename.zip * For Windows:
Compress-Archive -LiteralPath node_modules, index.mjs -DestinationPath yourfilename.zip6 – Test Time
→ Finally, you can test your code after you successfully upload it as a zip file. Go back to your Dolby.io dashboard and start a Broadcast. Then, navigate back to your Lambda function’s “CloudWatch logs”. You should be receiving an event log every 30 seconds, and check your S3 bucket and view the logged image objects.
And, that’s it! Now, you know how you can receive and store the thumbnail images of the ongoing stream.
Summary
In this blog, we explored how to use webhooks to access the generated thumbnail by leveraging AWS Lambda functions to process the webhook payload and store the images in an S3 bucket. This process makes it easier to implement and maintain the solution while minimizing bandwidth usage, resulting in a better user experience for both the viewers and the creators.
Go check out the sample code repository that includes three different folders about how to receive and store generated thumbnail images from the ongoing stream. For future projects using Dolby.io Real Time Streaming, take a look at the Getting Started and Webhooks documentation.


")