


Immersion.
Well, social immersion.
For some time now, virtual worlds have been a part of the conversation of brand-new fields. It started with the buzz of VR in 2015, and recently it has been expanded with mixed reality reviving the conversation. However, it is a field that has yet to be fully explored, and Dolby.io recently announced its contribution to the space with new plugins: the ability to broadcast real-time streaming (RTS) and spatial audio powered by Dolby Atmos technology. Both of these are available now in Unity and Unreal Engine, but we will focus on the streaming plugin within Unity for today’s walkthrough.
In this breakdown, we will be able to stream a live video attached to a GameObject and also stream out your perspective as a character in the world.
*Note: Dolby.io didn’t create the assets used in this example, they come from the Unity Asset Store, and full credit goes to these amazing artists.
I. Installing The Plugin
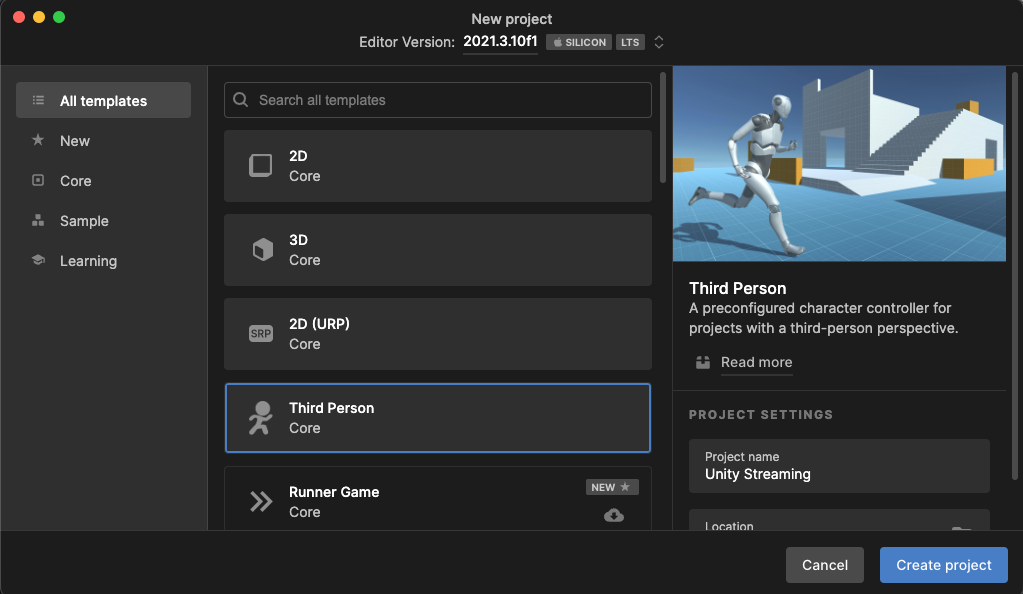
For version one of the RTS plugin, the Editor’s version should be 2019.4, 2020.3, or 2021.3, and it works with all development platforms. Once the version has been selected, we will go ahead and create a new project and select the ‘Third Person’ option. This will give you a preconfigured character with a third-person perspective.
*Note: For this example, I created a third-person world instead of using the Unity template. This selection will not affect how our plugins work.
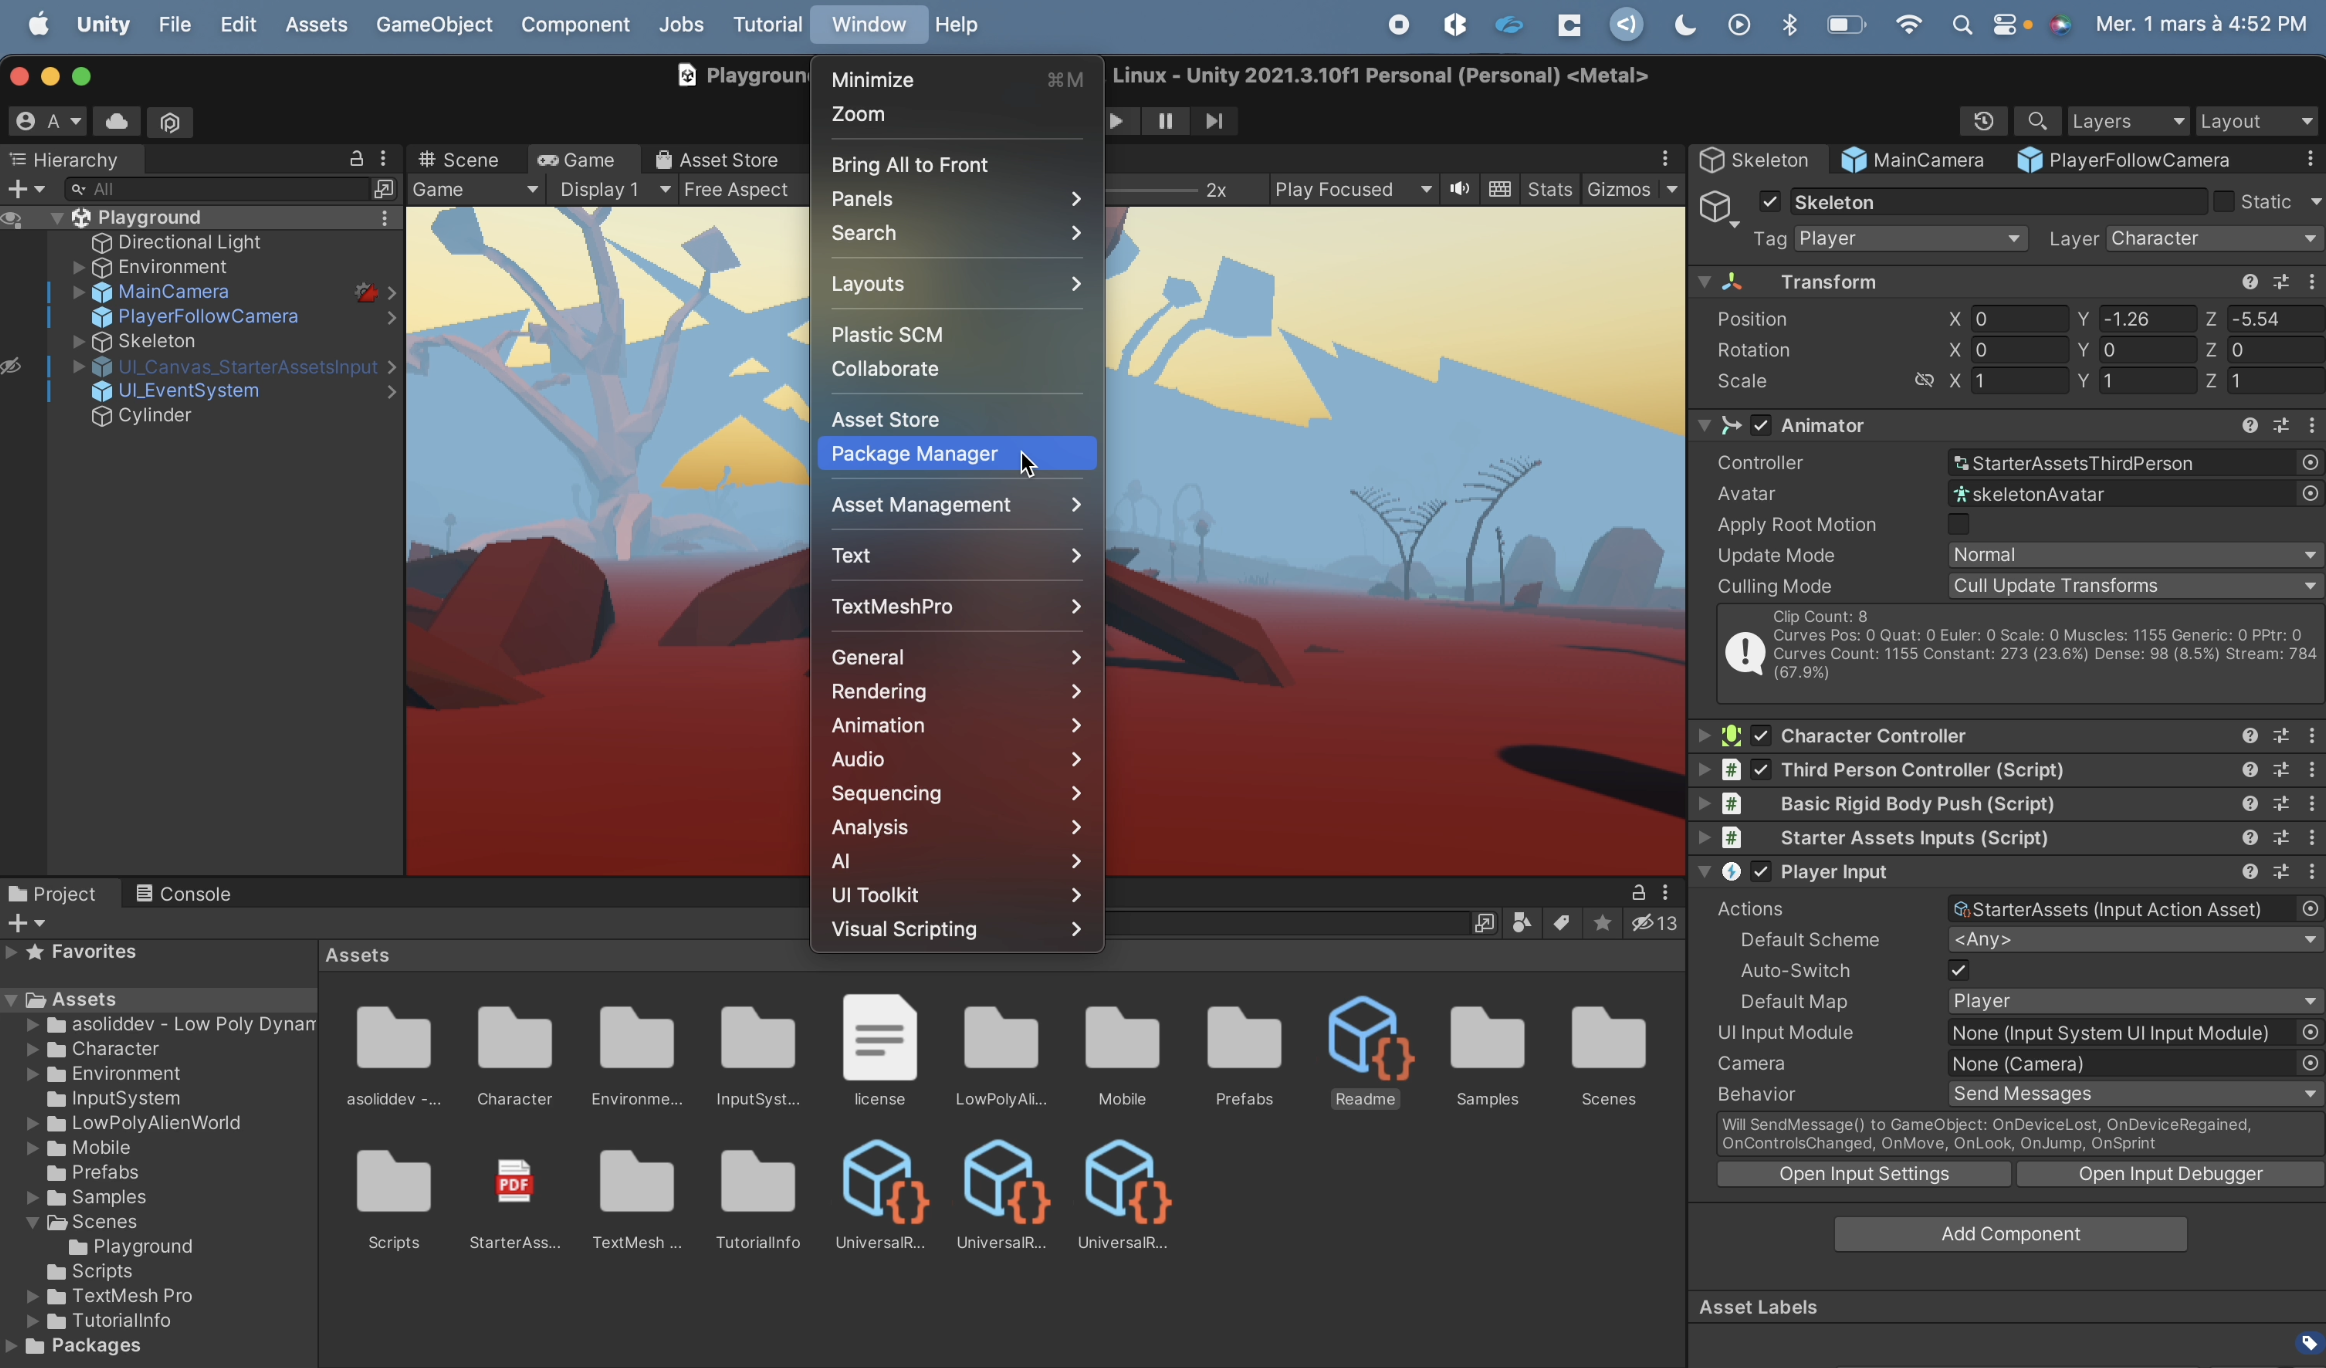
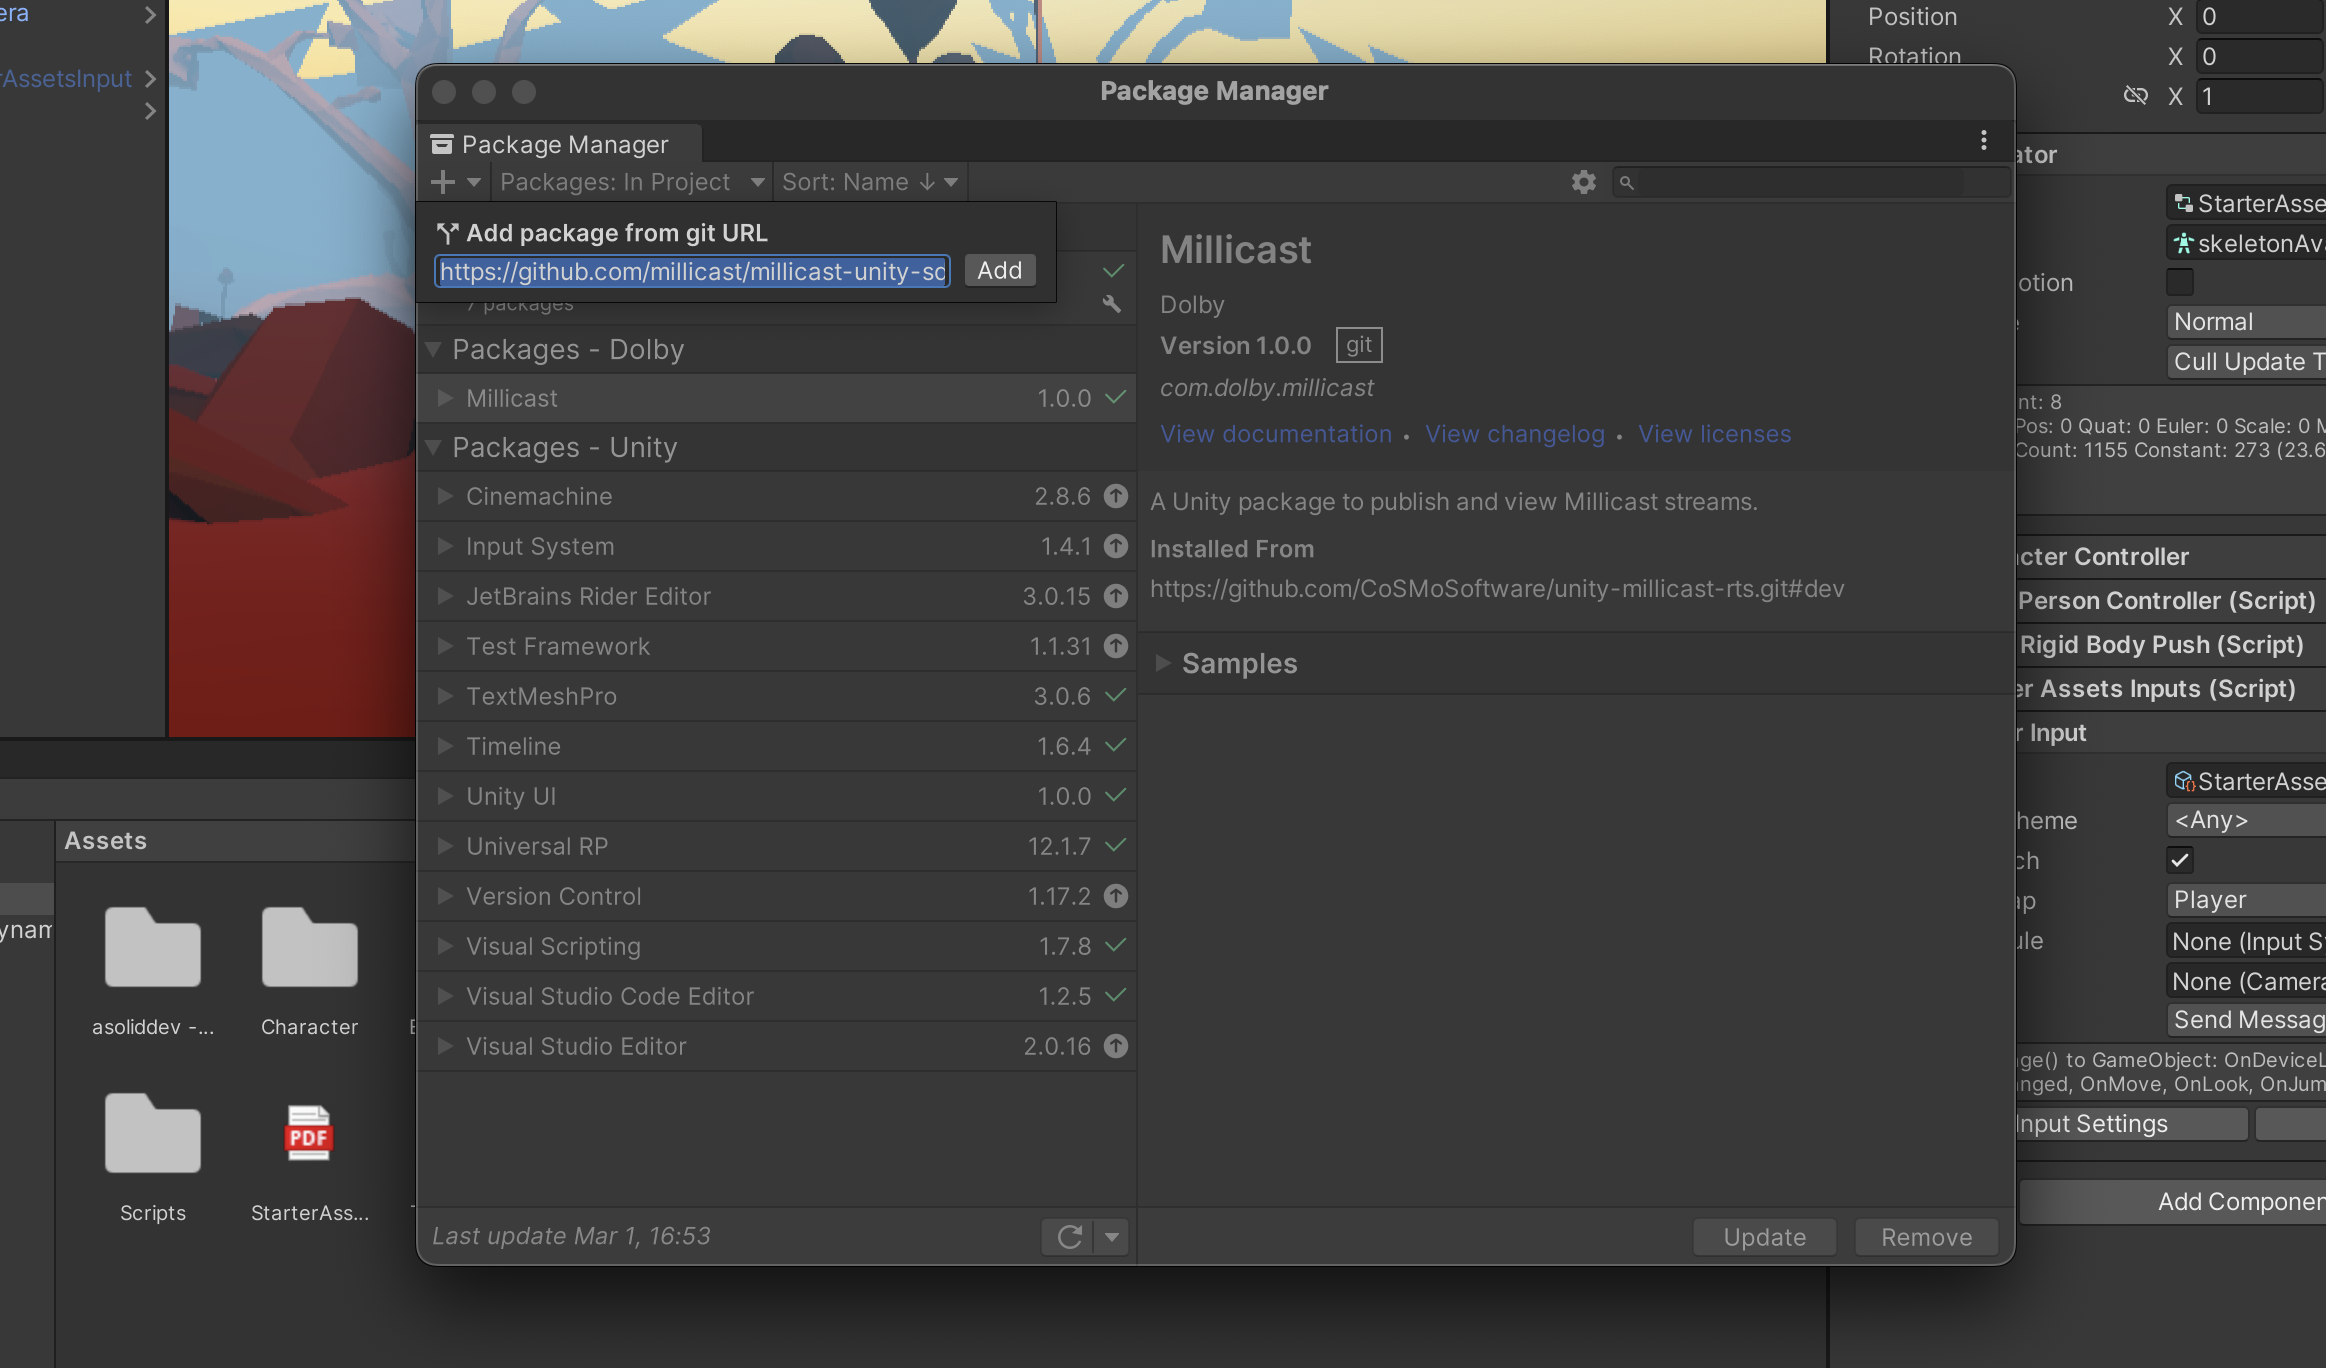
Now that we are inside the editor, we are going to look at the top menu and select Window, and from the dropdown, select Package Manager. On the top left corner, there is a “+” sign showing another dropdown. Click on Add package from git URL… from this list. Insert the following into the space:
https://github.com/millicast/millicast-unity-sdk.git and install the package. It will read out as Millicast in the Package Manager as Dolby acquired it, and it is what powers Dolby.io‘s Real Time Streaming Solution. And that should be it; the plugin has been installed! If any complication is faced during this step, visit the getting started guide on our documentation.
II. Establishing Credentials and Video Resolution
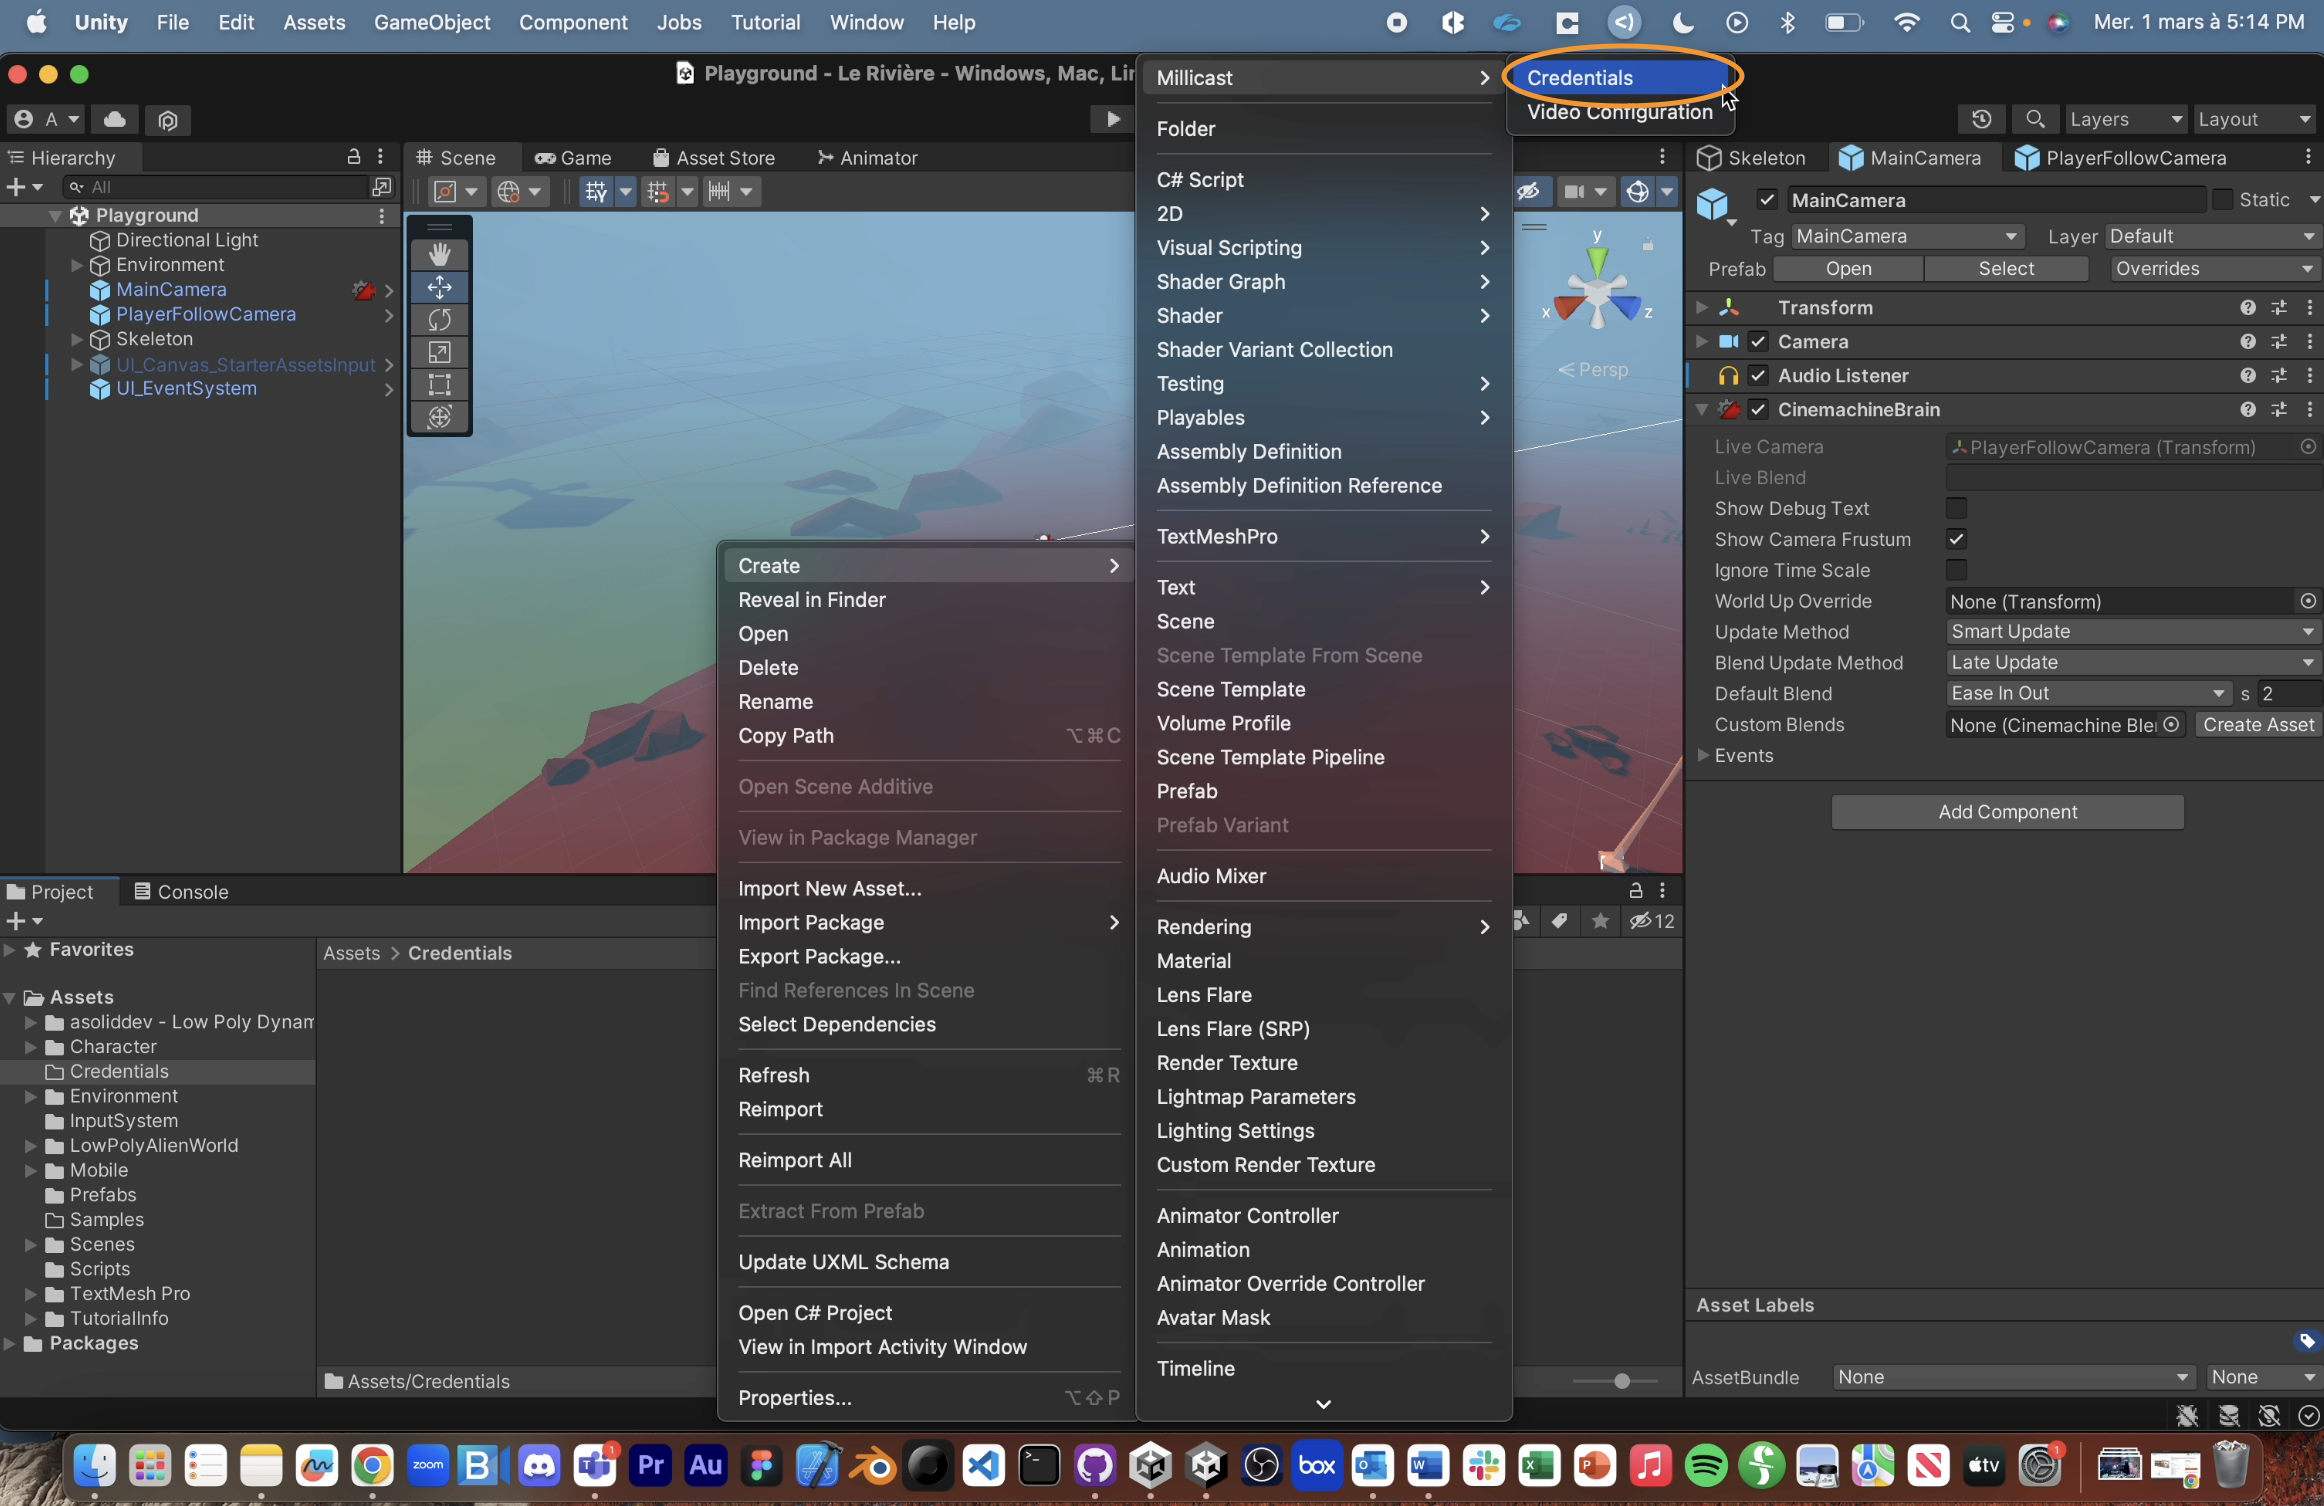
Before starting with the stream, we will need to do one more thing. On Assets, create a new folder and title it “Credentials”. Once inside, right-click and navigate to Create>Millicast>Credentials. This will allow us to set up credentials once and attribute them to the plugin’s components without having to rewrite them every time.
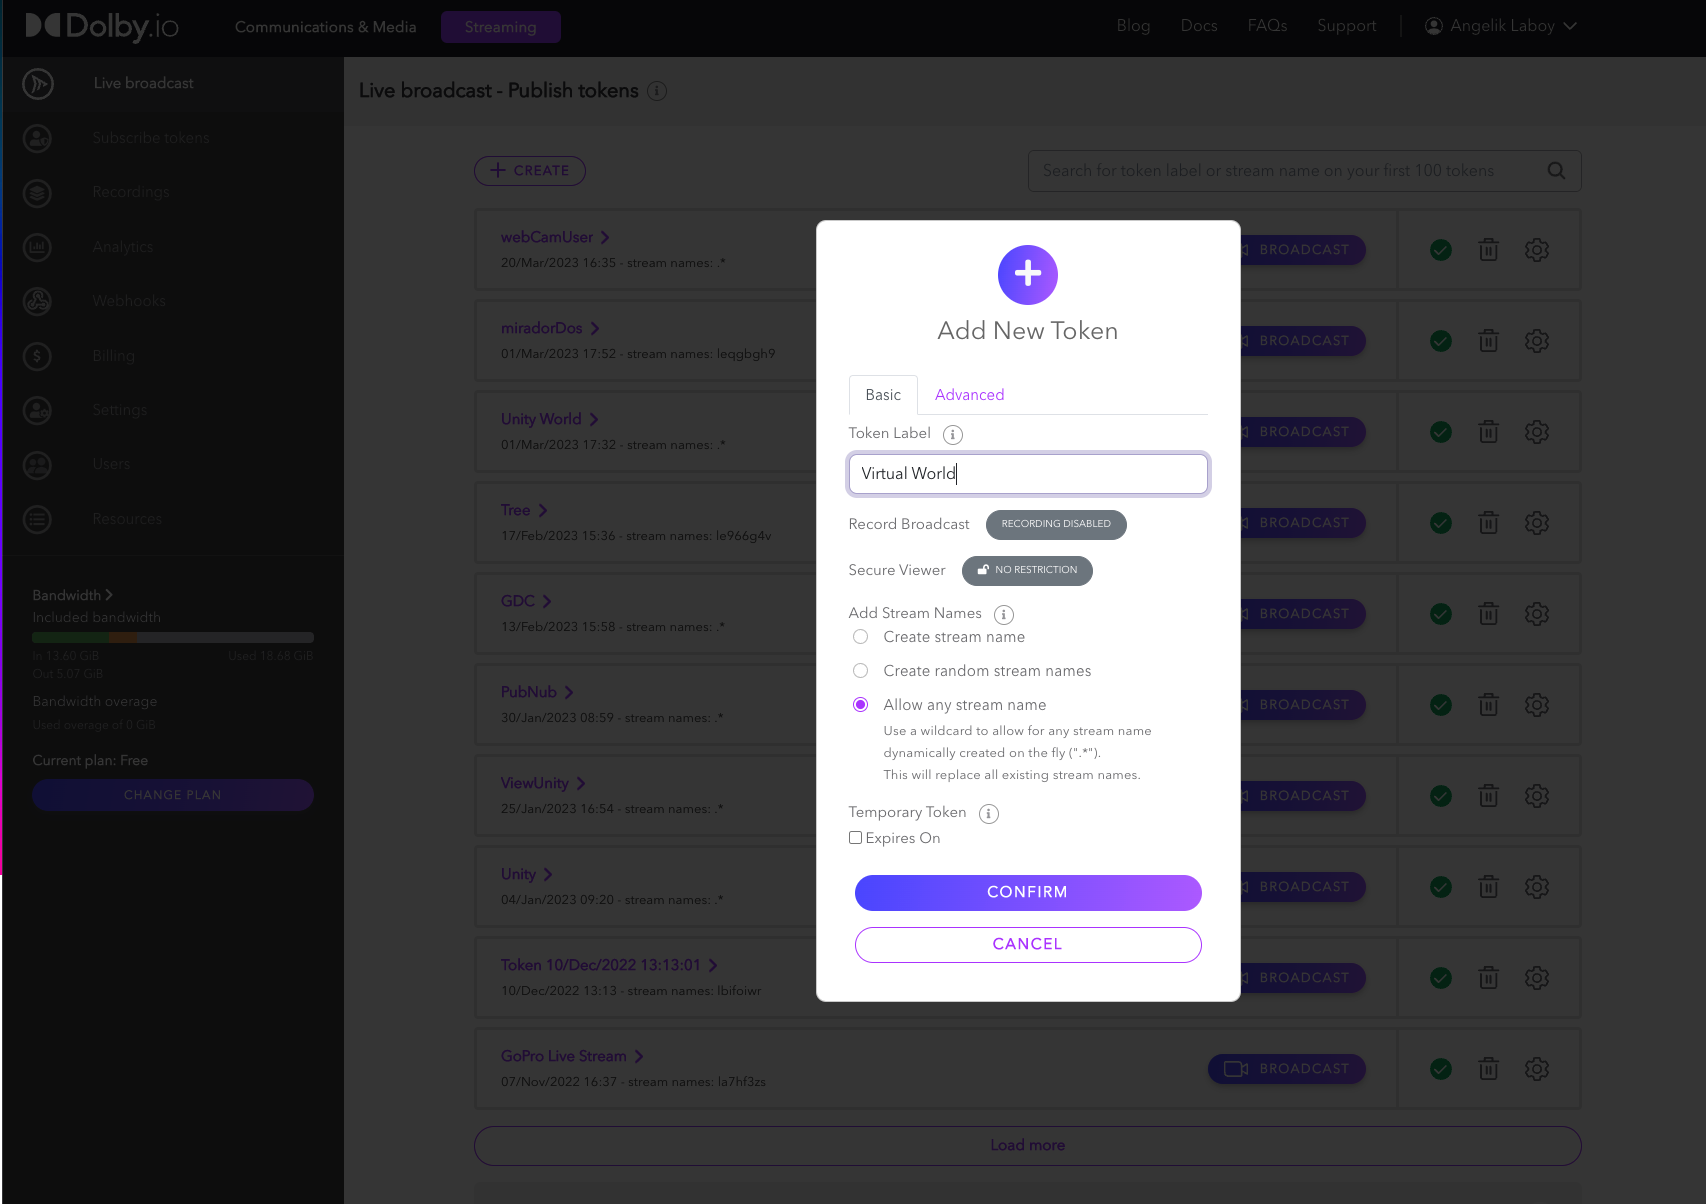
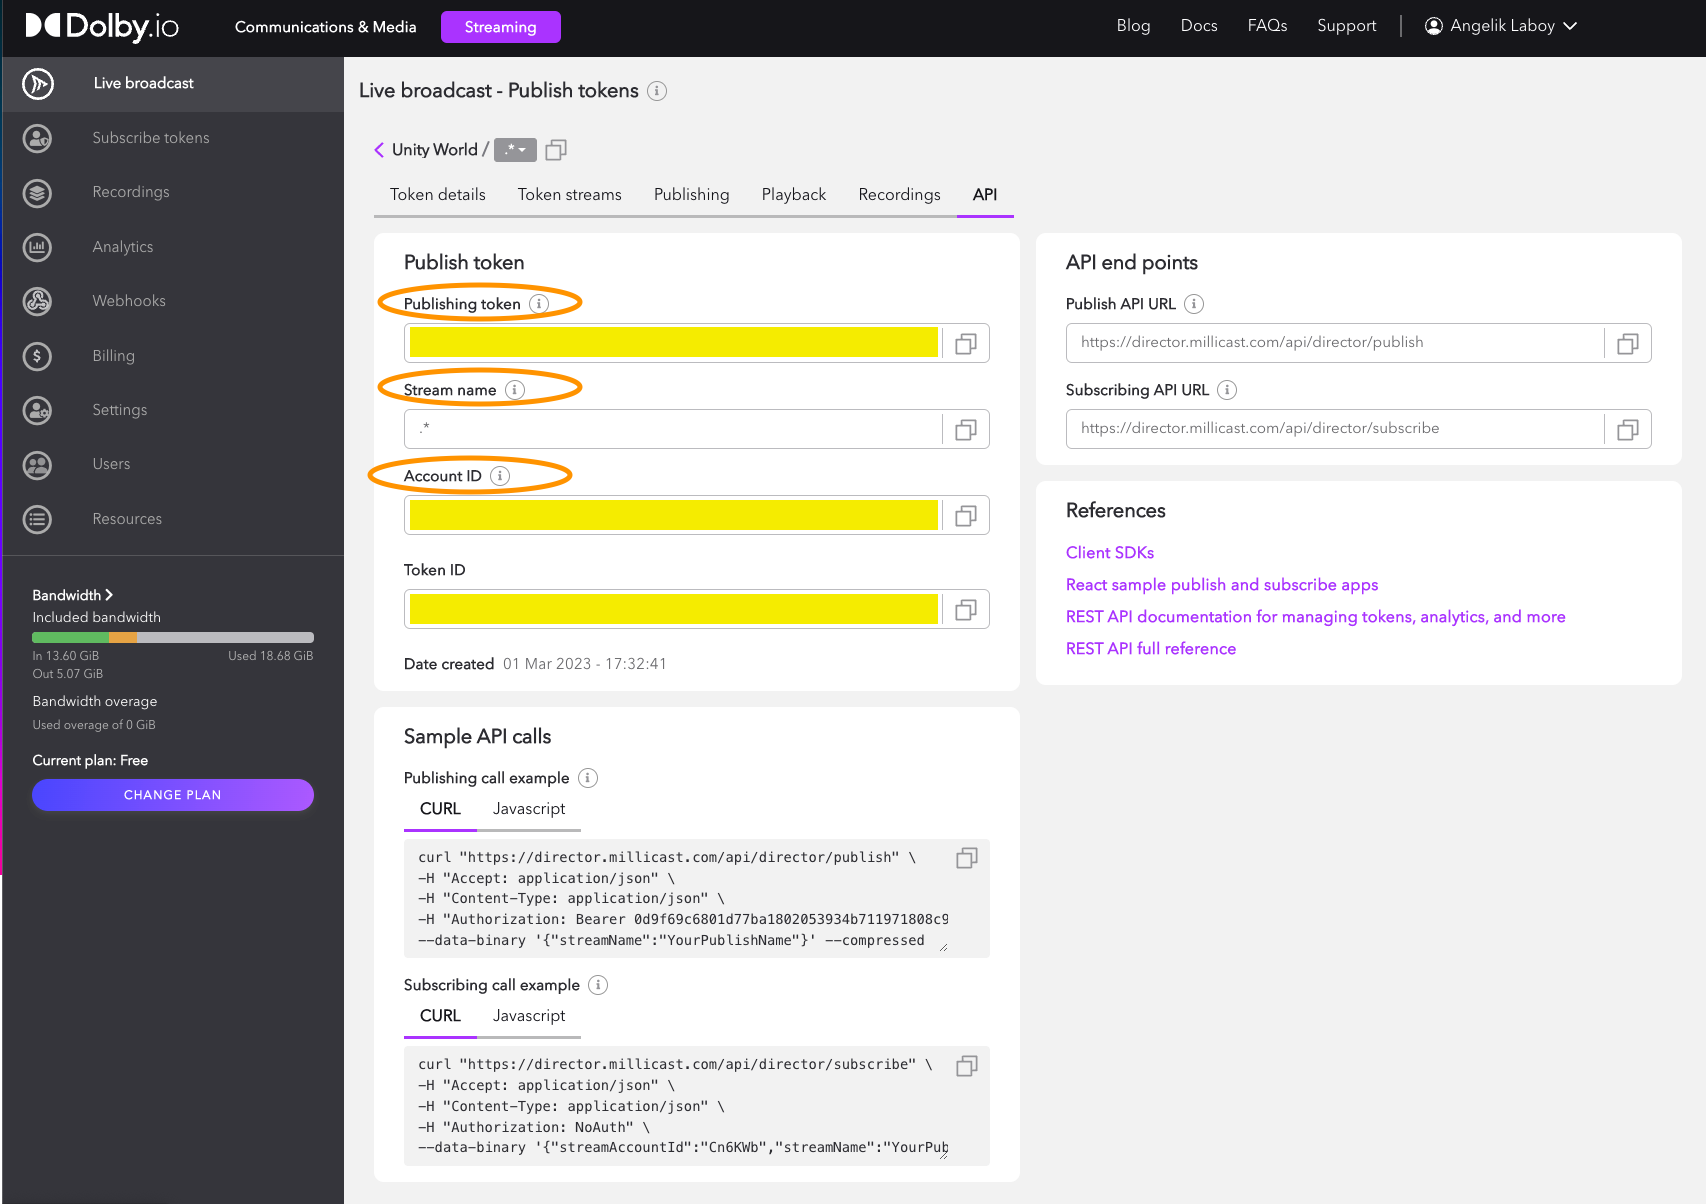
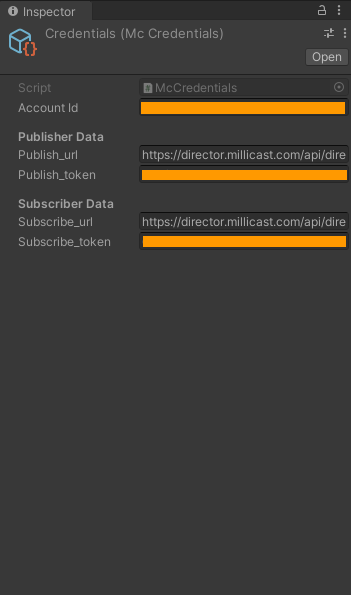
Next, we must go to our Dolby.io Streaming portal. If you are new, Dolby.io offers 50GBs of streaming bandwhich every month for free from the moment you sign up. Once inside, make a new stream token, and preferably make a wild-card token. A wild-card token (.*) allows for the use of any arbitrary stream name in the publishing path; simply check off the circle stating Allow any stream name. With the token made, navigate inside settings and view the API tab to collect your Account ID and Publishing Token. The next step is not required; however, it is good practice if you want to create a secure stream. Go to the settings on the subscriber token and copy/paste the token on the last remaining field of your Credentials. Consult our docs if you would like more information about creating a subscriber token and the different customization possible.
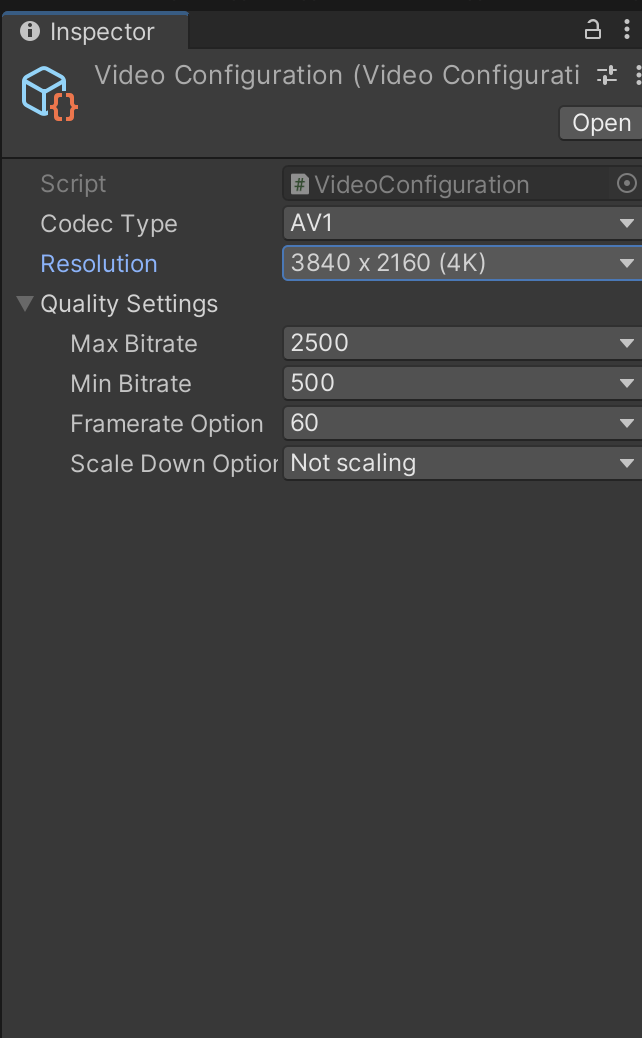
Lastly, in the same way Credentials was created, an asset called Video Configuration would have you control the codec, resolution, framerate, and many more. Handpick the quality of your choosing!
III. Publisher: How You Can Stream Out
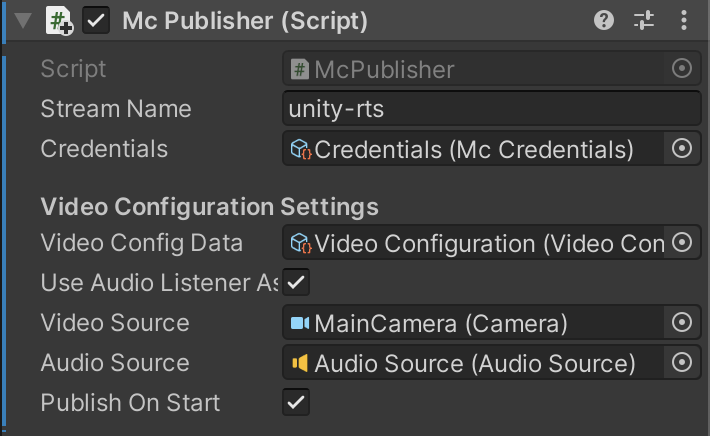
Now we can get started! In your playground, a Main Camera should be designated, which we will open its inspector and click Add Component. Next, search Mc Publisher; this is a component from Dolby.io that will allow for the game to be streamed out. The first information we need to give is a Stream Name. Since the stream token was created as a wild card, any name can go there. However, if the stream token was created to have a specific name, go back the streaming dashboard to collect the token’s API information, where you will see the Stream Name (e.g., “leqgbgh9”).
On the Credentials space, drag and drop the asset containing all of this information (previously named Credentials), and the same will be done in the space asking for the Video Config Data. You will notice that it asks to use the audio listener of the camera. Selecting this option will have the audio transmitted be from the camera’s perspective. With the third person example, the camera is capturing the perspective of our protagonist, making us only able to hear what they are hearing.

Following this, it asks for the Video Source and Audio Source, which will work when placing the MainCamera and AudioSource. The last thing that needs to be checked is the box that says Publish on Start meaning the game will start streaming whenever it starts being played.
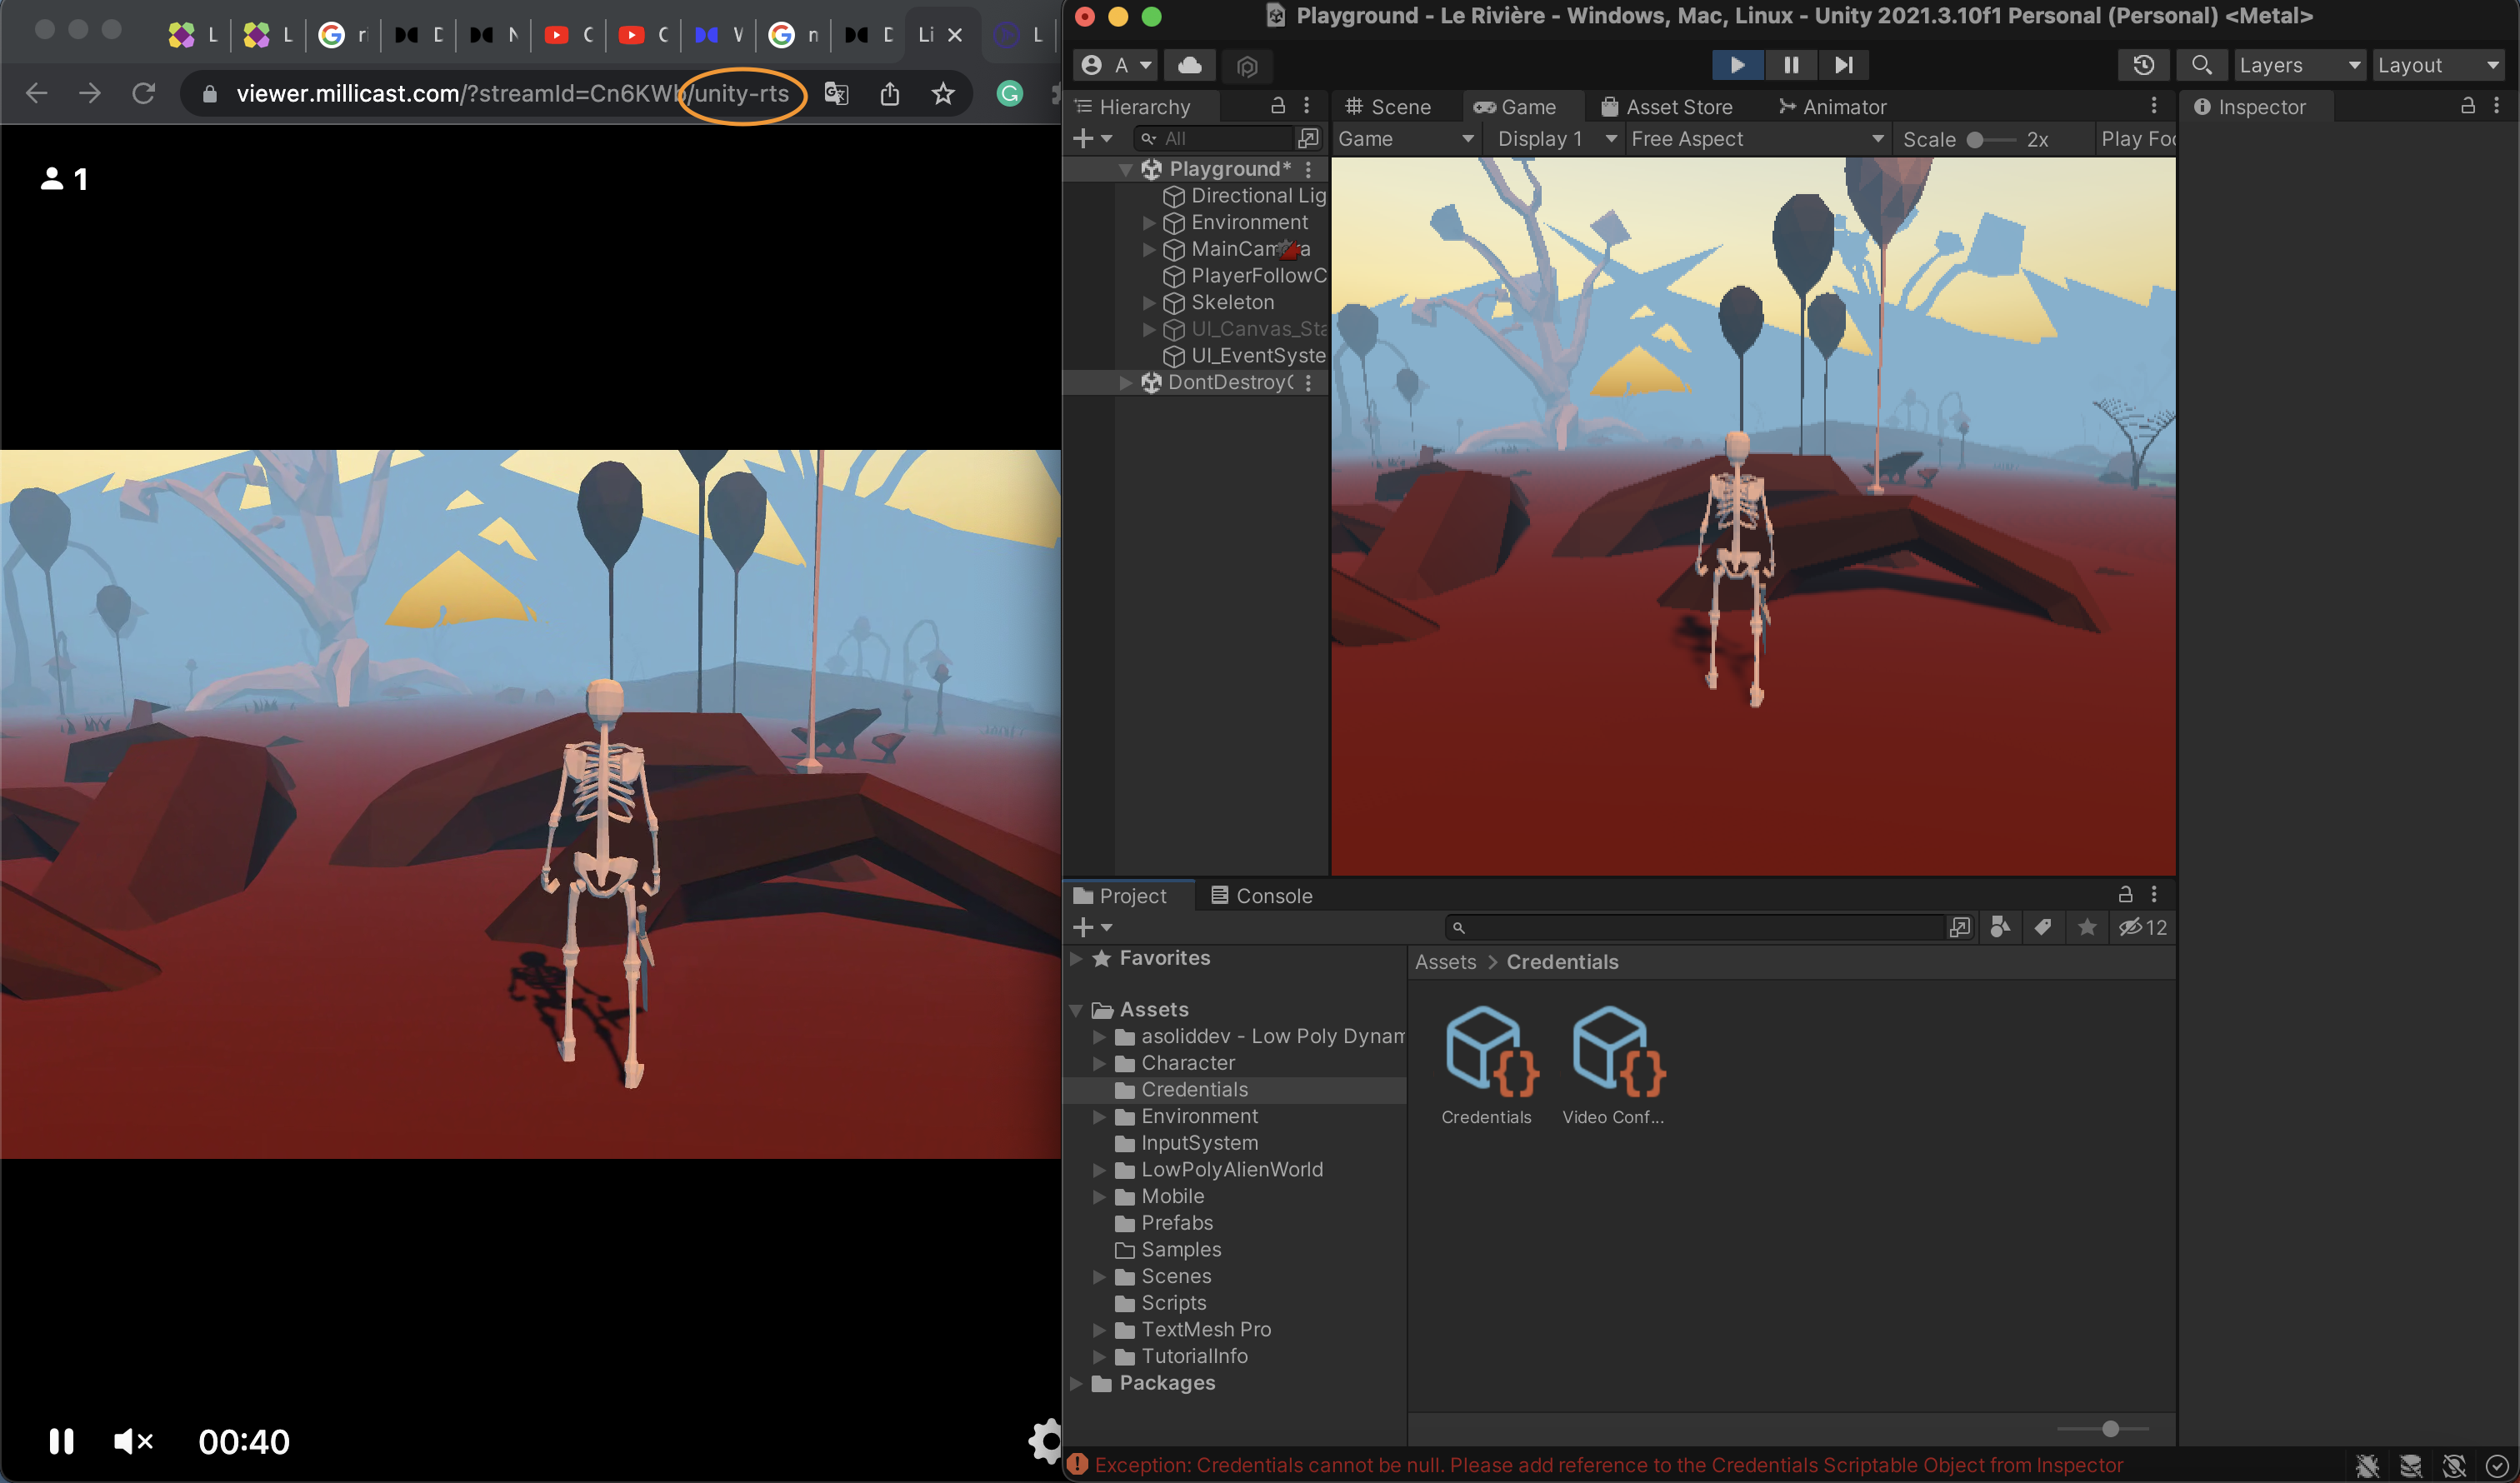
With the Mc Publisher finished, let us verify our work. On the engine’s centered buttons, press Start to commence the experience. Congrats, your game has started streaming! But where is it being streamed out to?
Let’s pay back a visit to the token’s API information. On the Playback tab, the hosted player path URL will be present. This URL is the link needed to view the livestream going on. In the URL, you will be asked to write in YourPublishName, which is the stream name of your token. If you decided to add the secure viewer, it would also ask for your subscribe token information.
https://viewer.millicast.com?streamId=accountID/McPublisherStreamName&token=SUBSCRIBE_TOKEN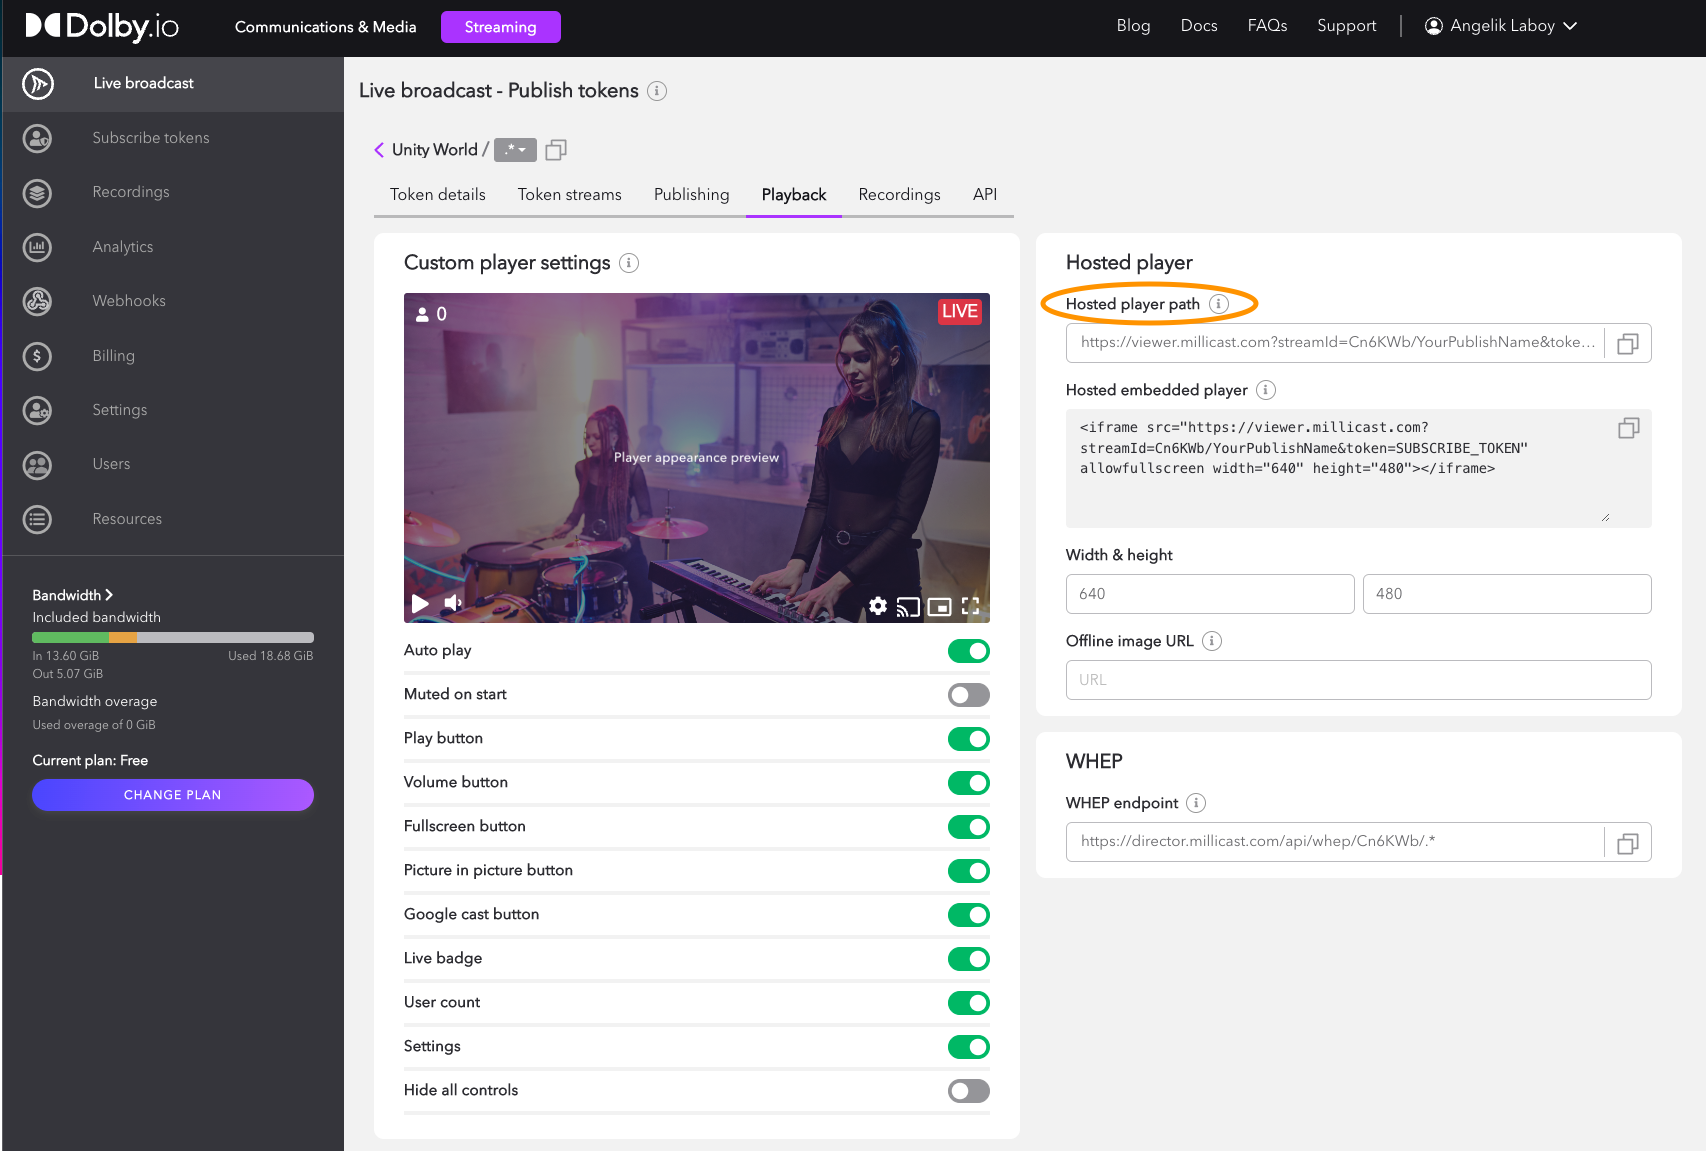
Voilà, your streaming is up and running!
IV. Subscribe: Stream Inside the World
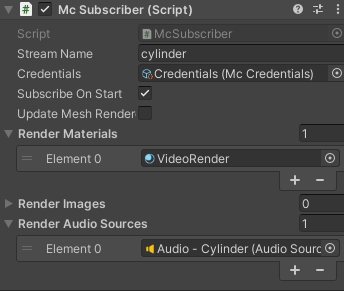
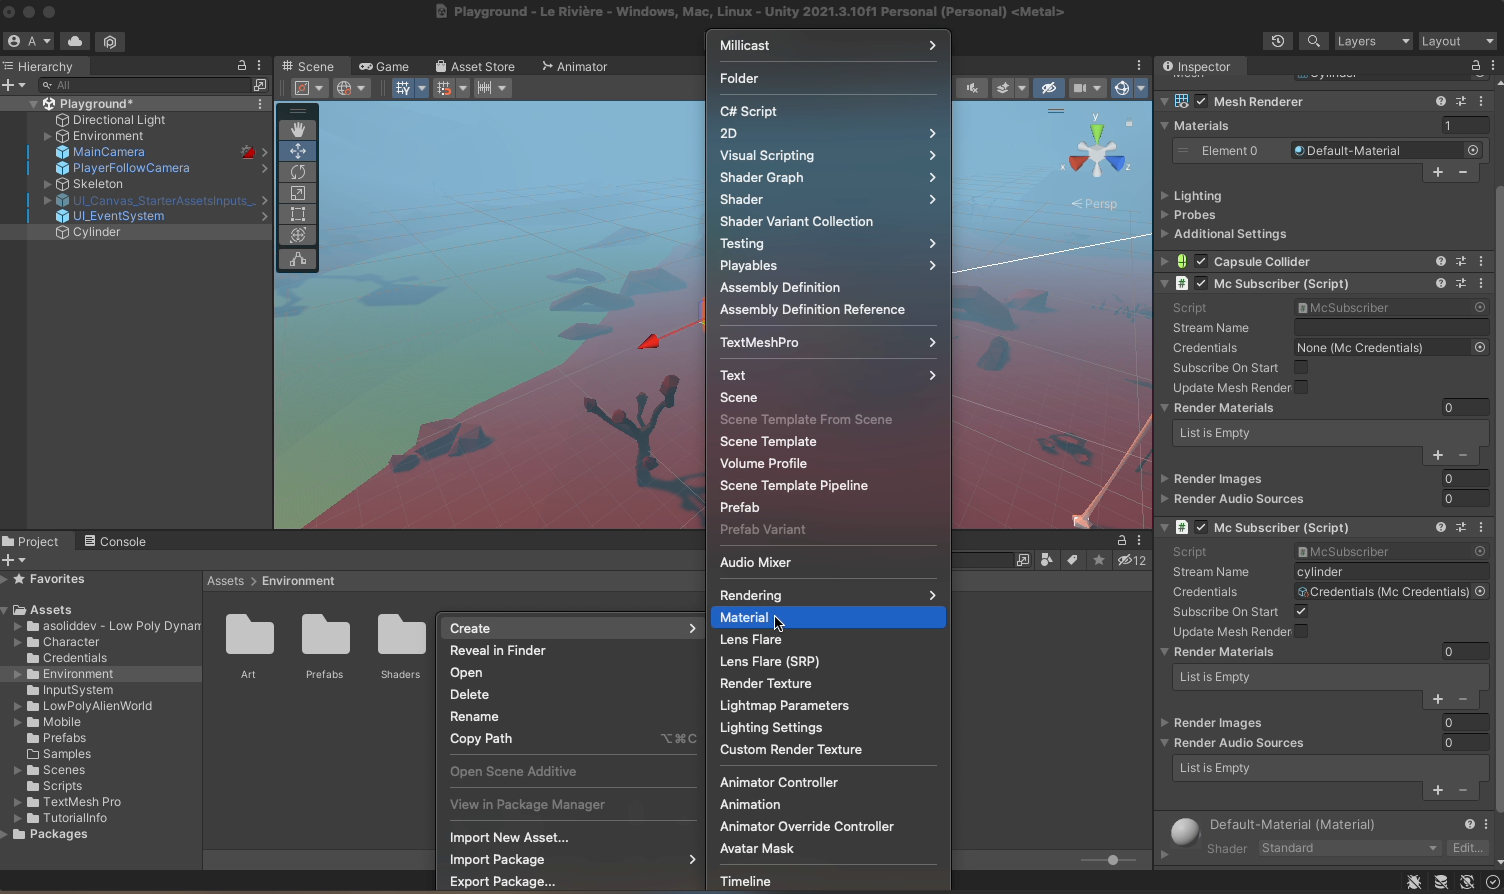
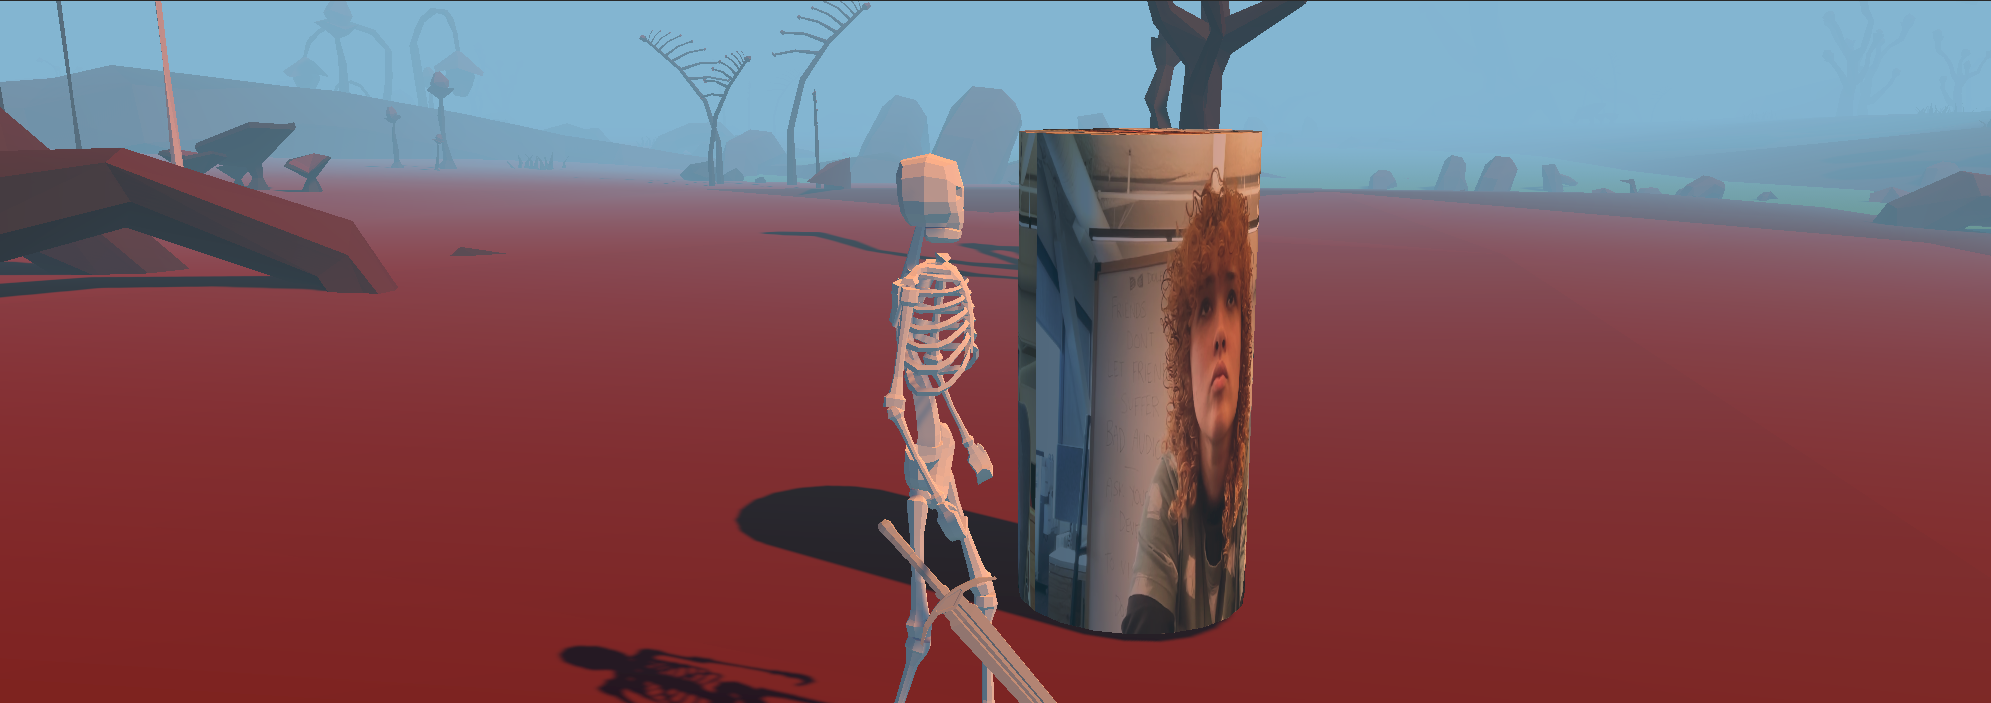
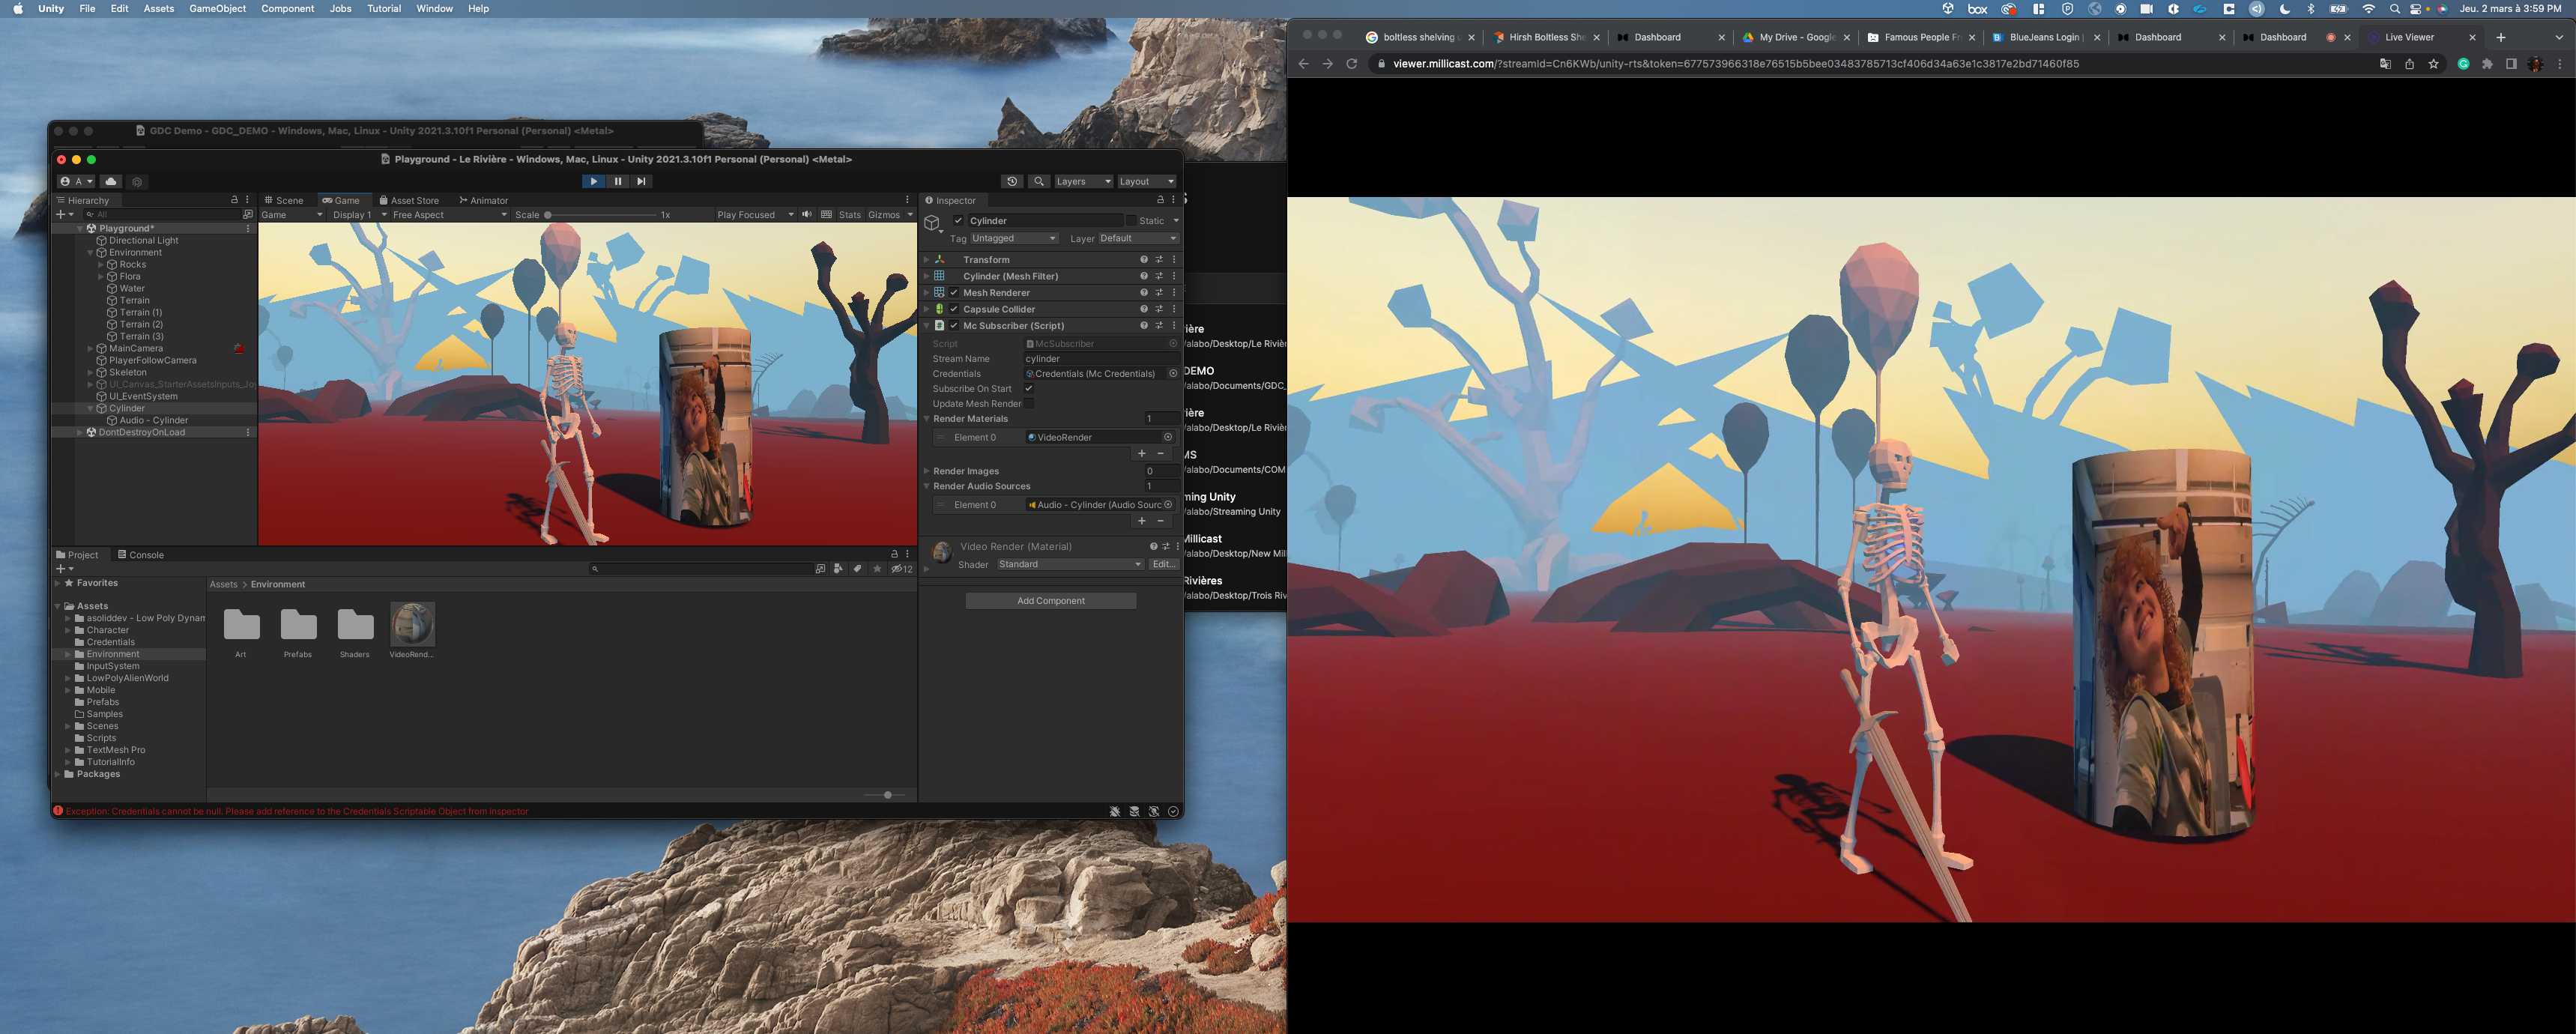
Yet, this is not the only thing that the plugin can do! The other component available is the Mc Subscriber. Wouldn’t it be cool to stream a live video INTO the game experience? Let’s start by creating a new 3D object by right-clicking on the playground. It can be any of your choosing, but for this example, I am selecting a cylinder. Place the object in your preferred location inside your playground. Subsequently, in the cylinder’s inspector, add a new component and type in Mc Subscriber. Next, add a new Stream Name, drag/drop the Credentials in the space provided, and check the Subscribe On Start box.
*Note: Make sure the stream name is NOT THE SAME as the one written in the Mc Publisher (if it is a wild card token).
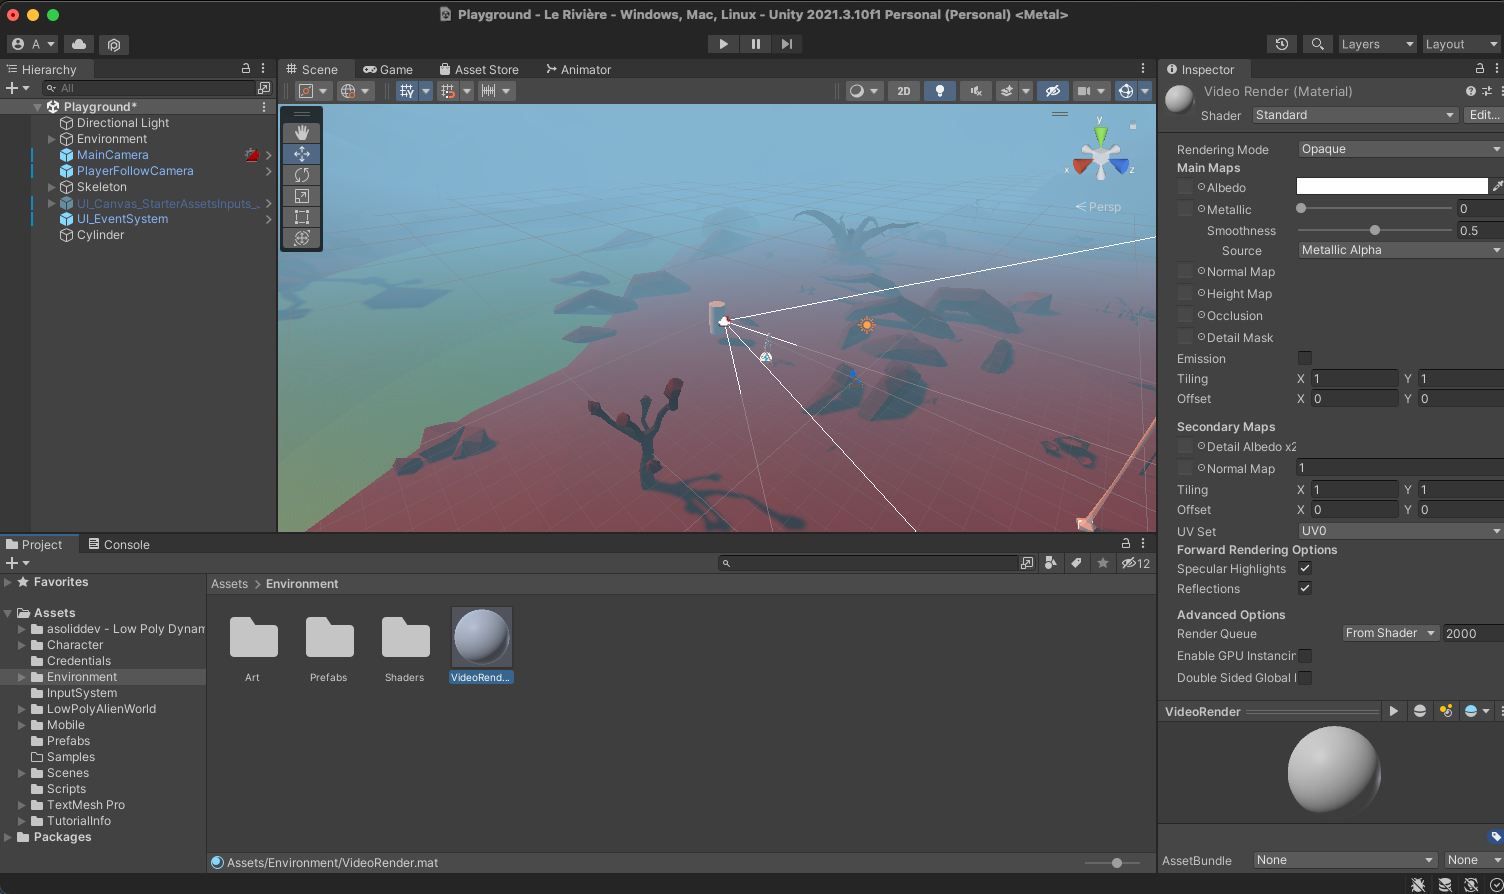
At this point, we need to create a material to attach to the cylinder. Right-click on the selected folder you want this material saved and Create>Material which you will name videoRender. Drag/drop the videoRender on top of the cylinder shape to have the material be assigned.
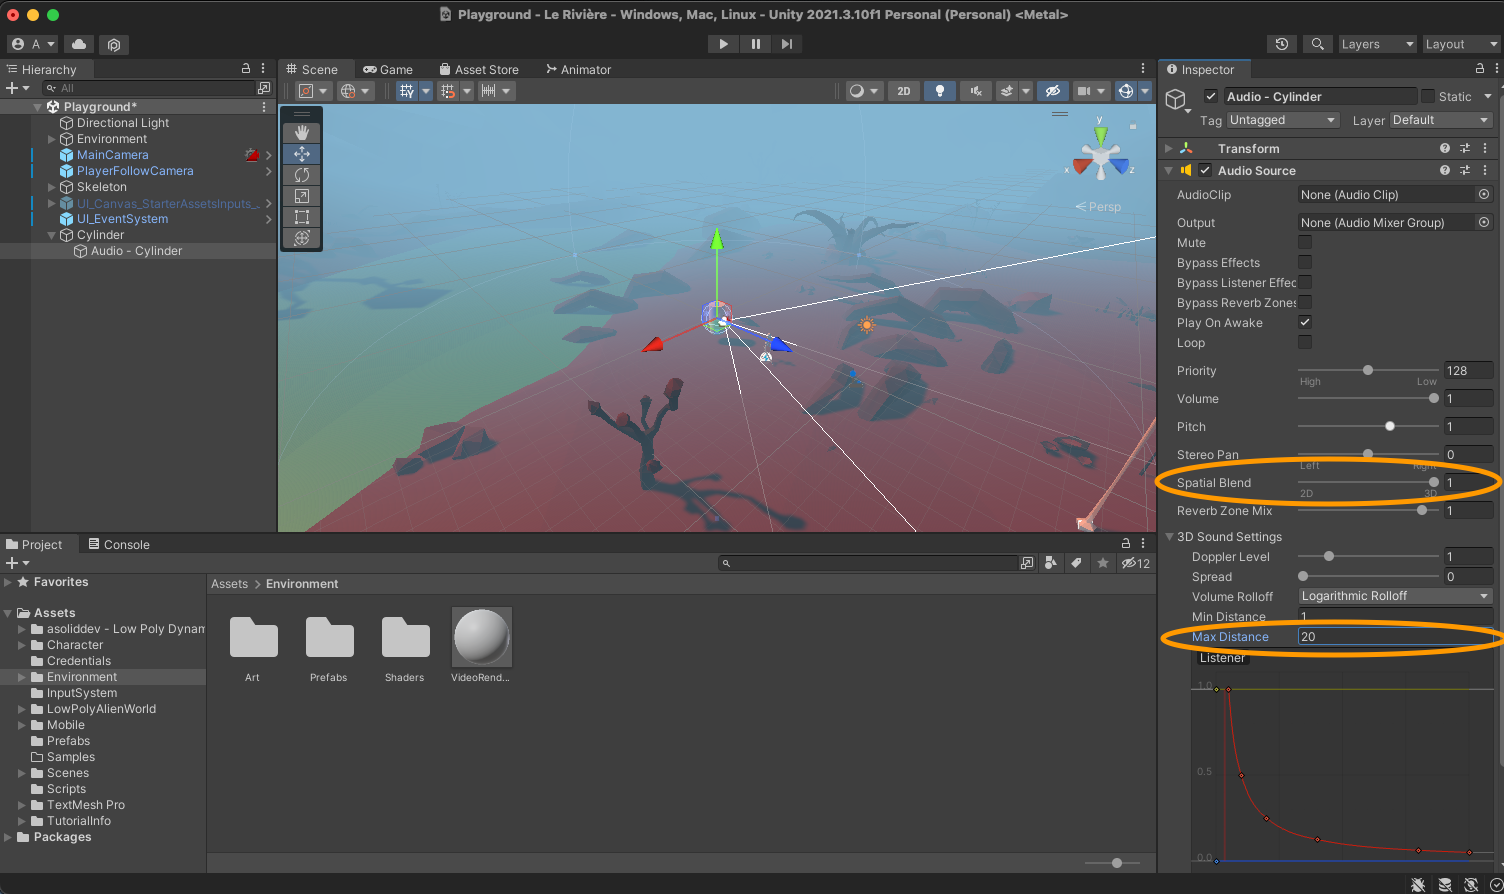
Then, clicking on the cylinder again and going to the Mc Subscriber, there will be a dropdown in Render Materials. Press the “+” button to add Element 0 and drag/drop the videoRender material in the provided space. Finally, we need to add an audio source to the cylinder for audio emitted during the stream. To keep it contained within the radius of the 3D object, let’s create the audio source as a child. Right-click on the top of the cylinder, and from the audio dropdown, select Audio Source and name it Audio – Cylinder.
Within the inspector of the audio source, we need to modify two areas: the spatial blend and the max distance. Spatial blend allows for the audio to be felt dimensionally (3D) instead of flat (2D). Drag the Spatial Blend in the Audio Source component to “1”. Concurrently, we need to control how far the audio is being emitted. Imagine a conversation between two characters; it wouldn’t make sense for said conversation to be heard 600 ft away unless it is transmitted through speakers. Therefore, change the value to how you think the audio’s loudness would be transmitted from the cylinder. For example, I am assigning it a value of 20.
After that, we can add an Element 0 in the Render Audio Source inside the Mc Subscriber and drag/drop the Audio–Cylinder into that space. Thus, we are done with setting up the stream-in for the game!
V. SO META: Viewing the STREAM
Go to Dolby.io and start a broadcast from your stream token. Substitute the stream name for the stream name used in Mc Subscriber:
https://streaming.dolby.io/#/broadcast-new?id=4838412&s=McSubscriberStreamName*Note: The URL above will only work in my account as it is a stream token that only exists there. It is to provide an example of where your Mc Subscriber’s stream name goes.
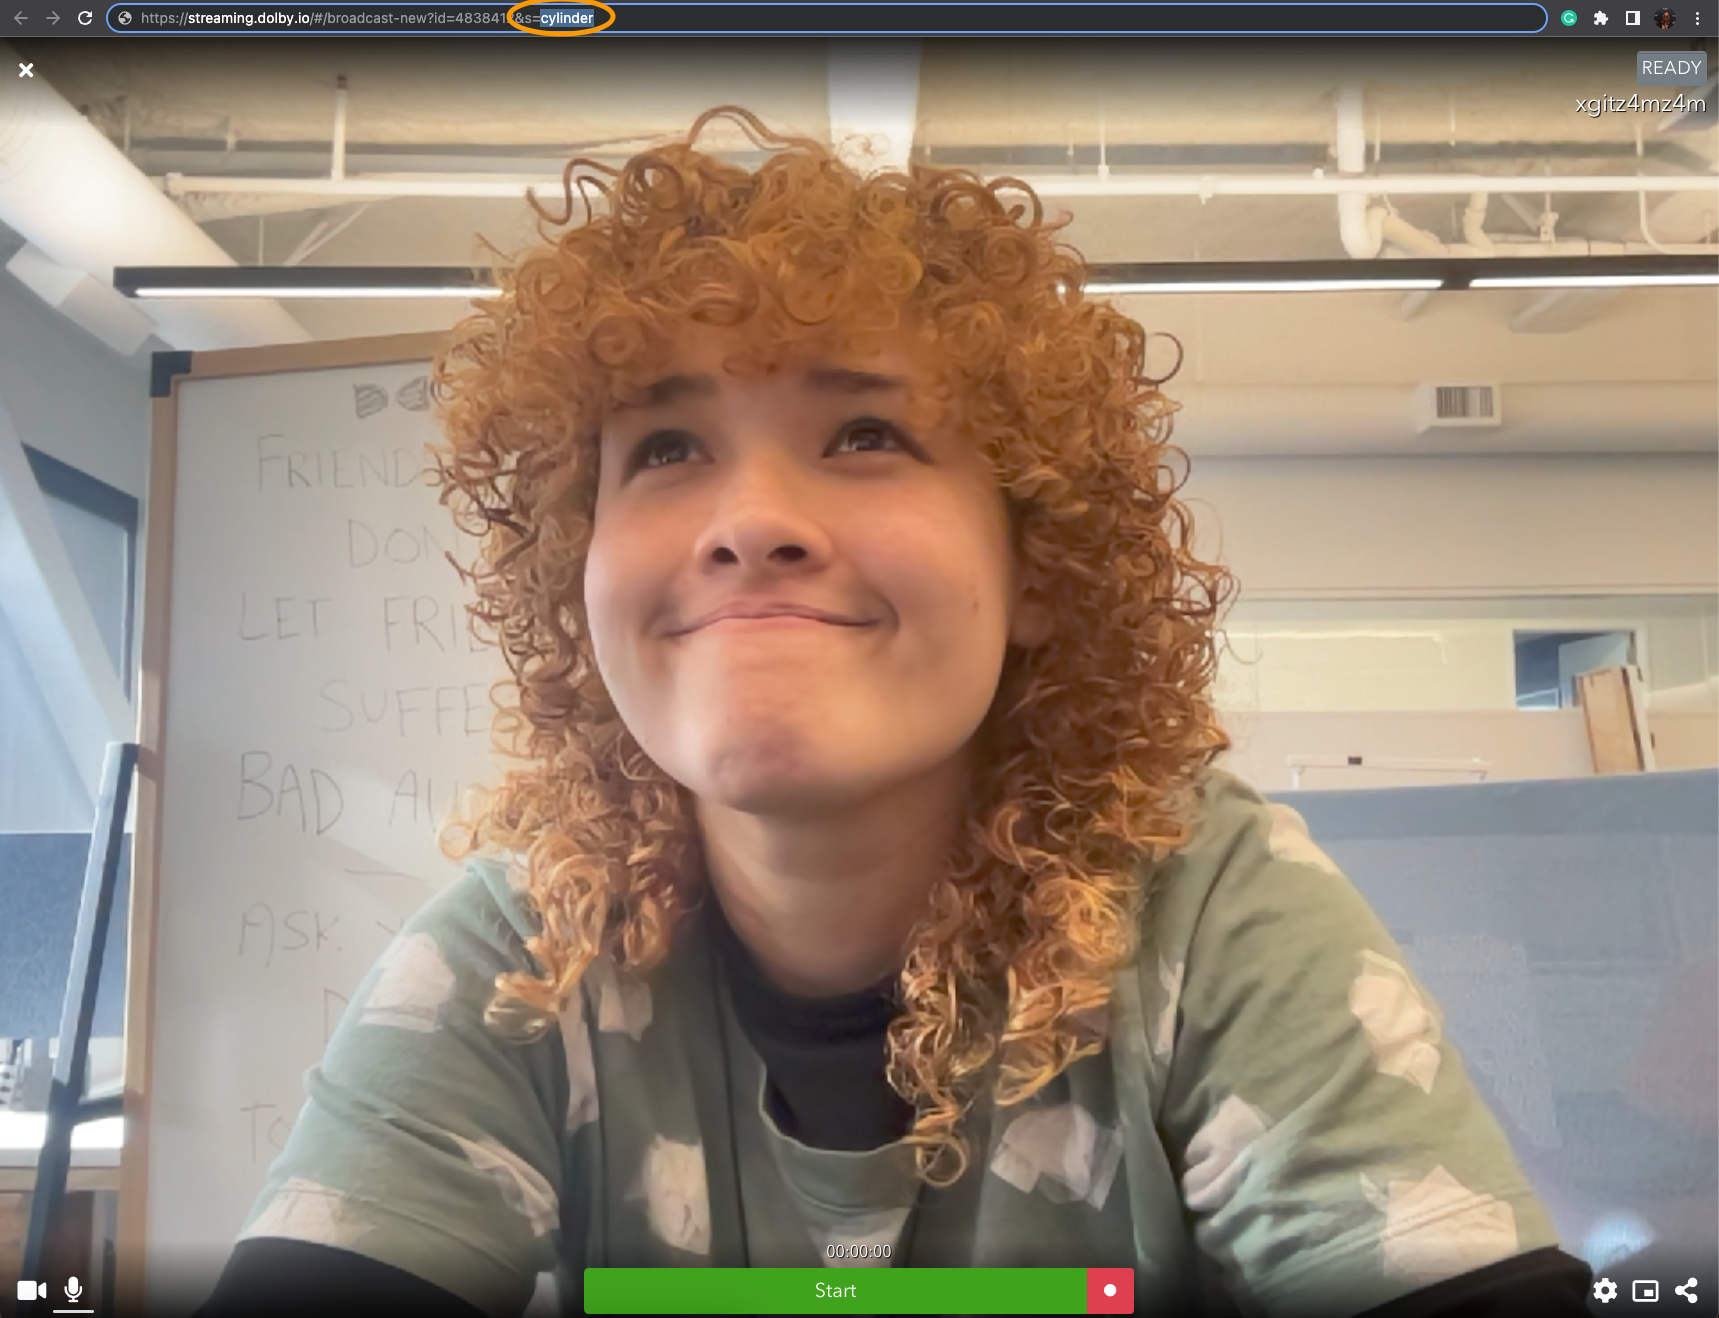
Refresh to have the name update and start broadcasting! Go back to the engine and start the gameplay. You should be able to see your video feed as the material of the Cylinder! Go around the object, hear the spatialization of the audio, and walk away to listen to the fade out of the emitted audio, just like in a real-life scenario.
ALSO, you can do both streams in conjunction; open up the previous link we were streaming out to, and you will see the cylinder streaming in your webcam, which is streamed out through a live stream of the game!
Now that the basics are done, it is your time to experiment and build more creative ideas with these new plugins! If you want to see a full display of these features, we are showing up at GDC (March 20-24, 2023 – San Francisco, CA) and NAB (April 15-19, 2023 – Las Vegas, NV), where you can interact with a few demos we have built. All in all, take some time to learn more about our virtual plugin offerings and all that YOU can do!


")