


In the fast-paced digital landscape, high-quality streams have become a necessity for content creators, broadcasters, and businesses alike. As part of that frontier of game changers, Videon has been exceptional at providing cutting-edge video streaming solutions. With a rich history of expertise spanning over 20 years, Videon has always been part of pushing the boundaries for delivering captivating streaming experiences.
In the search for excellence, they have earned a reputation for delivering high-performance, reliable, and feature-rich solutions. At the heart of their offerings lies Videon’s EdgeCaster, an encoder design for low-latency, high-quality video streaming. It is built with live event and broadcasting applications in mind, with the capacity to ingest video feeds from various sources, encode them, and deliver them to multiple destinations. Being our bread and butter, we have partnered up to extend the capabilities of EdgeCaster by helping provide a Simulcast and Multiview with Dolby.io Streaming API.
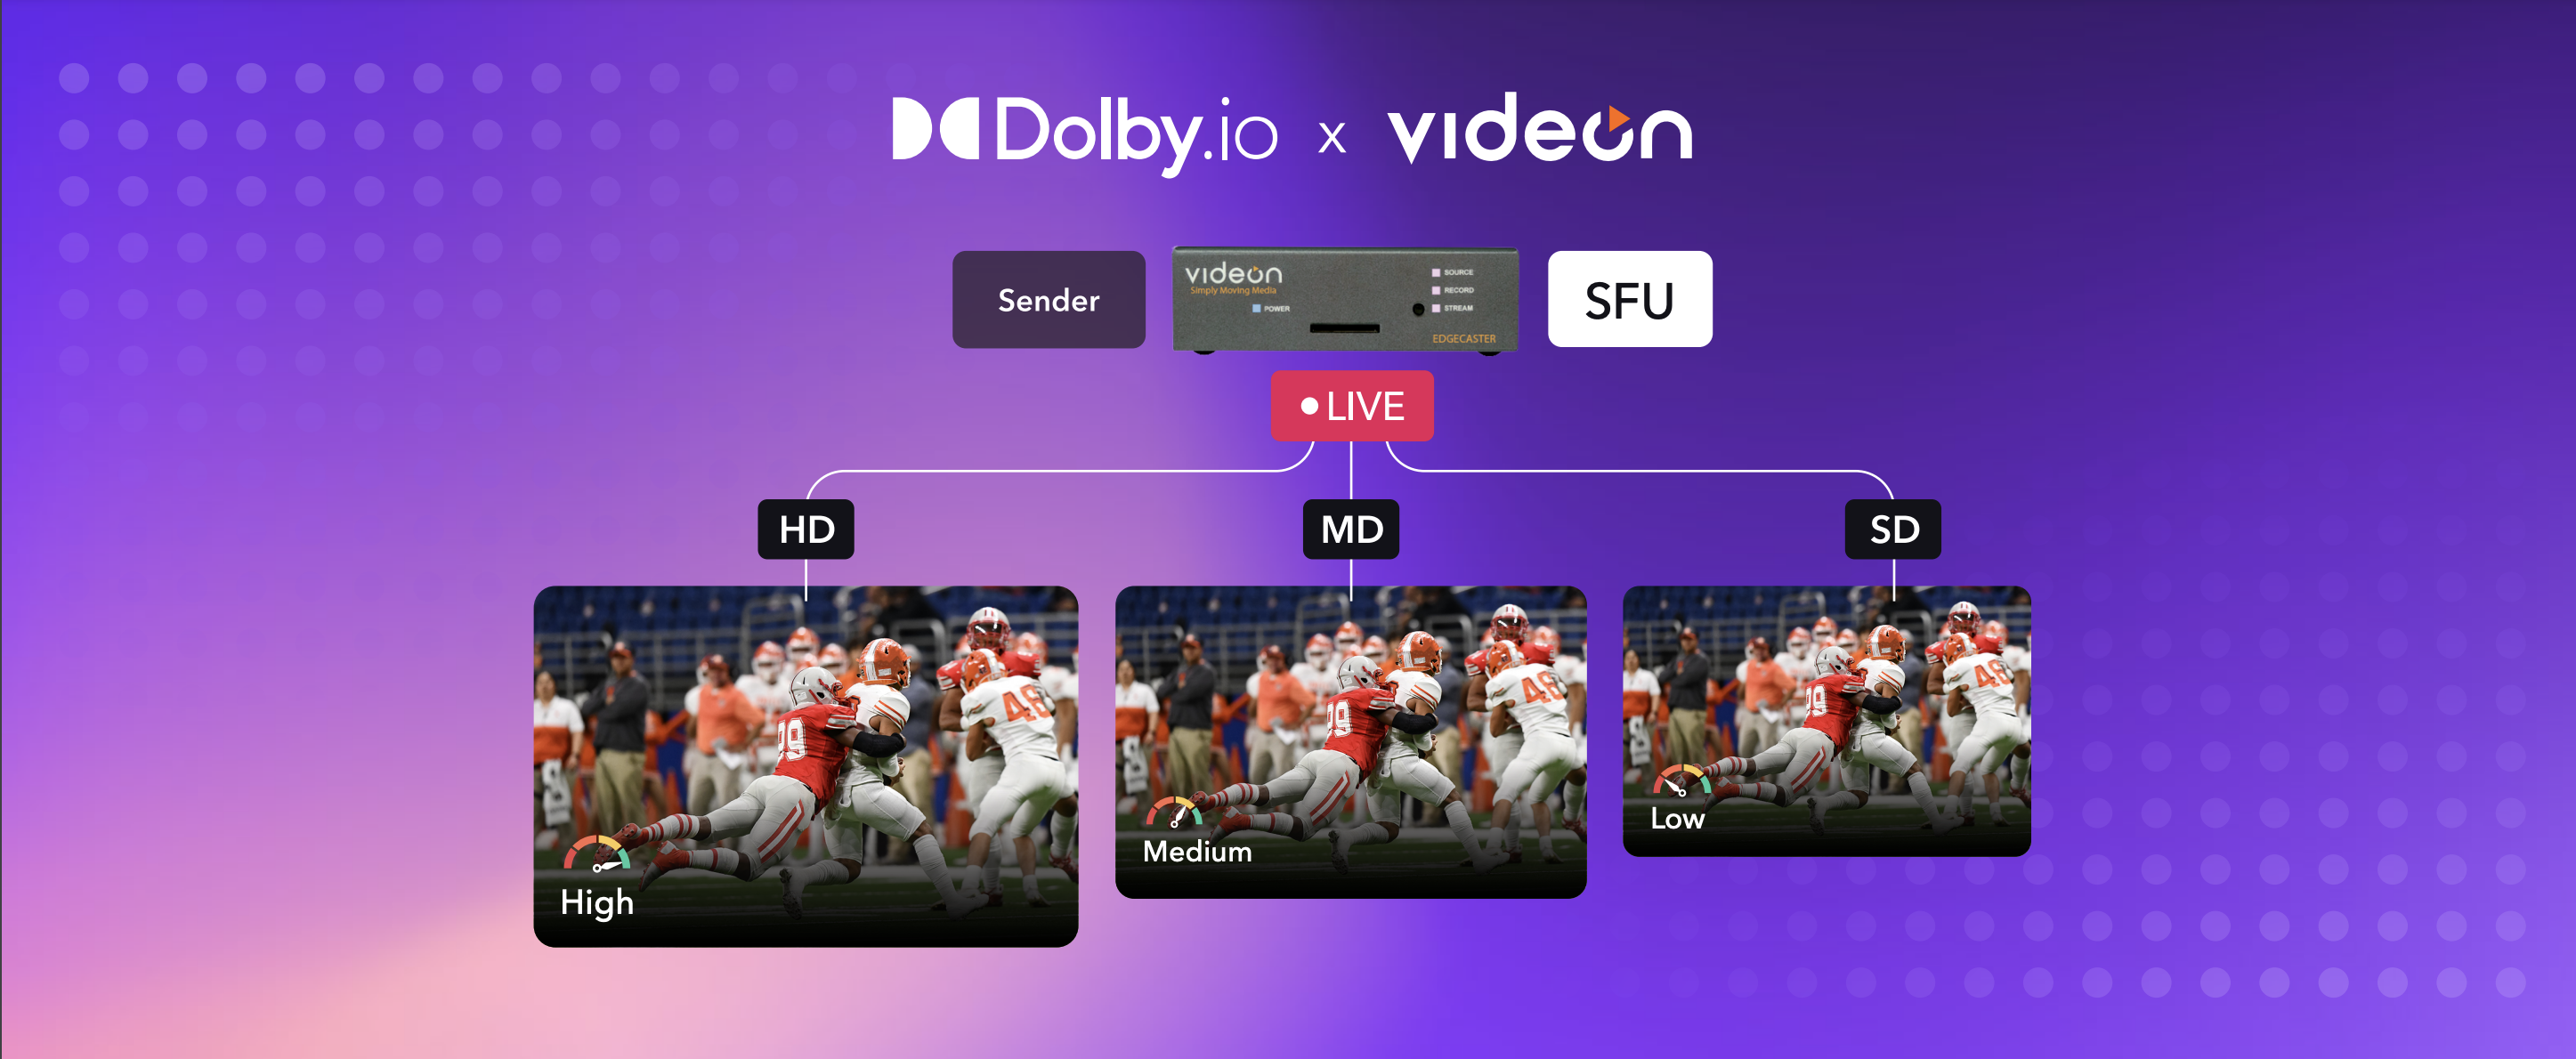
Simulcast is a common term used in the streaming world for the ability to deliver to large audiences with diverse networks ensuring stable content delivery without buffering or delays. With Dolby.io Streaming offerings, Simulcast is available for H264 and VP8 codecs helping platforms cater to a wide variety of devices. In this blog, we’ll guide you through setting up Simulcast with Videon’s EdgeCaster, empowering you to effortlessly reach diverse audiences across various networks and devices without compromising quality or user experience.
Setting Up EdgeCaster
At Videon, they believe in concrete and intuitive instructions; therefore, getting started is pretty simple. First, you would need the encoder available and connect it by plugging in an Ethernet cable in both the Videon device and the local network, providing it with power, and attaching it through HDMI or SDI source the camera. A critical note is to ensure the computer is connected to the same network as the Videon device, ideally connected via Ethernet cable. Next, install the Discovery Application.
- Windows Discovery App – Make sure you have the latest software operating
- Mac OS Discovery App
- Linux 64x-bit Discovery App
*Note: As a fellow macOS user, there might be some issues when installing the Videon Discovery App. Due to Gatekeeper, the app will only open if registered with Apple. To bypass this, locate the Discovery App in Finder, control-click, and click Open in the shortcut menu. A warning dialog will pop up and contain the option to open it. This will automatically be saved as an exception, and you won’t have to repeat this process next time.
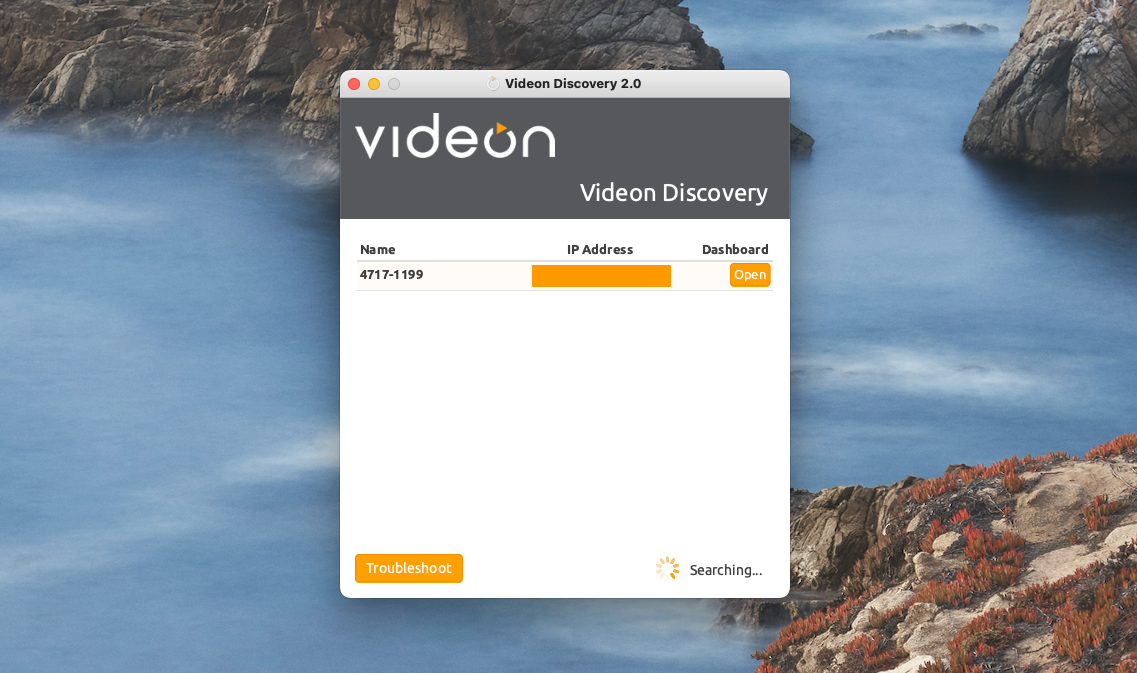
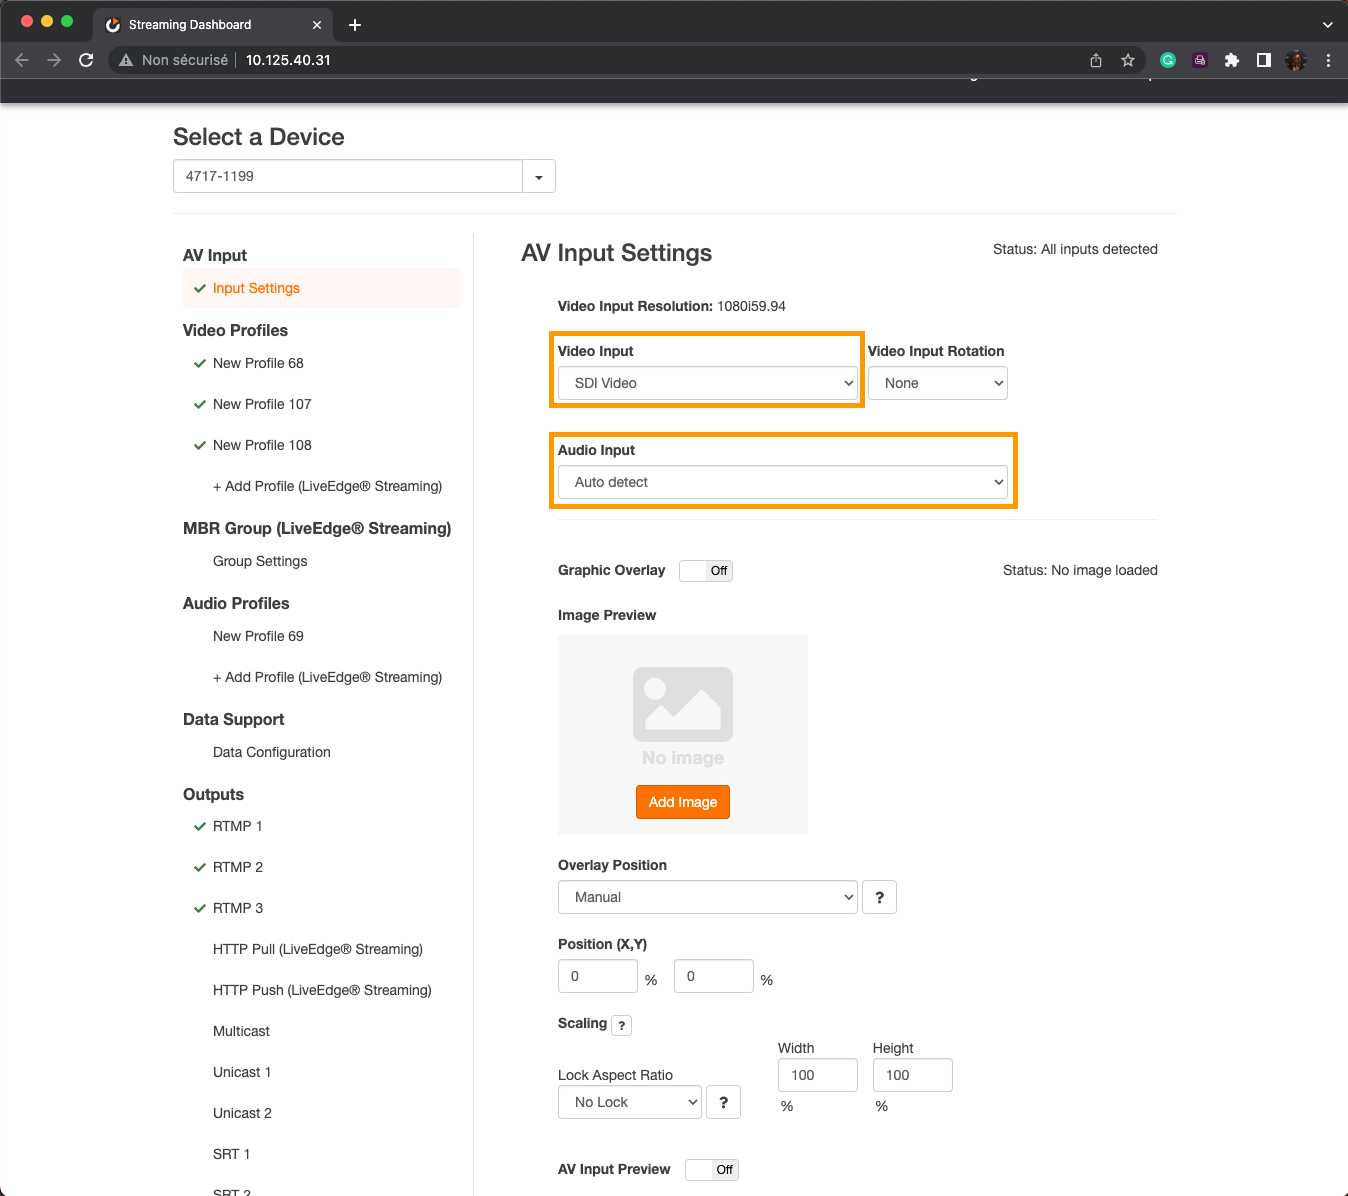
Then inside the app, it will search for your device. Once Open is clicked, you are now connected to the Video Web Browser Interface (aka Videon Web UI). Within these settings, we land on the AV Input. Select the Video Input of your desire as well as the Audio Input. For this example, the setup is connected through an SDI source, therefore, choosing that from the dropdown. As for Audio Input, I am using an alternative option: Auto detect, making the encoder detect the audio and determine where the audio is received from. This is also the space where scaling, position, and graphic overlays can be added to the stream.
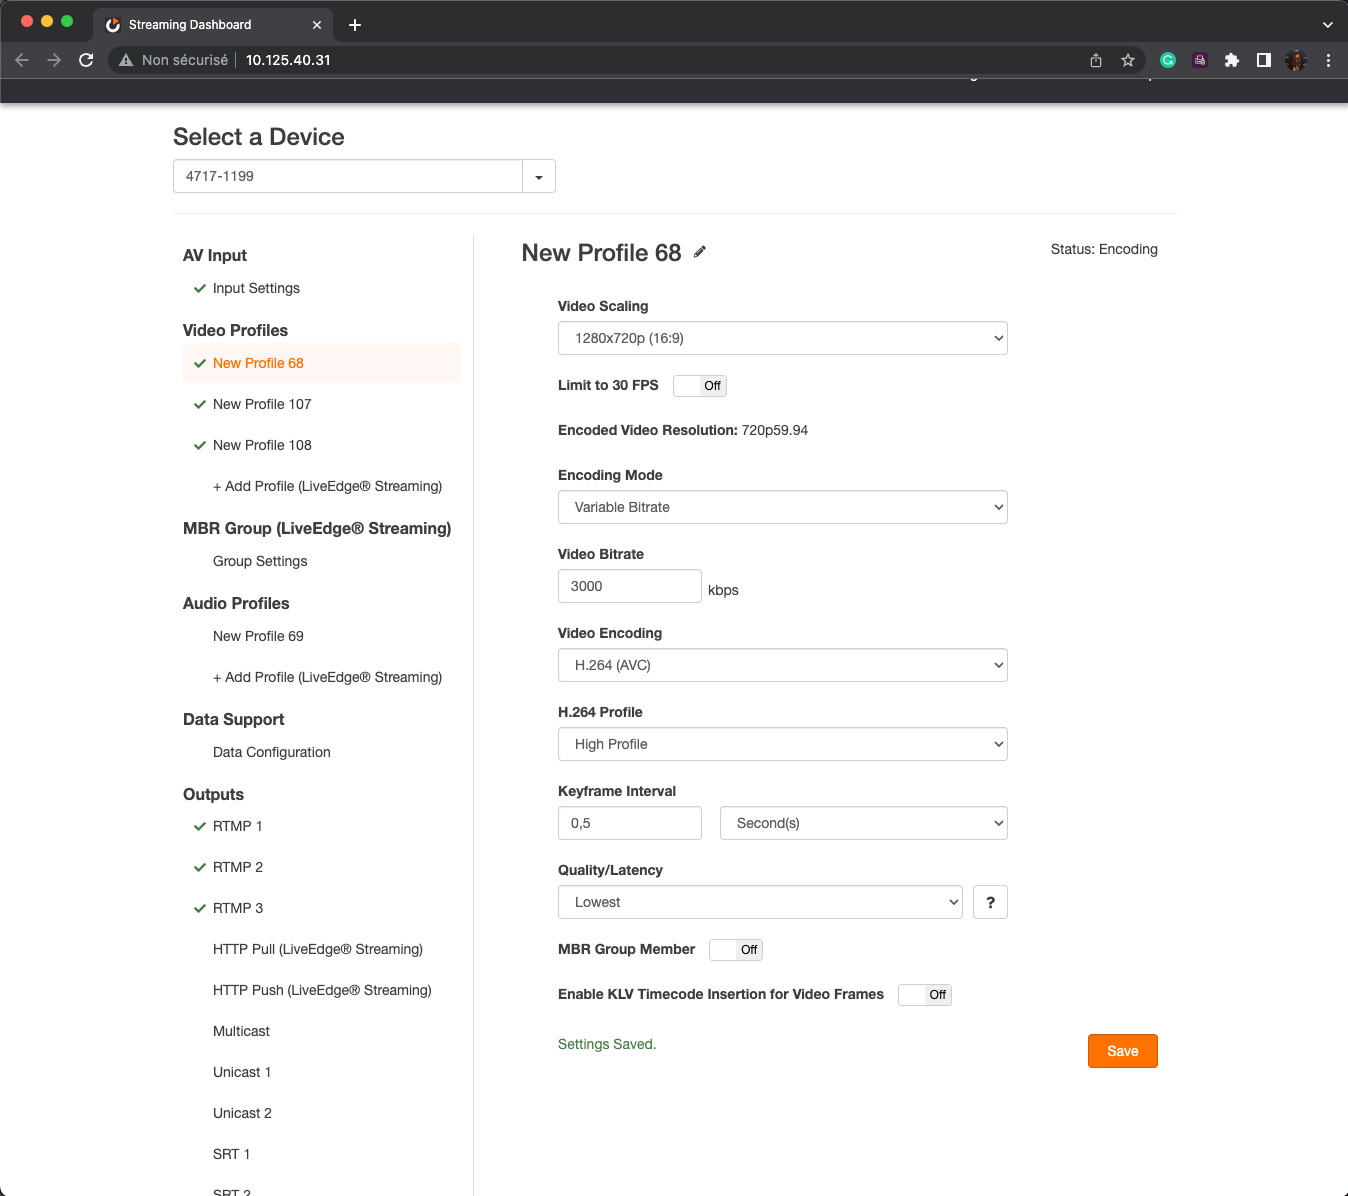
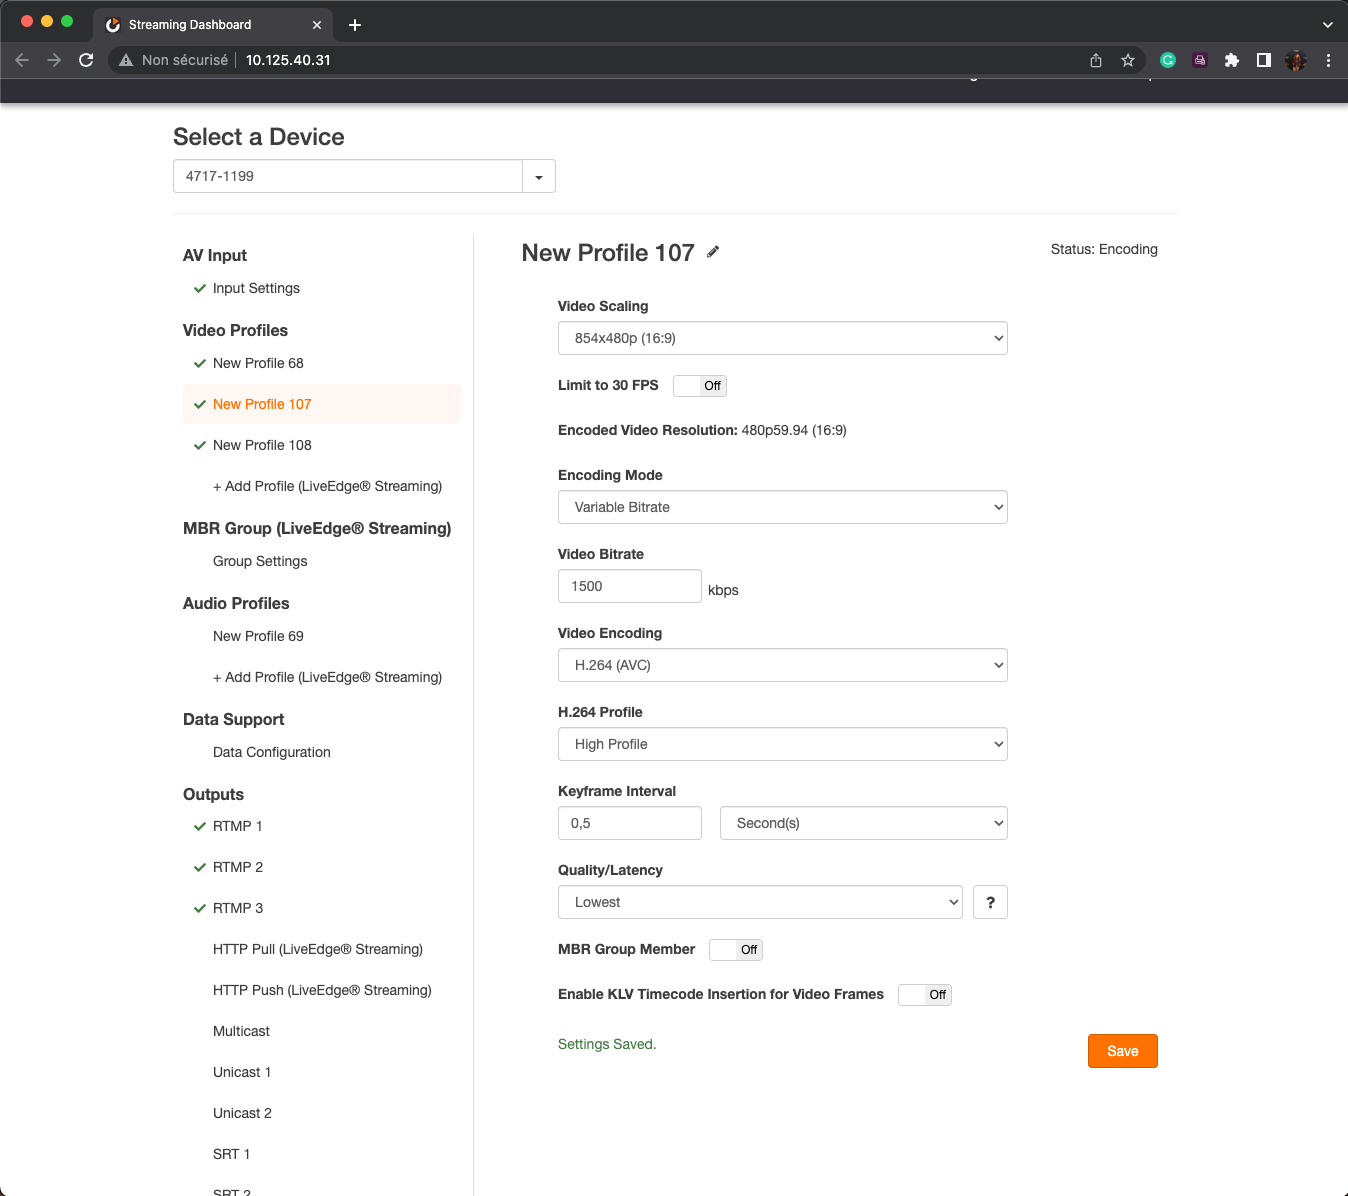
On the left side, we will set up three instances under Video Profiles: 720p, 480p, and 360p. In this example, the idea is to deliver the live stream to 3 destinations. Multisource (Simulcast), a feature from Dolby.io Streaming API, gives the power to send three renditions of your stream and allows viewers with limited bandwidth to receive the lower renditions created in your Videon settings.
The first profile should look like this:
The second destination changed to this:
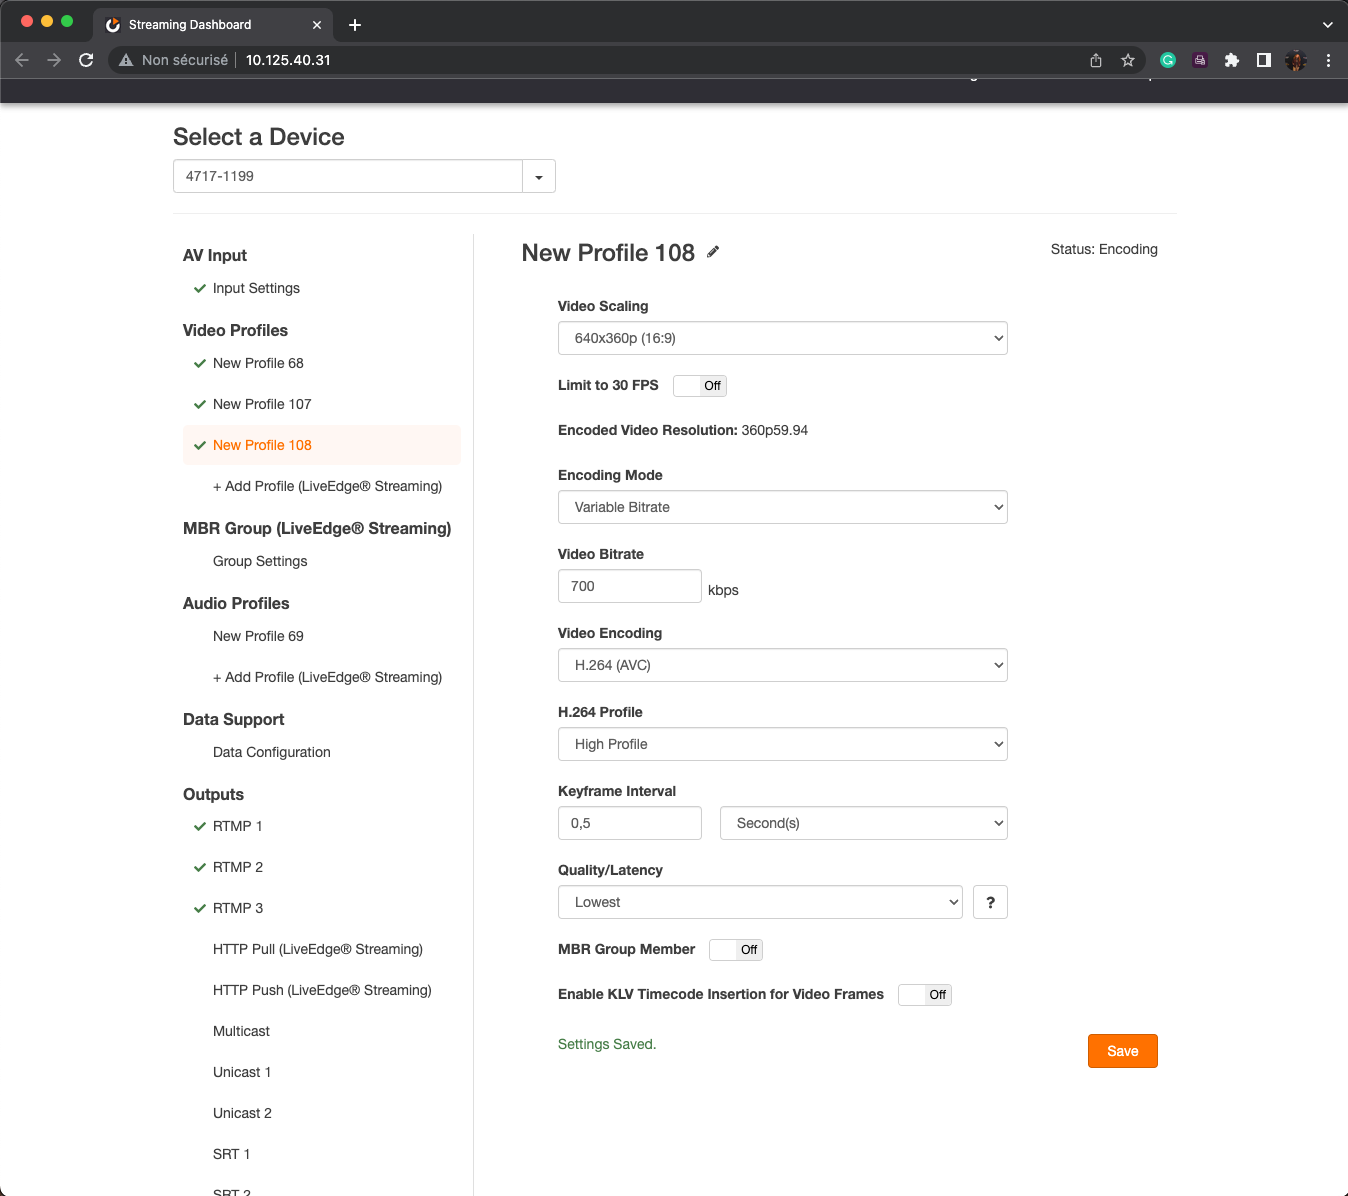
Lastly, the third profile will contain these settings:
Enabling Simulcast on Streaming Dashboard
With all the AV input and video profiles done, we will redirect our attention to the Streaming Dashboard. If you still need to make an account, sign up and receive 50GBs for free to test out this feature. After signing in, make sure you are in the Streaming dashboard by selecting it in the upper left corner.
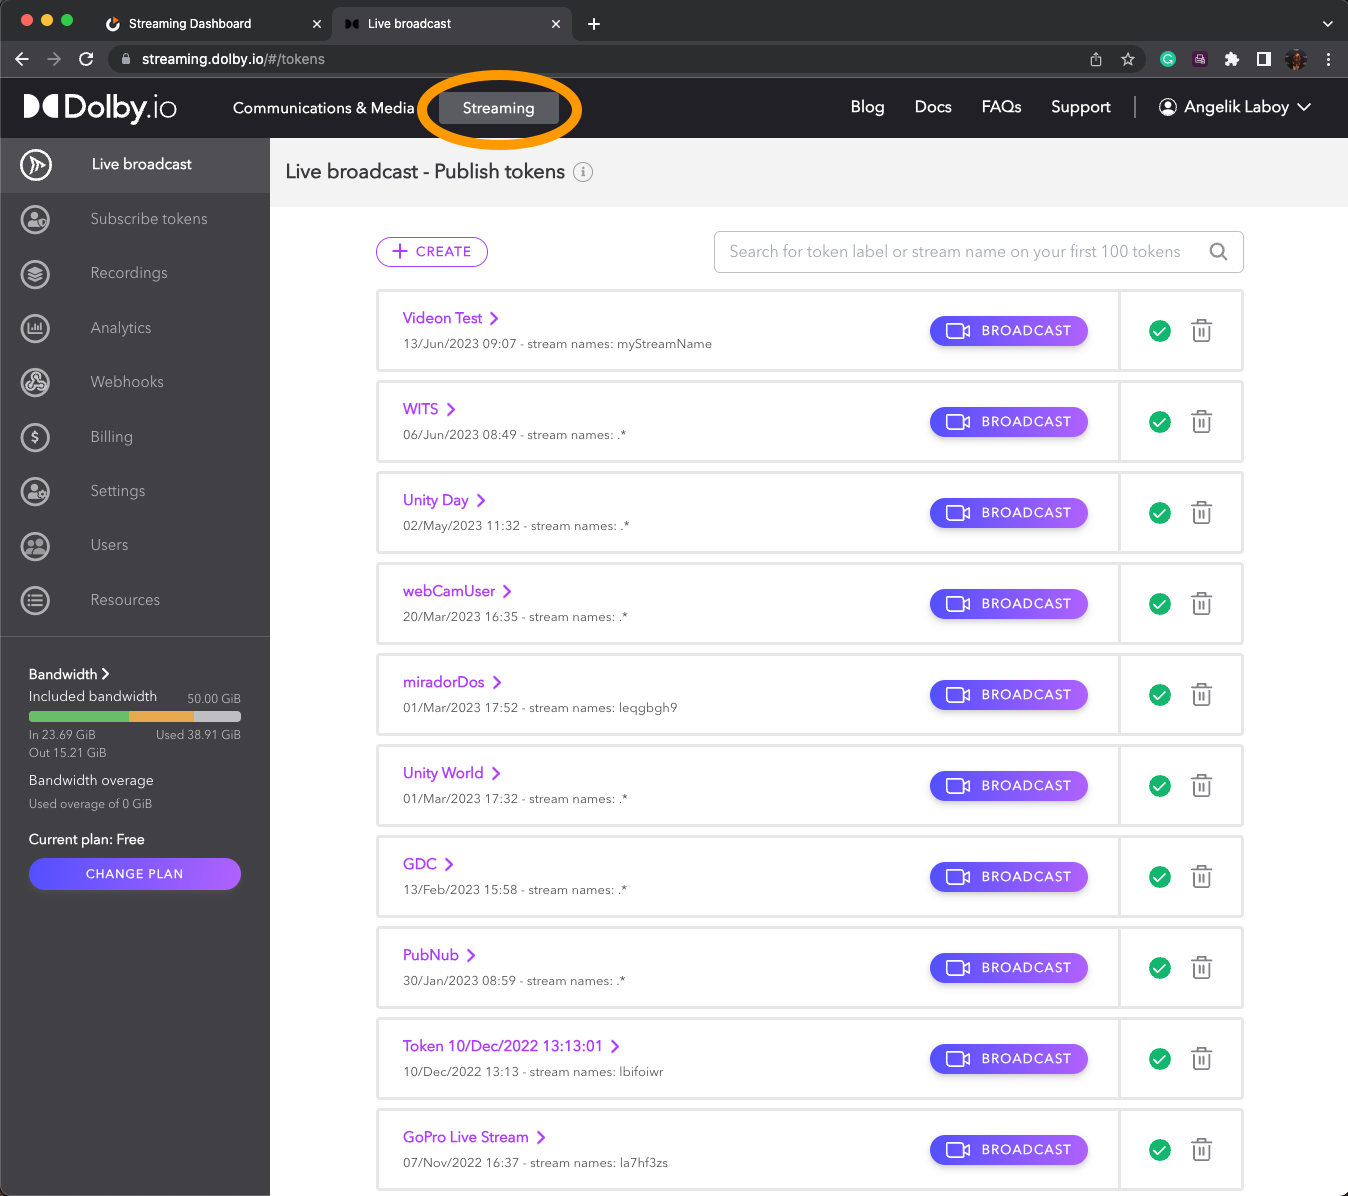
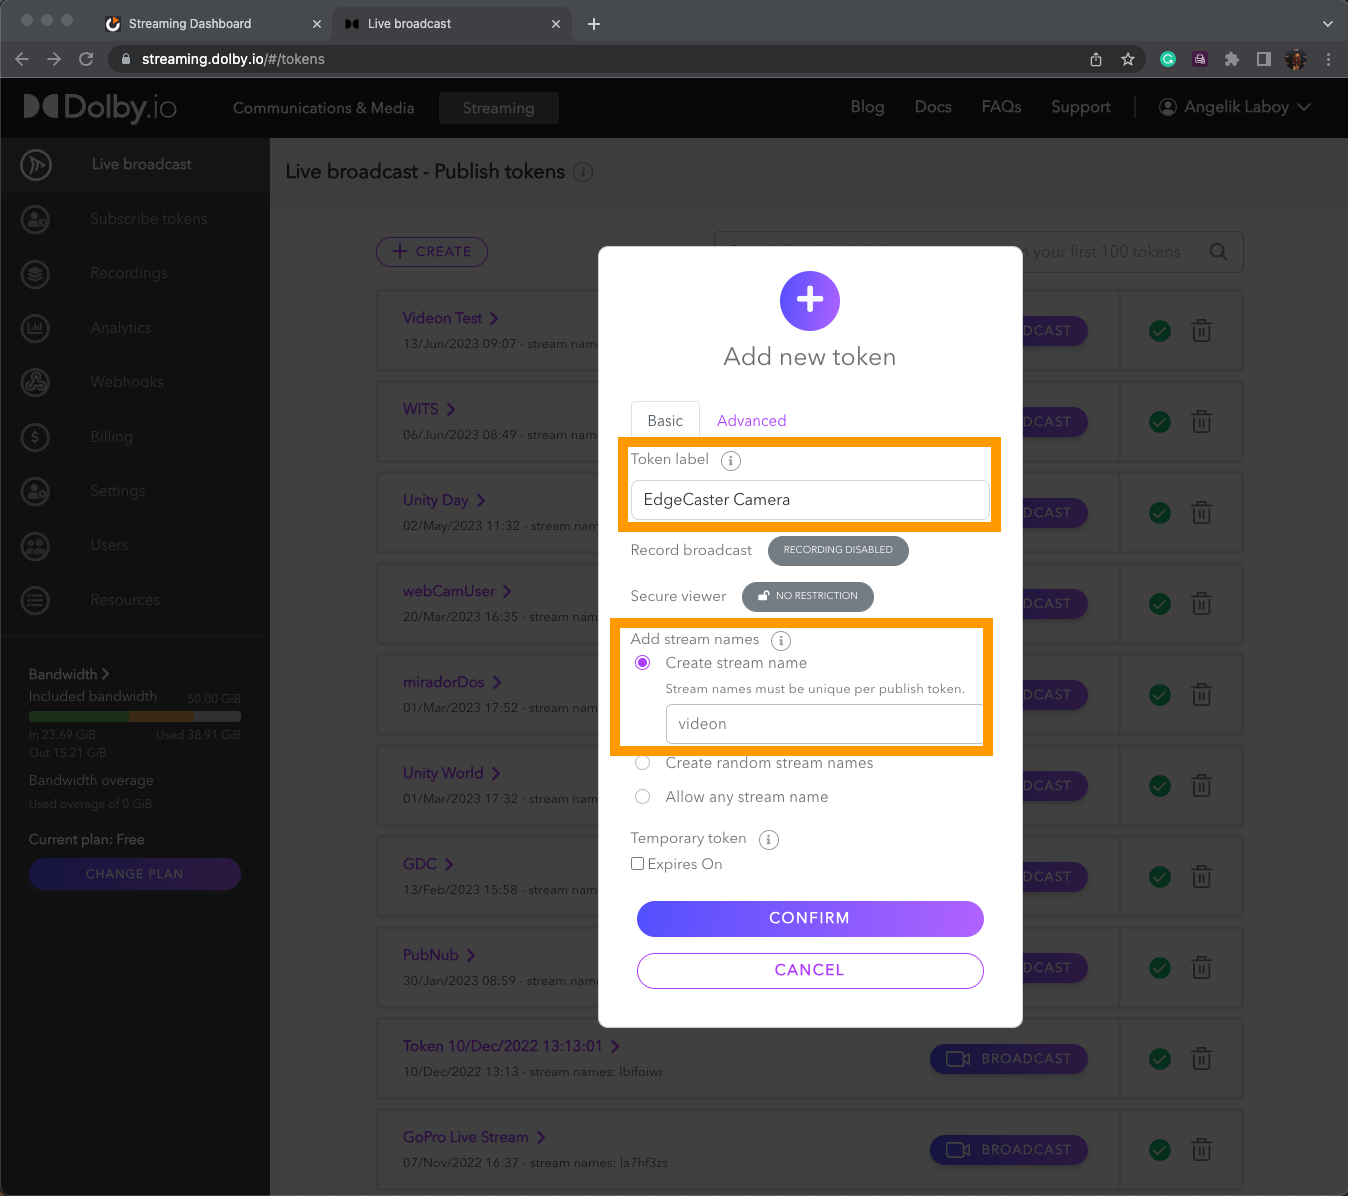
Create a new token by pressing the “+ CREATE” button and renaming the Token Label to remember the token you are experimenting with. In the Add stream names section, you can select any of the following; however, for simplicity’s sake, I will use the Create stream name option and changing the name to “videon”. Another setting you could modify is the cluster region in which the account will target. This is available for change in the Advanced settings tab and set to auto, meaning it will select the cluster close to you. Hence, if you are in the Americas, the nearest cluster would be Phoenix, while if you are in Europe, it would be Amsterdam.
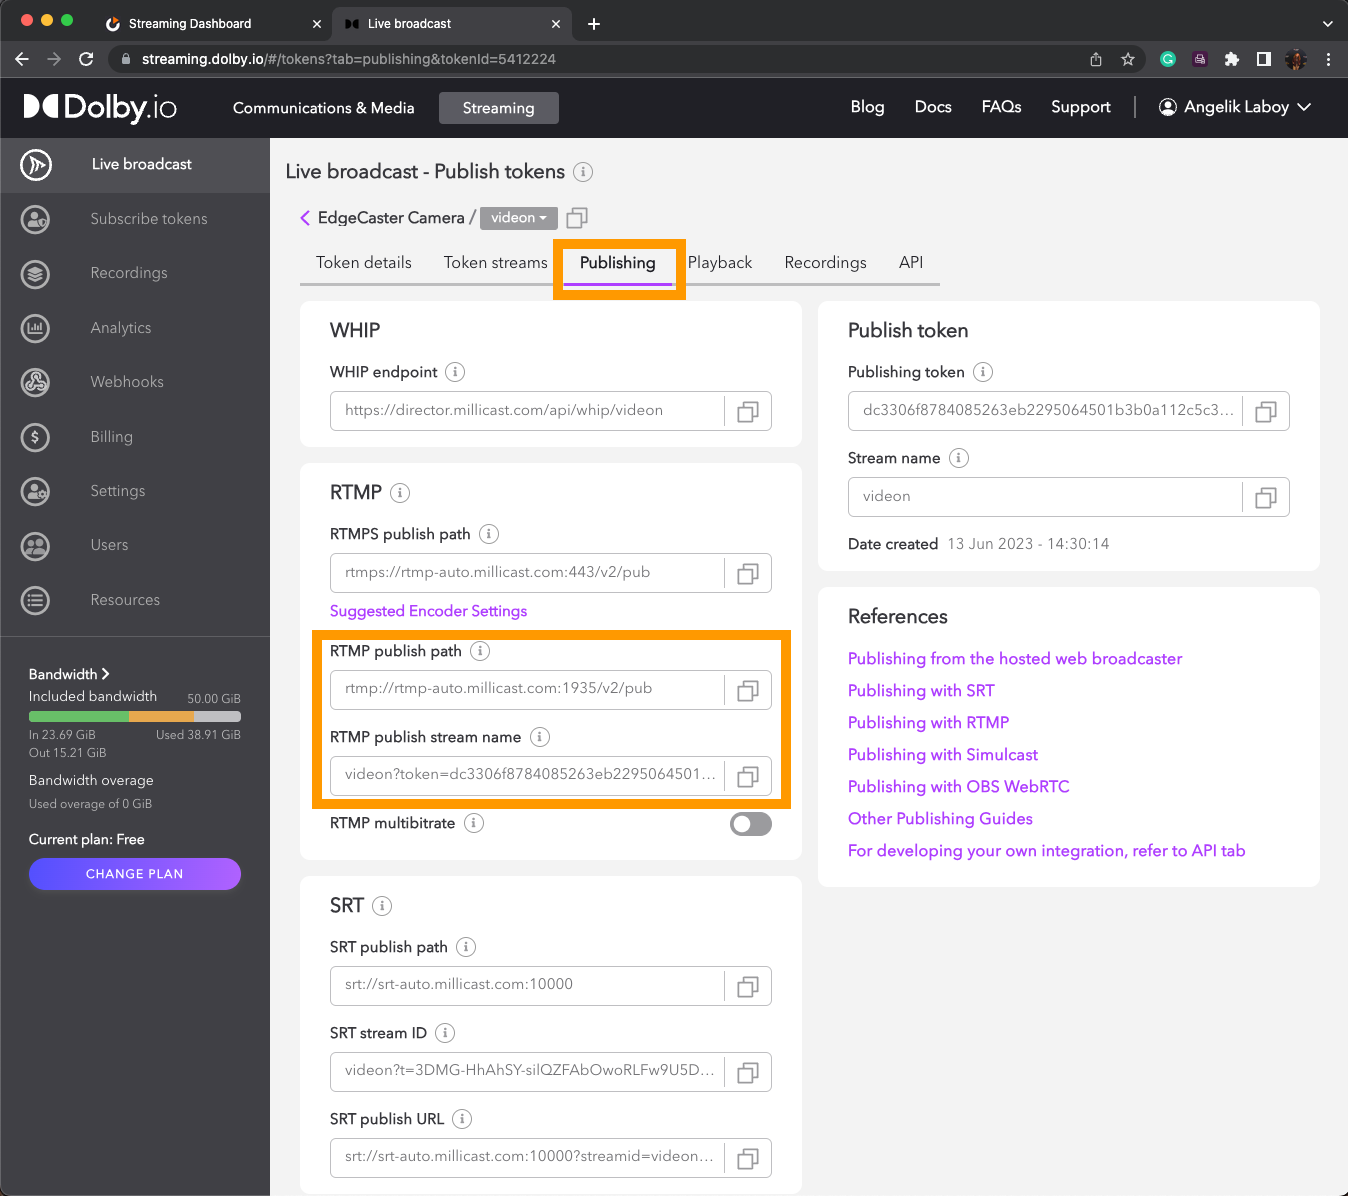
Inside the Publish token setting, navigate to the Publishing tab. Under RTMP, we will need to take note of the RTMP publish path and the RTMP publish stream name. This information will be needed to give the stream URL to Videon’s EdgeCaster.
Under the publish stream name, enable the RTMP multibitrate. This option will enable/disable multisource, so by turning it on; it will enable the capacity to stream RTMP MBR (Multi-Bitrate) for delivery via WebRTC Simulcast.
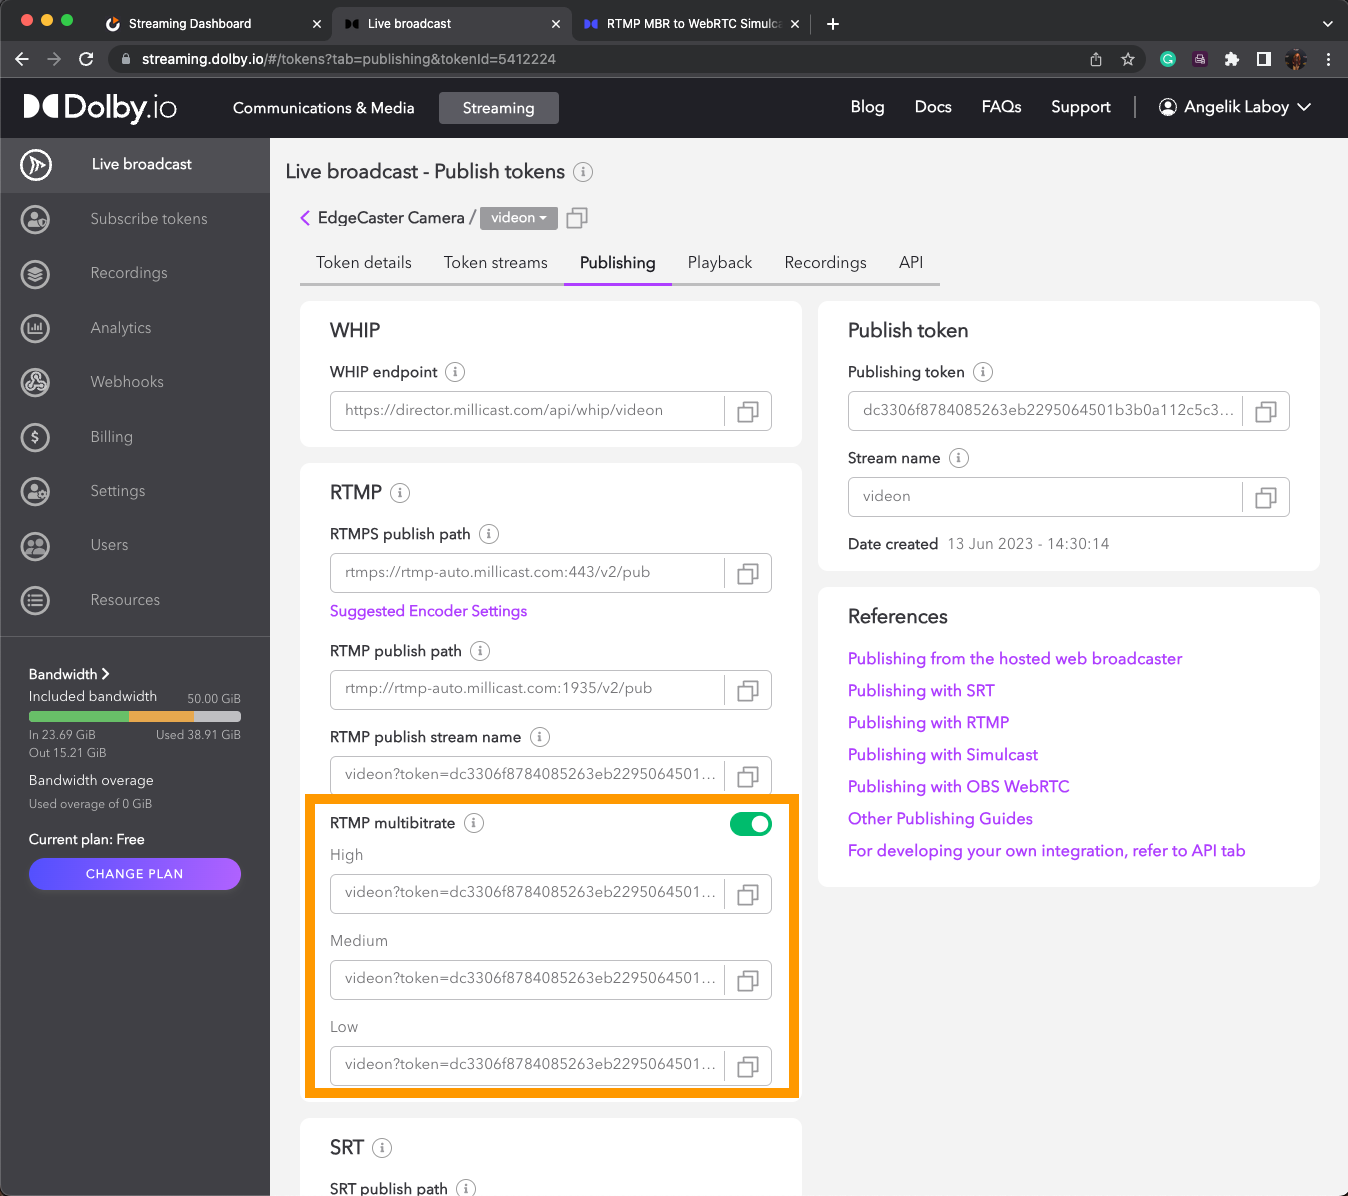
Add the RTMP publish path URL to the front of each of the Simulcast layers URLs, as these are the URLs we will be adding to RTMP 1, RTMP 2, and RTMP 3.
Adding RTMP Outputs
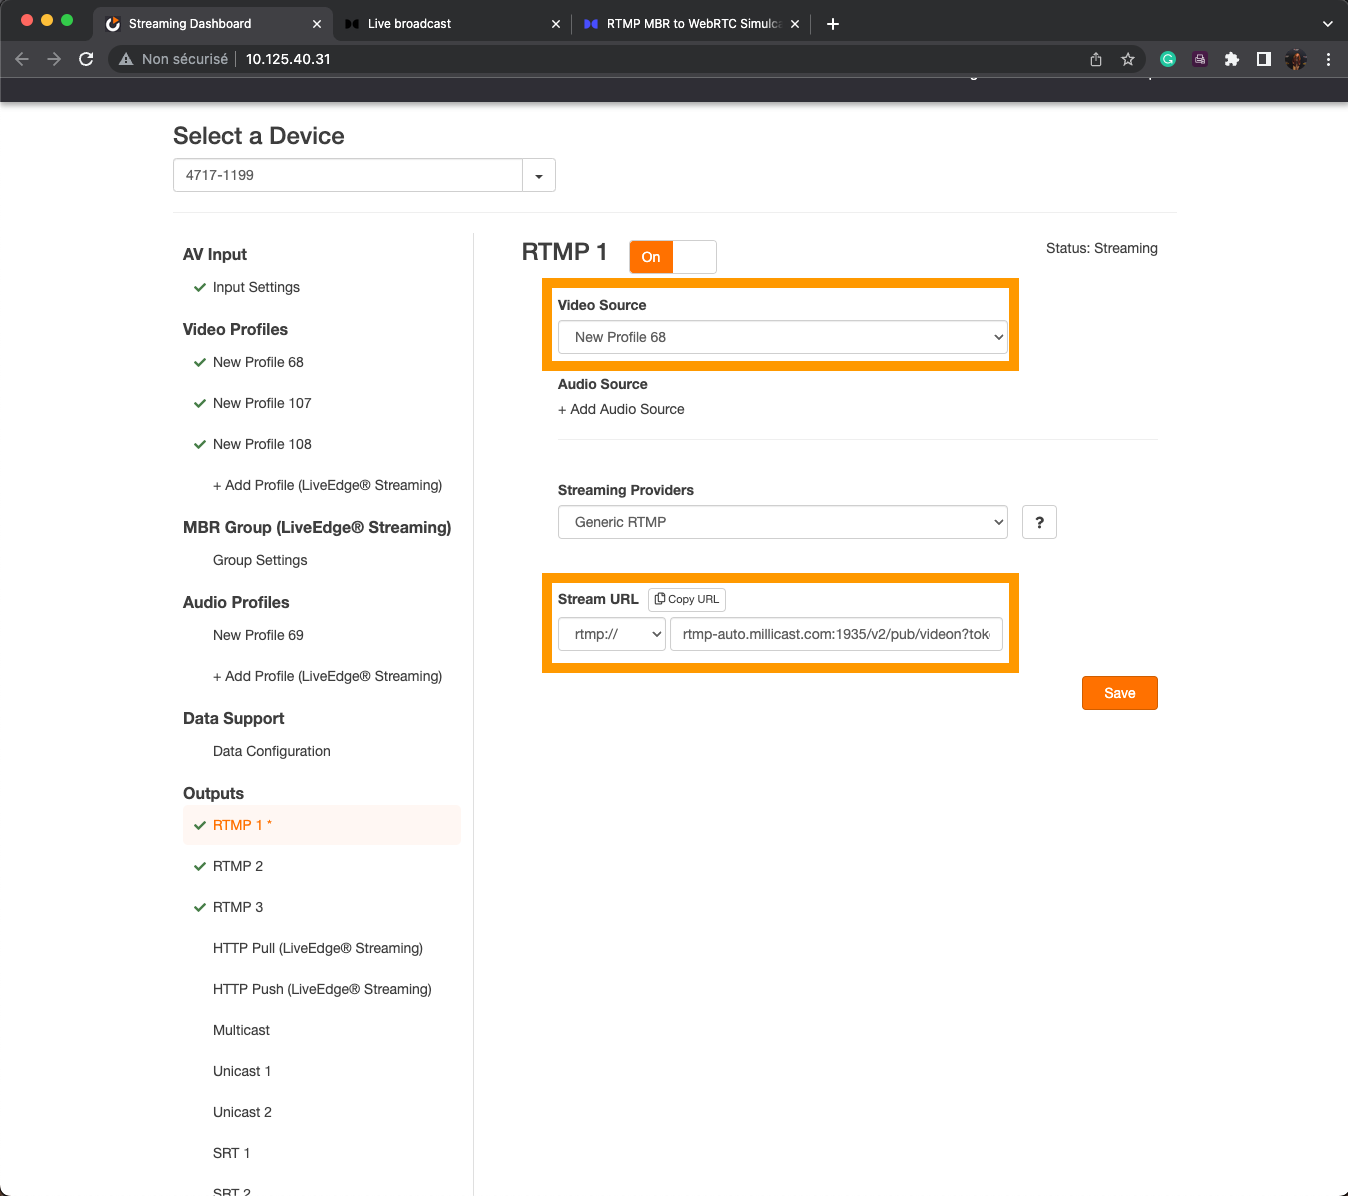
Going back into the Videon Web UI, on the left-hand side, will be the division of Outputs. Select RTMP 1 and toggle on to activate this setting. For Video Source, select the first profile (720p in this case or New Profile 68). Have the Streaming Providers as Generic RTMP, and in the stream URL, add the first link (High).
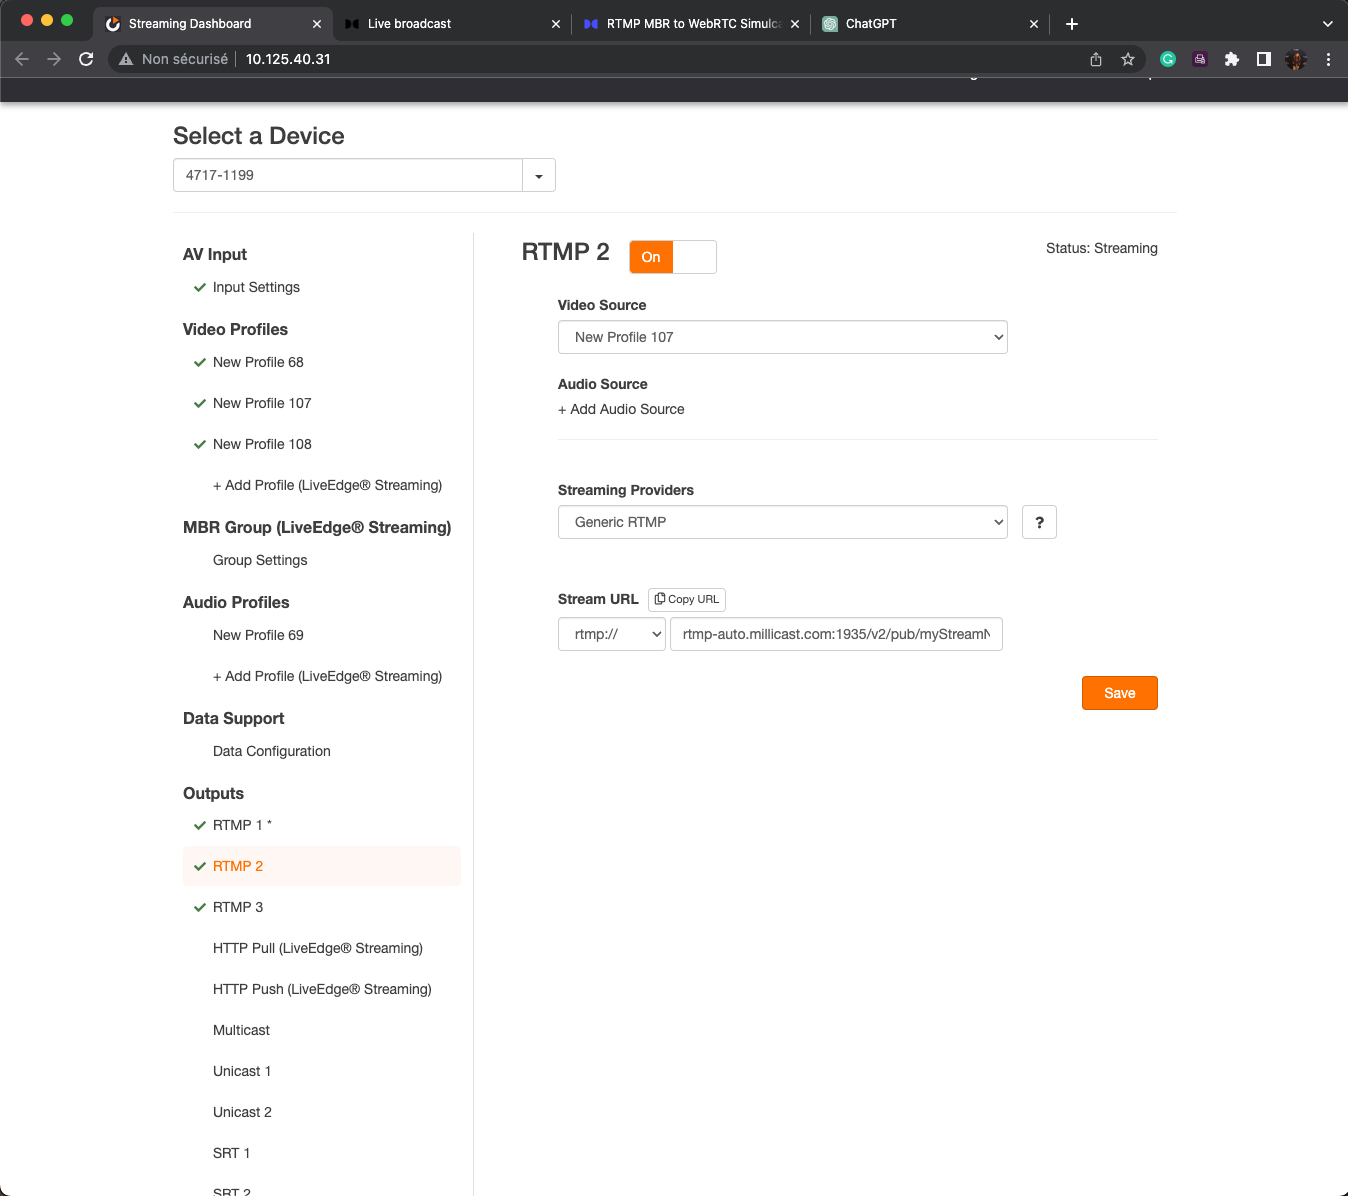
Repeat the same process for RTMP 2 → Video Source: New Profile 107 (480p) and the Medium URL in the Stream URL and for RTMP 3 → Video Source: New Profile 108 (360p) and the Low URL in the Stream URL. Save all of these setting changes. Next to them will be a green check mark that confirms a healthy status ready to stream. Review the Input Settings if there is an exclamation mark; it might mean your video input hasn’t been correctly detected.

Start Publishing Streams
If your encoder is reading blue on the source and the stream, your camera is already live streaming; thus, we would only need to watch the stream happen. Returning to the Dolby.io Dashboard, select the Playback setting, and copy the Hosted Player Path.
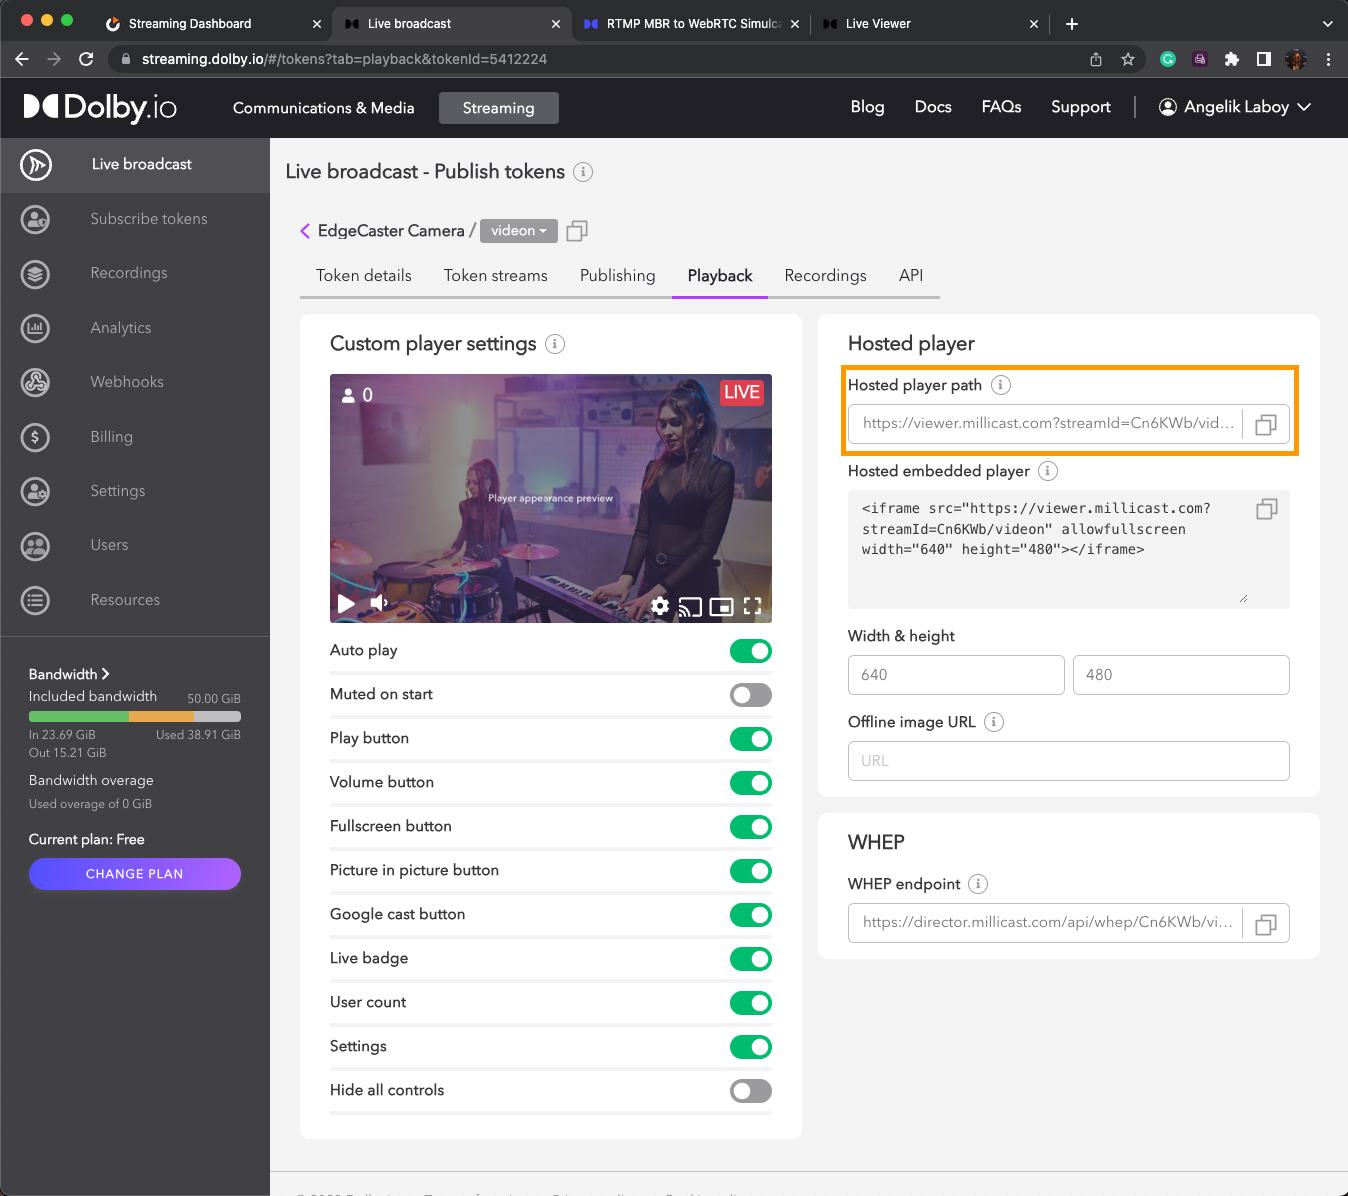
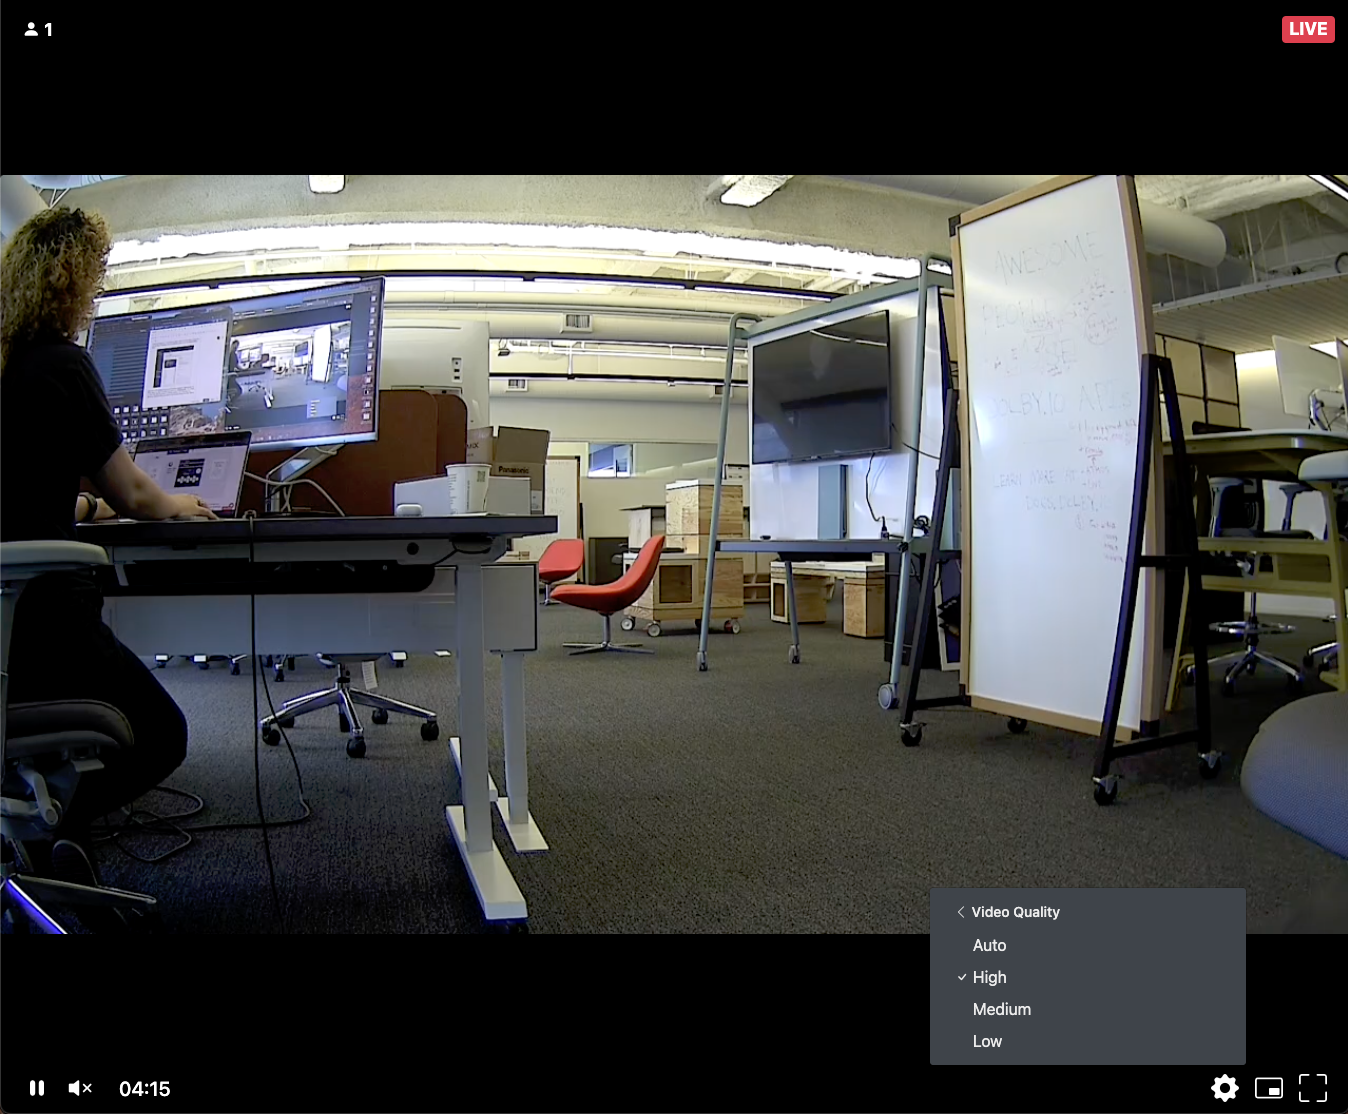
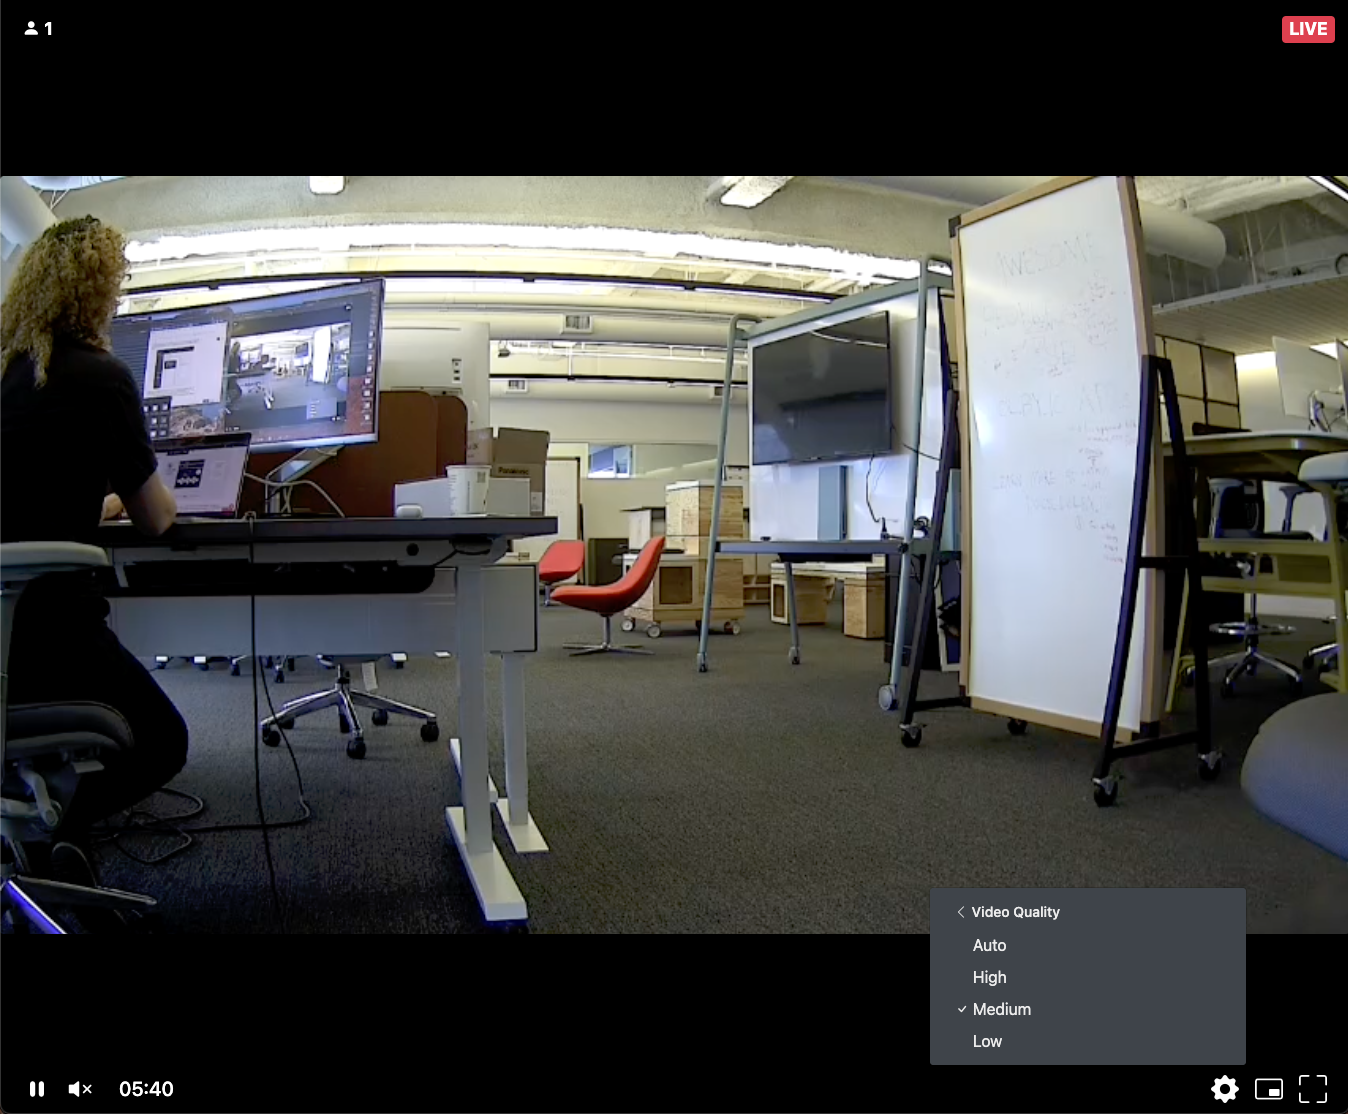
Paste that in a new browser tab and see the live stream happening! Toggle between the bitrate streams, go to the gear icon in the downright corner, and press on the Video Quality. This is where you can see the different profiles (High, Medium, Low) running with their respective resolutions, latency, and keyframe interval set up through the Videon Web UI.
Here is an example of the changing stream targets:

And that is all, folks! Join us next time to talk about enabling Multiview for each Videon’s EdgeCaster while simultaneously retaining the Video Quality selection from Simulcast. In the meantime, here is how to build your own WebRTC live stream Multiview app or read more about the importance of Simulcasting and why it matters. Don’t forget to check out the new documentation!


")