


WebRTC Streaming enables broadcasters to deliver video and audio content with delays of less than half a second, perfect for live virtual events such as sports streaming, auctions, and live concerts. With such low-delay audio and video content, its important that your graphics are also dynamic in real-time providing users with up-to-date scoreboards, written content, and branding.
In this guide, we’ll explore how to add and manage graphics in real-time on a Dolby.io WebRTC stream with Singular.live.
Creating Dolby.io and Singular.live Accounts
Adding Real-time Graphics to a WebRTC Stream from the Singular.live Dashboard
Client-side Personalization of Graphics on Your WebRTC Broadcast
Adding Real-Time Graphics to a WebRTC Stream from OBS
Why Dolby.io and Singular.live?
Dolby.io (formerly Millicast) is a real-time streaming platform that lets users create compelling streaming experiences with WebRTC. Because Dolby.io can provide low-delay streams to massive audiences, it makes Dolby.io an ideal choice for use cases where delay, quality, and scale matter. Dolby.io handles delivering audio and video content but doesn’t provide graphics to the stream. To support the stream experience Dolby.io integrates with Singular.live, which is a platform for production-quality graphics that can be rendered broadcast-side or client-side in HTML and CSS.
Create a Dolby.io account here.
Create a Singular.live account here.
WebRTC Streaming with Real-time Graphics from the Singular.live Dashboard
Singular.live has two ways of rendering graphics on your broadcast, client-side and broadcast-side. If you are interested in rendering graphics broadcast side check out the OBS guide below, otherwise, we can learn about client-side rendering. In the context of Singular.live and Dolby.io, client-side rendering means that the graphics and the video and audio stream are delivered separately and rendered in browser for the viewer to experience.
Client-side rendering is powerful as it allows broadcasters to render overlays and graphics custom to the user such as different languages, interactive elements such as quizzes, and targeted advertisements.
To get started, we first need to create or edit a Composition on the Singular.live dashboard.

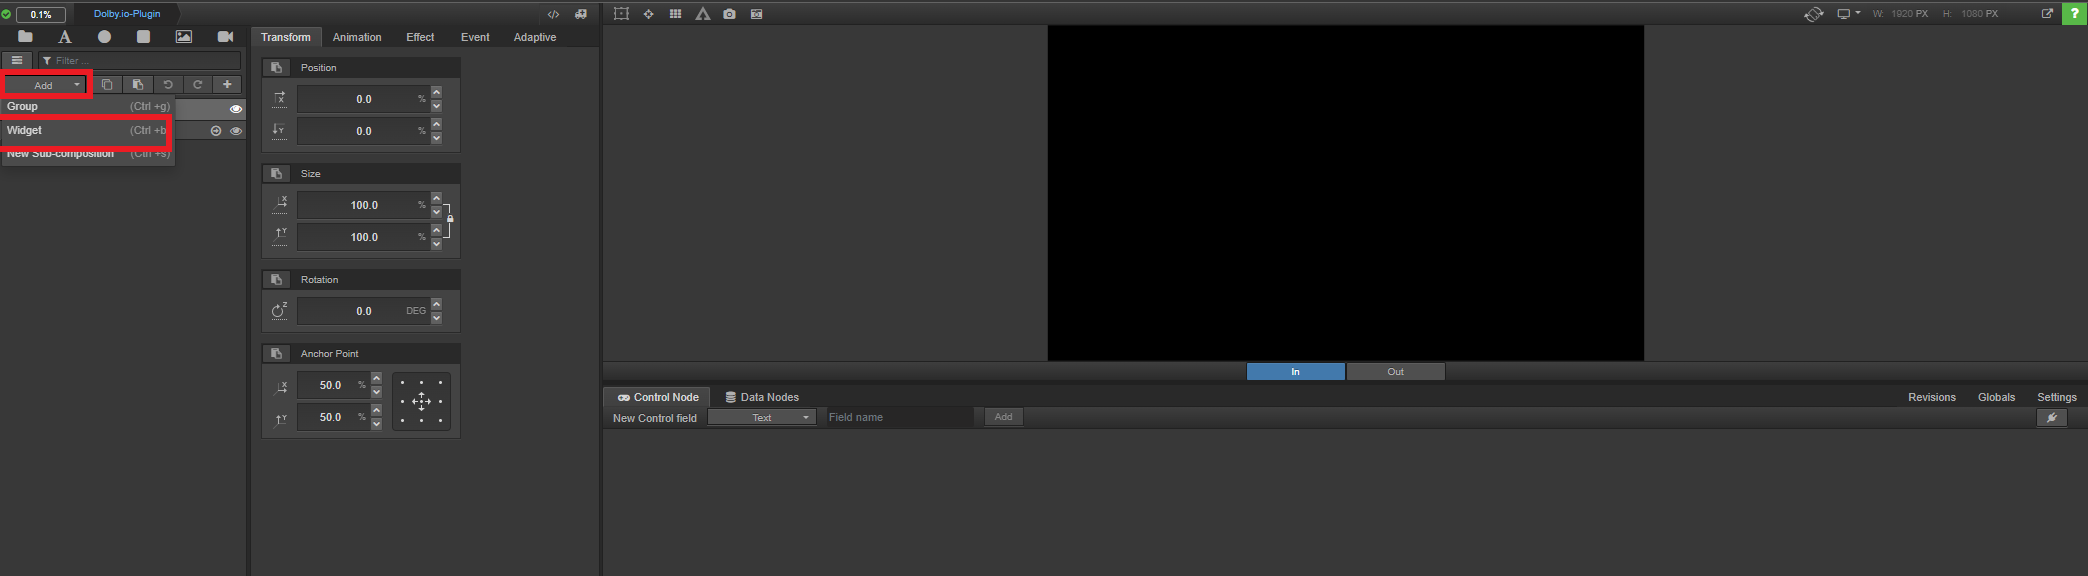
Once you’ve created your composition you will need to add a Widget, which can be done by clicking the “Add” button in the top left corner.
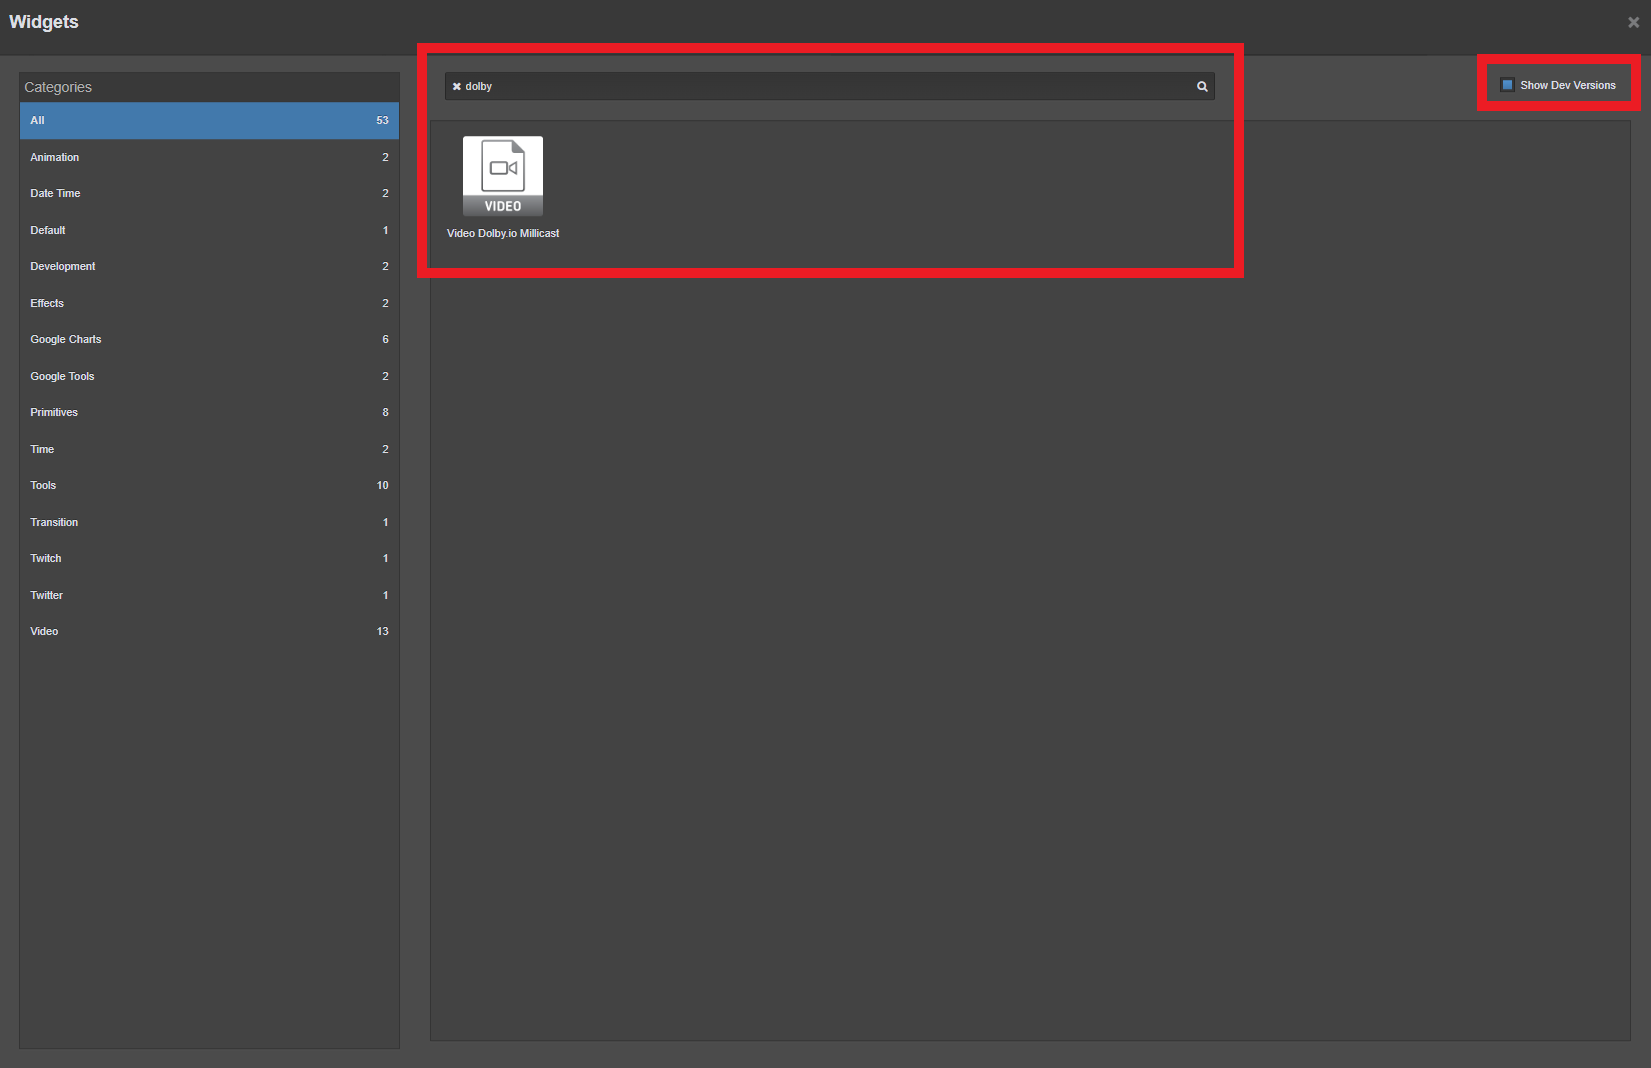
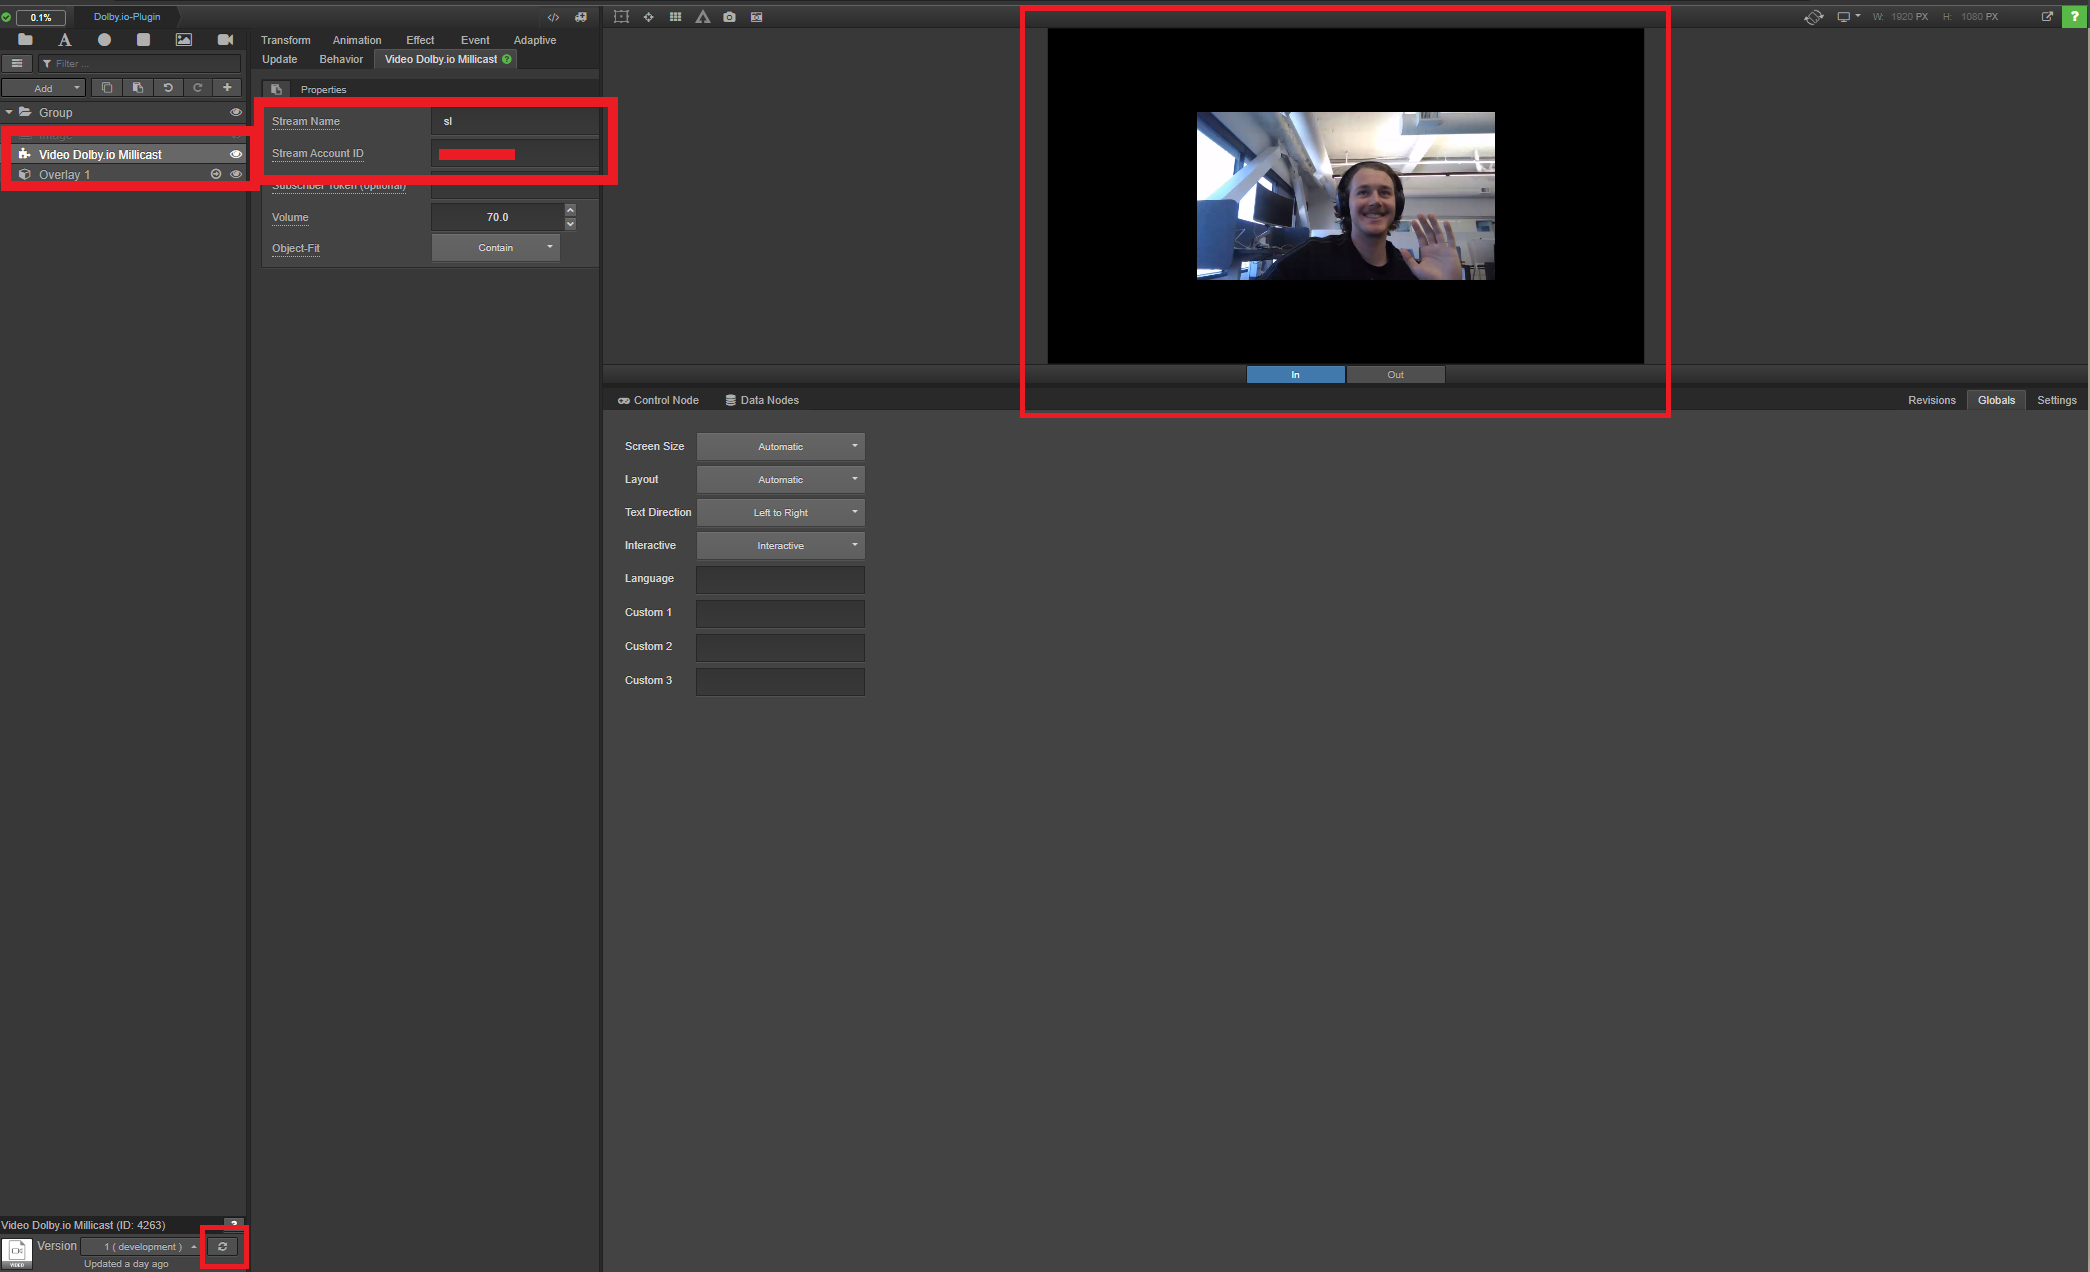
After clicking Widget, locate “Show Dev Versions” in the top right corner (requires you to be an account admin) and search for “Dolby.io”. You’ll see “Video Dolby.io Millicast” pop up. Click on it to add it to your app.
This widget allows you to render a Dolby.io live stream inside of the Singular.live dashboard for you to overlay graphics on. For the widget to work we need to update it with the appropriate Dolby.io credentials to load the stream.
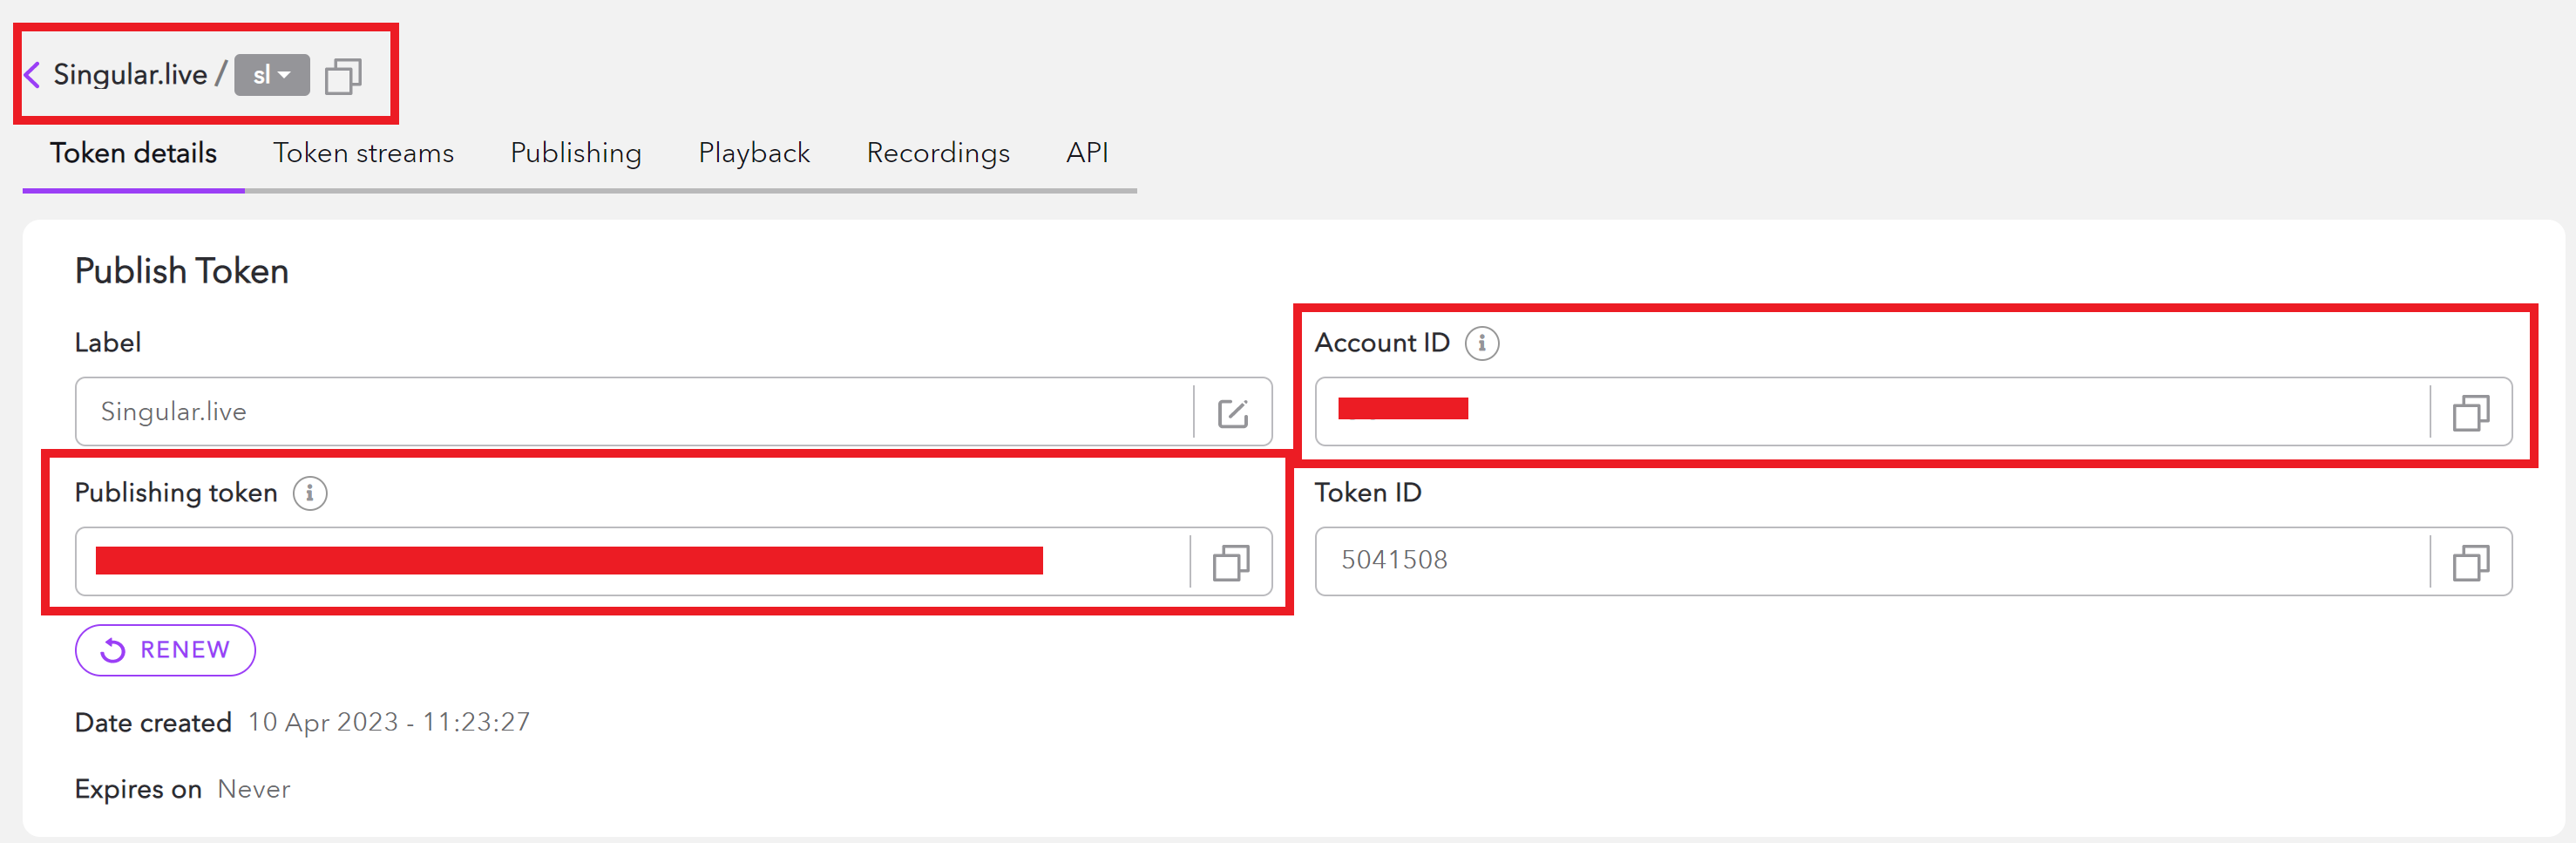
To get these credentials log into your Dolby.io account and navigate to the streaming dashboard. Inside the dashboard create a new token by clicking “+ create” and give the token a label and a stream name.
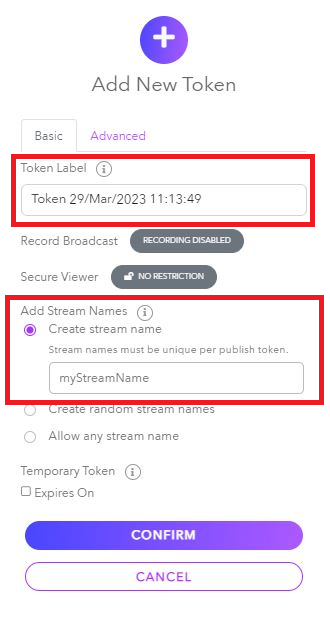
Once labeled, confirm the token creation. Click on the newly created token to open the “Token details” tab. Here you’ll find all the credentials to authenticate a connection to a Dolby.io stream. Copy the “Account ID” and the “Stream Name”.
Add these credentials to the “Video Dolby.io Millicast” widget back on the Singular.live Composition creator. To render a video on the Singular.live dashboard you first need to start broadcasting a Dolby.io WebRTC stream. This can be done from the Dolby.io Dashboard, OBS, or with one of the SDKs. Once a stream is broadcasting, return to the Singular.live Composition creator and refresh the widget by clicking the cycle icon in the bottom left. This will start rending your stream into the Singular.live Composition creator.
From here you can add customer overlays like you normally would with Singular.live.
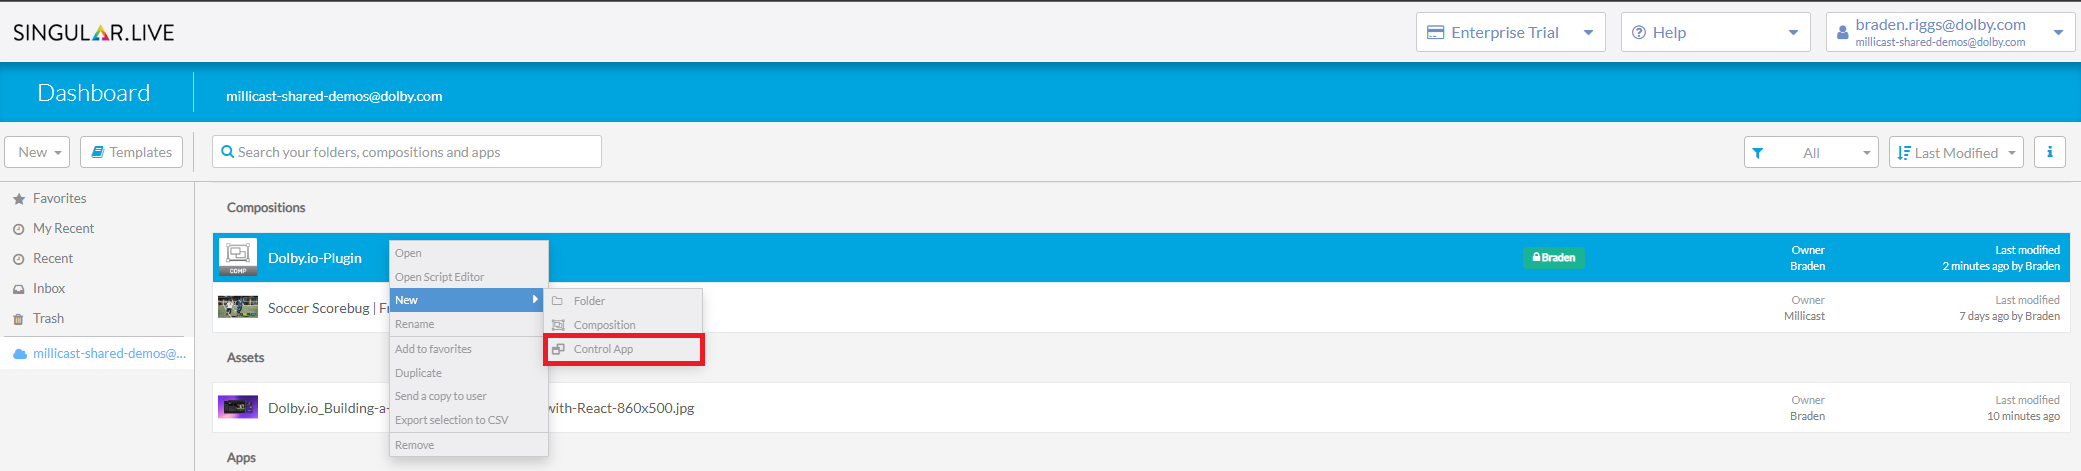
To begin broadcasting with Singular.live graphics we need to turn our composition into an “App”. Return to the Singular.live dashboard and select your newly created composition and turn it into the “Control App” by right-clicking and selecting “New” and “Control App”.
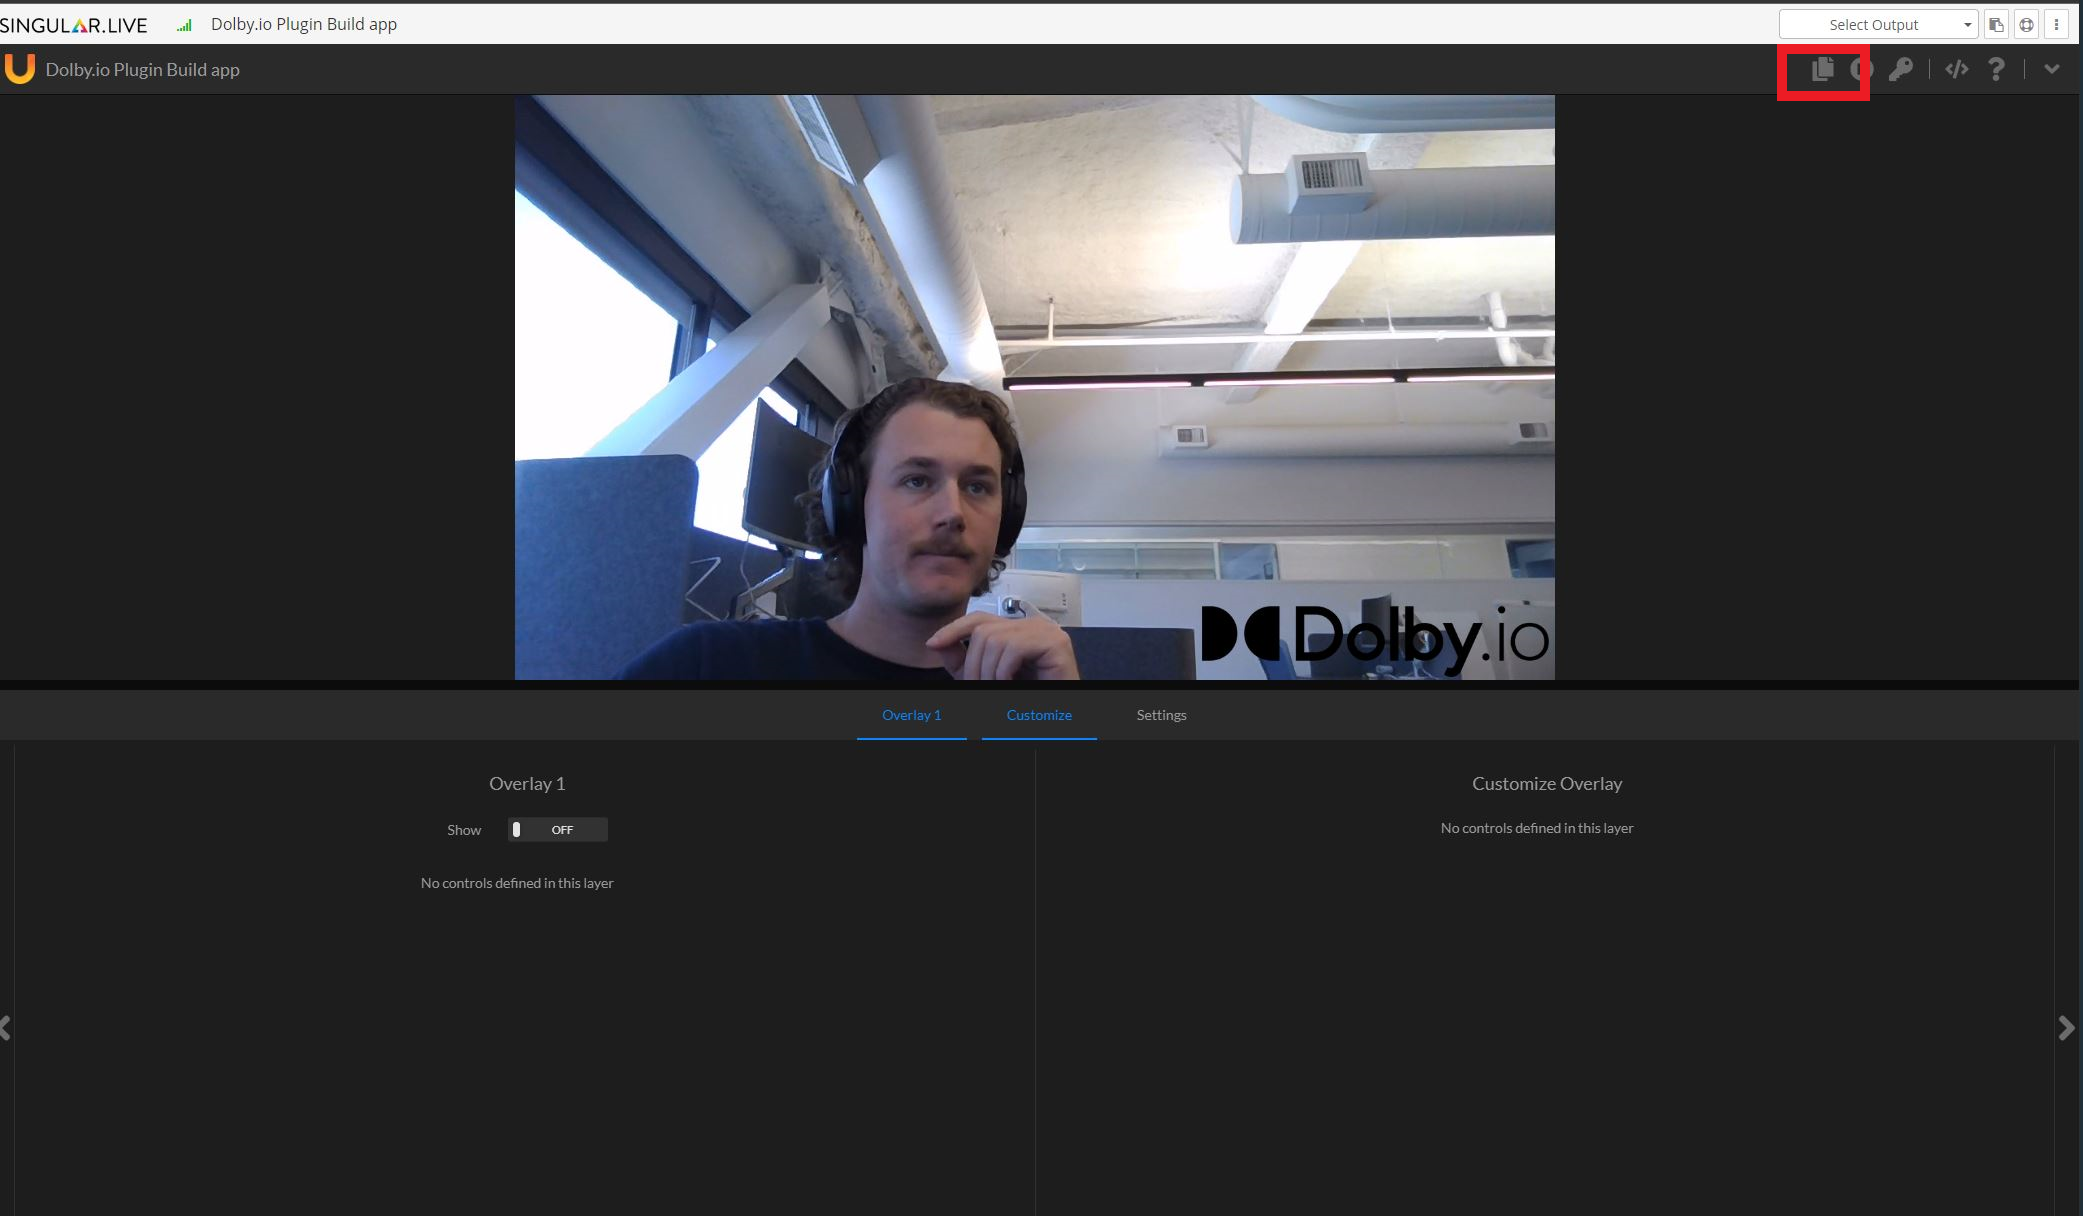
Once you’ve created your Control App, open it to see the graphics control interface.
Note: Due to browser security, you need to interact with the webpage to begin rendering the video. One way to do this is to toggle an overlay switch or similar button on the control panel. Additionally, the Singular.live team recommends enabling audio playback by default for app.singular.live to prevent any other browser security issues.
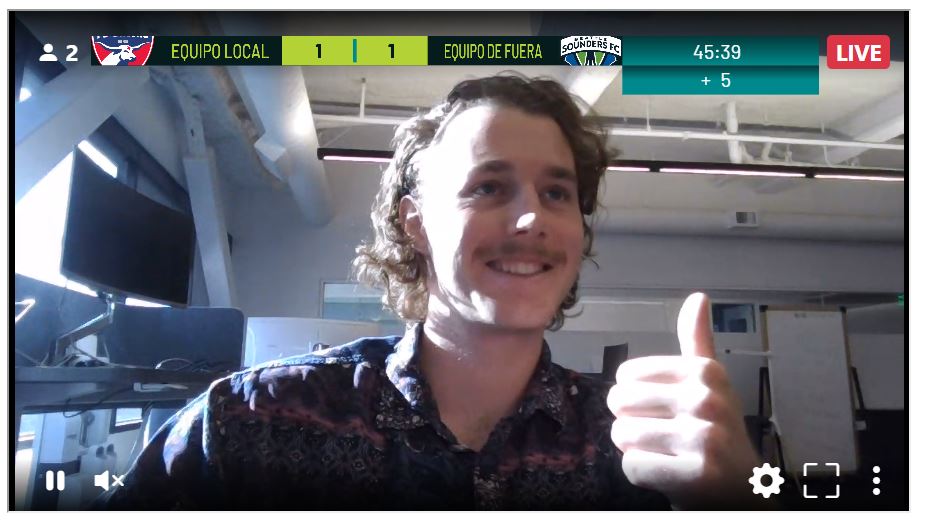
From the Control App, you should now be able to see your composition including graphics and video feed. The Control App allows broadcasters to interact with the stream graphics in real-time. From the Control App you’ll also see icons in the top right that allow you to copy output URLs for sharing and reviewing the broadcast. Copy this URL as we’ll need it for embedding the broadcast into a web app.
Most stream graphics tend to be more advanced than the example pictured above. For building more advanced compositions Singular.live offers a great guide to walk you through building dynamic compositions.
With our stream and graphics set up and synced, we can now render the broadcast inside the end viewer’s browser. Singular.live offers a number of ways to accomplish this depending on whether you want graphics to be interactive, customized to the viewer, or static on the client-side. For simplicity, we’ll cover static client-side graphics, which can be added via the Graphics SDK.
To load a composition via its URL first import the Singular.live graphics SDK in the head of your HTML file.
<head>
  <!-- Include the Singular Graphic JavaSrcipt library -->
  <script src="https://app.singular.live/libs/singulargraphics/1.0.0/singulargraphics.js"></script>
  <link href="style.css" rel="stylesheet" />
</head>
Next, embed an iFrame in the body of your HTML file with the src pointing towards the Output URL.
<body>
    <h1>Dolby.io WebRTC Streaming with Singular.live</h1>
        <!-- define iFrame for a non-interactive Singular Player Instance -->
        <iframe
            id="SingularOverlay"
            style="width: 720px; height: 400px"
            src="YOUR_APP_OUTPUT_URL"
        ></iframe>
</body>
With that, the webpage now has the broadcast, with graphics, embedded into it.

This example is of a basic stream viewer. Check out some of our more advanced web player tools such as the Dolby.io Millicast Vue.js Web Viewer Plugin.
Client-side Personalization of Graphics on Your WebRTC Broadcast
As mentioned earlier, the advantage to Client-side graphics rendering is that you can customize graphics such as advertisements, languages, and interactive features based on the user. Using languages as an example, we can show how a basic web app could load different language graphics based on a user’s browser language.
To accomplish this we alter the body of the HTML file to include two iframes, one which will hold the Dolby.io stream and the other which will act as a container for our Singular.live graphics. Additionally, we’ll also import a JavaScript file app.js.
<body>
<h1>Dolby.io WebRTC Streaming with Singular.live</h1>
    <div>
        <iframe
            id="VideoPlayer"
            src="https://viewer.millicast.com?streamId=GCNQRh/sl"
            allowfullscreen
            width="720"
            height="400"
        ></iframe>
        <iframe id="SingularOverlay" ></iframe>
    </div>
    <script src="app.js"></script>
</body>
Normally in JavaScript, iframes will avoid overlapping. In this case, we want the iframes to overlap and can use some CSS to accomplish this.
div {
    display:table;
    position:relative;
    margin:0 auto;
}
iframe + iframe {
    position:absolute;
    left:0;
    top:0;
    right:0;
    bottom:0;
    margin:auto;
}
With our iframes set up to overlap, we can begin building the functionality inside our JavaScript file. Since our app is detecting which language to load we need a composition for each language we plan to support. Additionally, we can detect the language by using the browser’s built-in language function.
const ENGLISH_COMPOSITION_URL = "https://app.singular.live/output/0QvA7Vh5IiQo1e4BqueRLx?aspect=16x9";
const SPANISH_COMPOSITION_URL = "https://app.singular.live/devices/69ln0e50SAxBfDvEMqUbuQ?aspect=16:9";
const lang = navigator.language;
Depending on the user’s language preference, we need to add functionality for loading an overlay. We do this inside a function called play_clicked() which sets the source of the SingularOverlay iframe to the corresponding composition URL.
function play_clicked() {
    var overlay = document.getElementById("SingularOverlay");
    console.log(lang);
    if (lang == "en-GB") {
        overlay.src = ENGLISH_COMPOSITION_URL;
    } else if (lang == "es-US") {
        overlay.src = SPANISH_COMPOSITION_URL;
    }
}
Finally, we need an event to trigger our newly created function which can be accomplished with an event listener which triggers when the stream is loaded.
var videoPlayer = document.getElementById("VideoPlayer");
videoPlayer.addEventListener("load", play_clicked, false);
With that, our app is ready to test. Load the stream, graphics, and jump into an instance of your web app to see everything load. Then switch languages to see them change.

Although these graphics are simple, similar logic can be used for things like targeted advertisements and interactive elements like quizzes and polls.
Streaming with Real-Time Graphics from OBS
In an earlier blog, we discussed using Dolby.io Streaming for Remote Live Production by leveraging the WebRTC-enabled version of OBS. Singular.live also supports live production workflows with OBS.
To add graphics to your WebRTC stream in OBS first make sure you have the WebRTC-enabled fork of OBS set up. You can follow along with this video to learn how to set it up and start a WebRTC stream. Once OBS is set up to stream, head over to your Singular.live dashboard and select your “App”. If you don’t already have any graphics, create an “App” from the templates to test it out.
As we outlined above, Singular.live supports overlaying the graphics on the client-side, however, in this case, we’ll be overlaying the graphics on the broadcast side via OBS. In the top right corner copy the Output URL by clicking the copy button.
Once copied, head to OBS and add a Browser source.
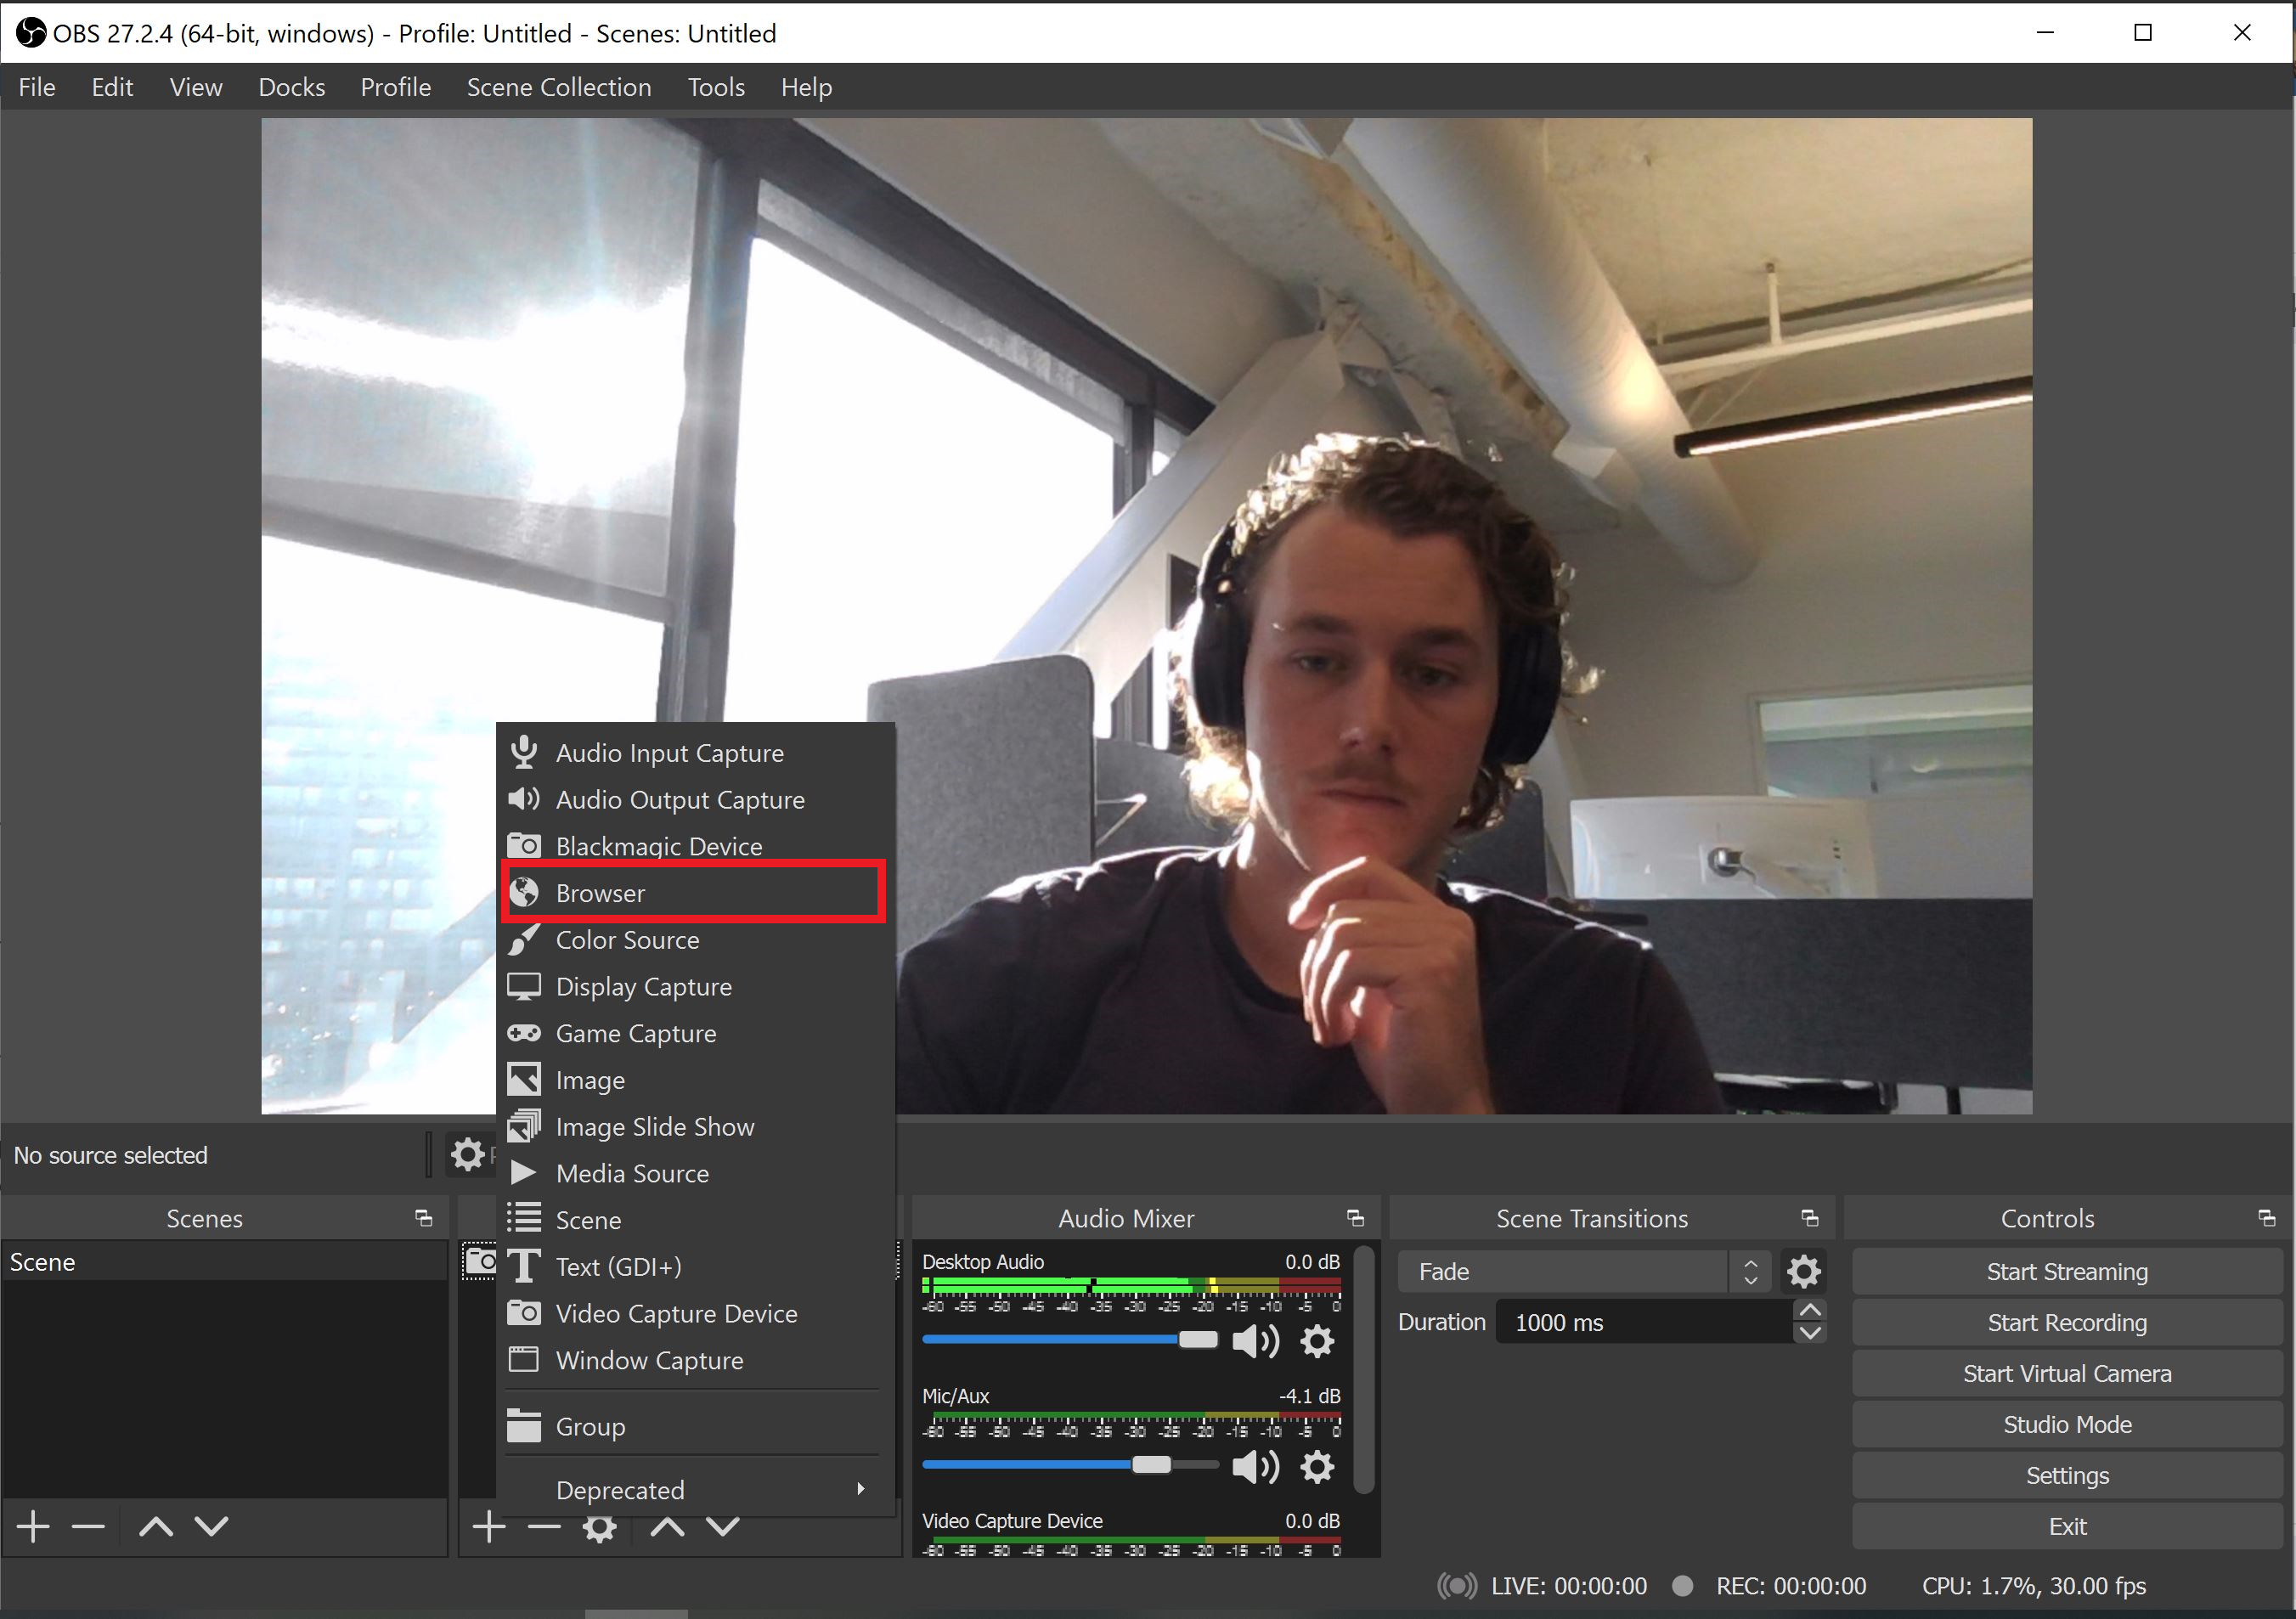
When adding the browser set the URL to the URL copied from the singular live dashboard.
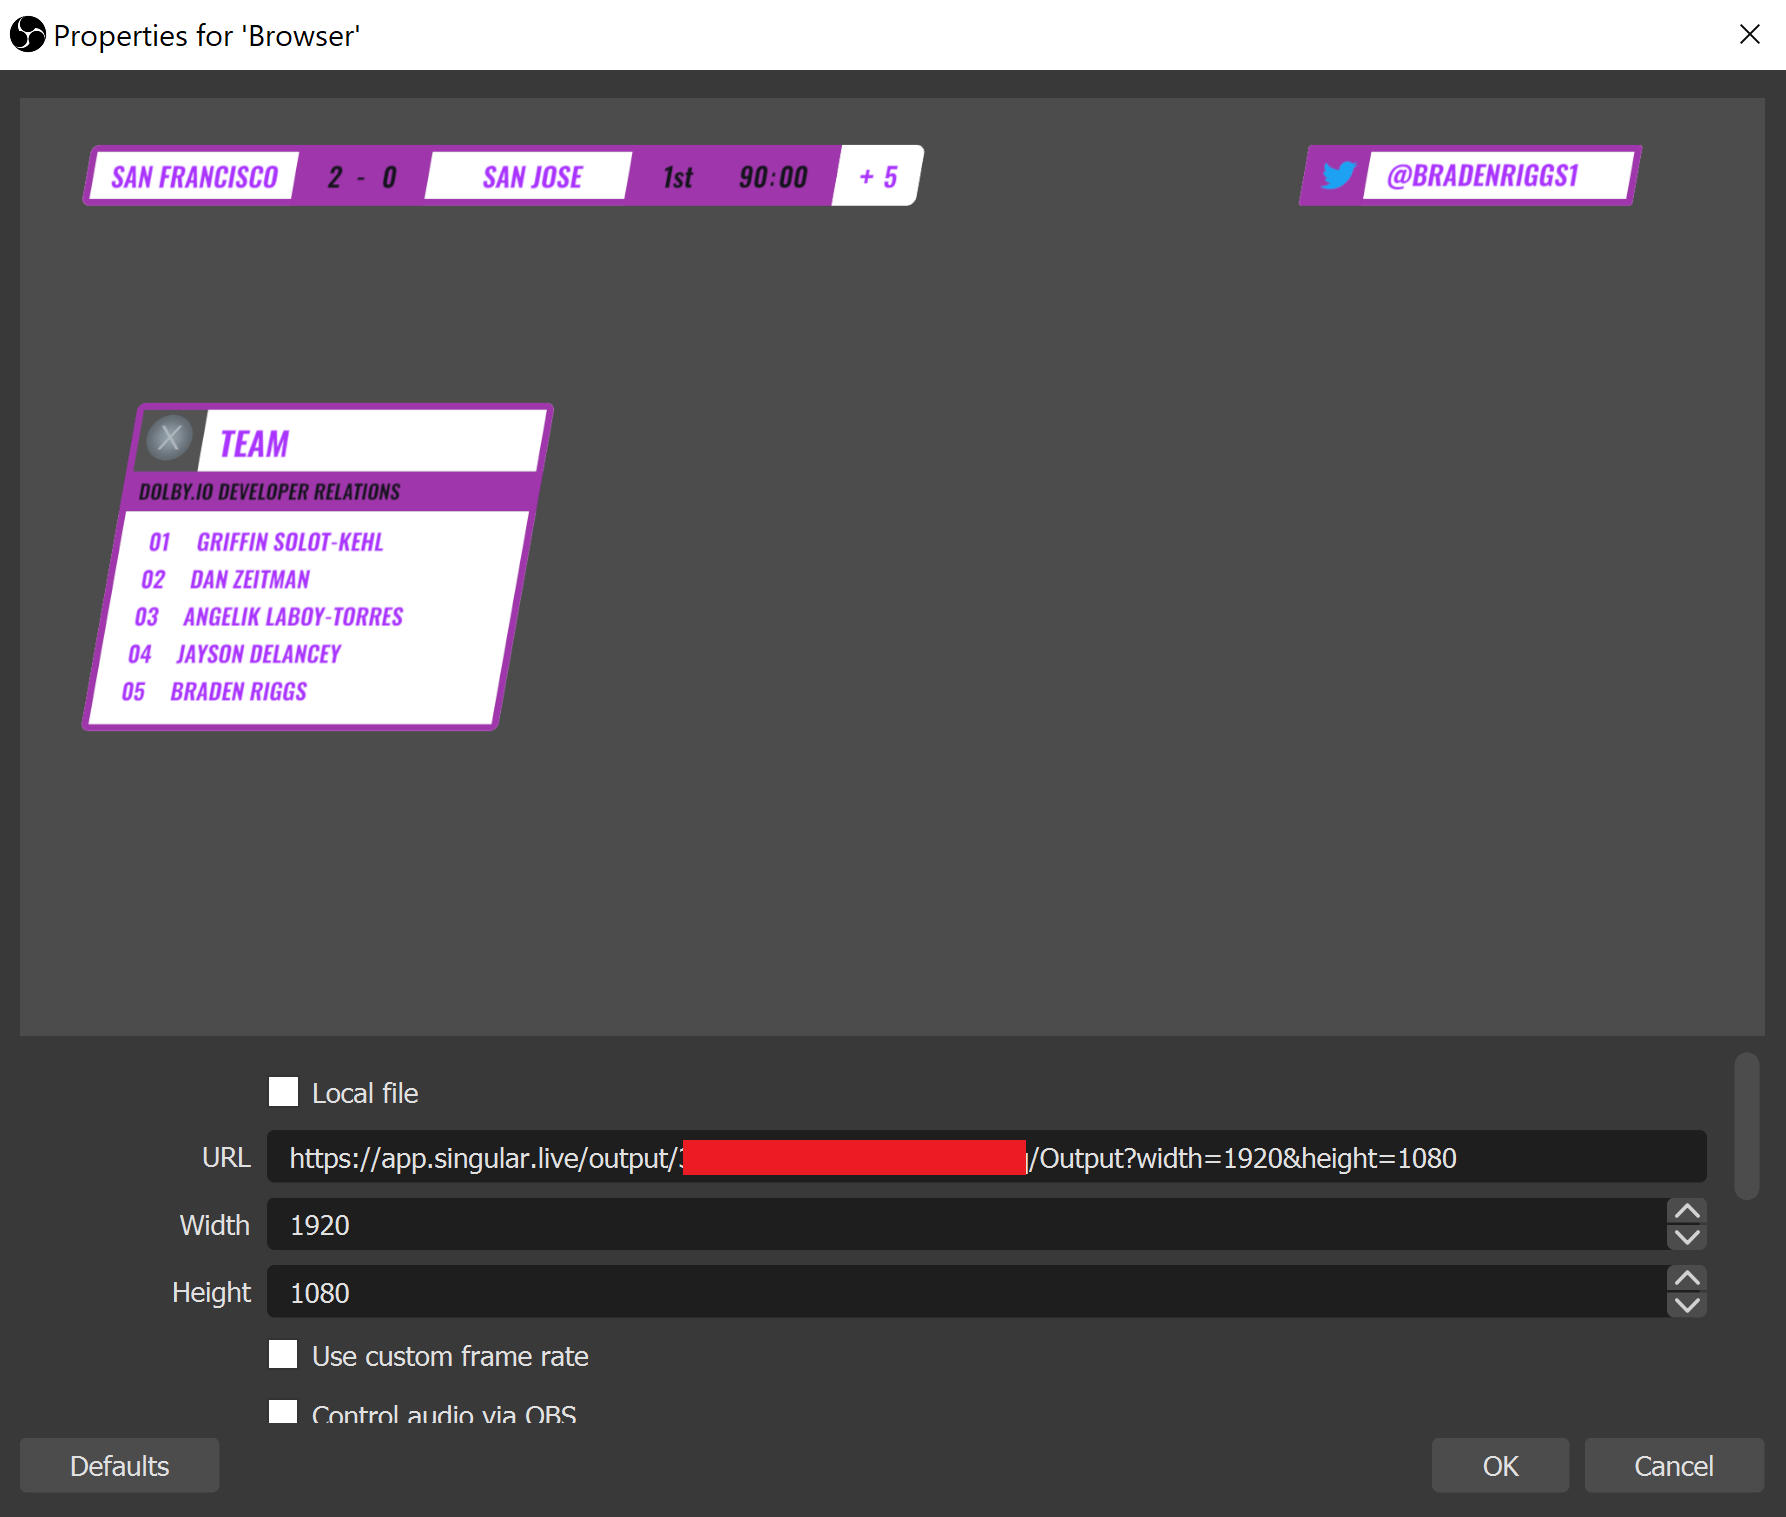
Make sure the Width and Height match the width and height specified in the URL. With that you can click OK. Now if you start streaming the graphics will be included in your stream. You can still control them from the Singular.Live dashboard too.
Start using Dolby.io and Singular.live in production
Whether it’s a live sports game, online concert, or a global auction, good graphics are essential to a professional broadcast. With Dolby.io and Singular.live, setting up these broadcasts, like those shown in the videos above, is easy and can be managed in real-time, helping keep your audience close to the action. If you are interested in learning more about Dolby.io and Singular.live reach out to the team on LinkedIn or via our Support Desk or sign up for a free account and get started building.


")