


When building a streaming app or platform it is important to consider how the end user experiences and engages with the content being streamed. If your users need to engage with the content creator, the delay between capture and consumption should be minimal. To achieve this, many developers rely on WebRTC, a content-over-internet transfer protocol that boasts exceptionally low delays for video and audio. By leveraging WebRTC, developers can quickly build a low-delay immersive experience, leaving plenty of time to make the UI look outstanding using front-end libraries such as ReactJS.
In this guide, we’re going to showcase a WebRTC ReactJS streaming app powered by Dolby.io Streaming and NodeJS.
The WebRTC React Example Code
The WebRTC React Streaming example app can be found on the dolbyio-samples GitHub.
To set up the project you need four things:
- A cloned copy of the sample app.
- Node v16 or greater installed.
- Yarn package manager v1.22.19 or greater installed.
- A Dolby.io account.
Once you’ve cloned the repo and set up the Node and Yarn, navigate to the main directory via the terminal and run the following command to install all dependencies:
yarnWhile your project is installing we can briefly discuss how to set up your Dolby.io account. Once you’ve created an account you’ll be dropped off on the Dolby.io Dashboard where you can create and manage tokens required for leveraging Dolby.io Streaming servers.
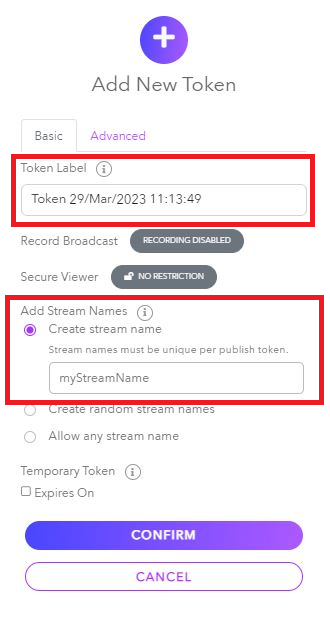
Click the purple and white + Create button to create a new token. Give the token a label and your stream name a unique identifier, then switch to the Advanced tab to enable “Multisource” as shown in the image below:
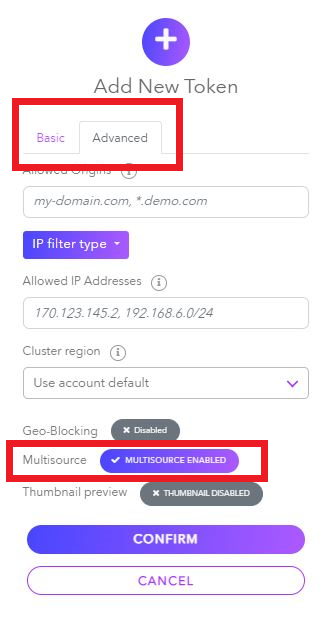
Enabling Multisource allows you to leverage Dolby.io Streaming to capture and deliver multiple low-delay streams at once. With your Token created, we can now click on the newly created token and gather your stream name, stream account id, and stream publishing token as shown in the image below:
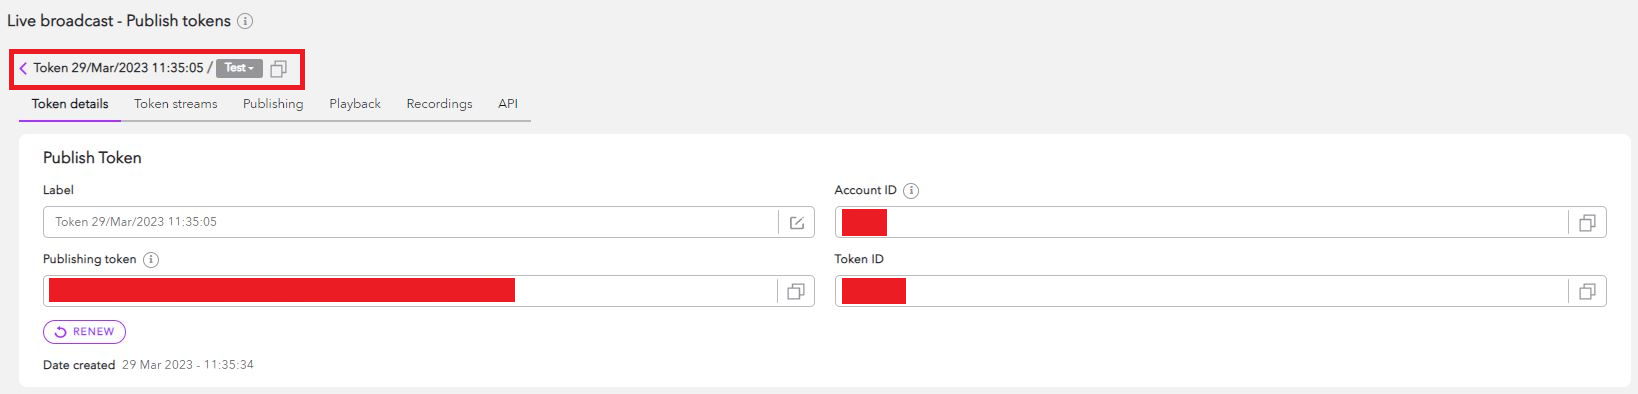
Now that we have all the credentials required to connect to the Dolby.io servers, let’s update the project credentials. To do this we need to edit the .env.example, which can be found inside of apps/publisher/ and apps/viewer/, by renaming the file to .env and populating the file with the respective credentials.
Additionally inside of the apps/publisher/.env.example there is a parameter to adjust the viewer URL. For testing locally this can be set to a local host URL, however, in production, this should be a web-accessible endpoint.
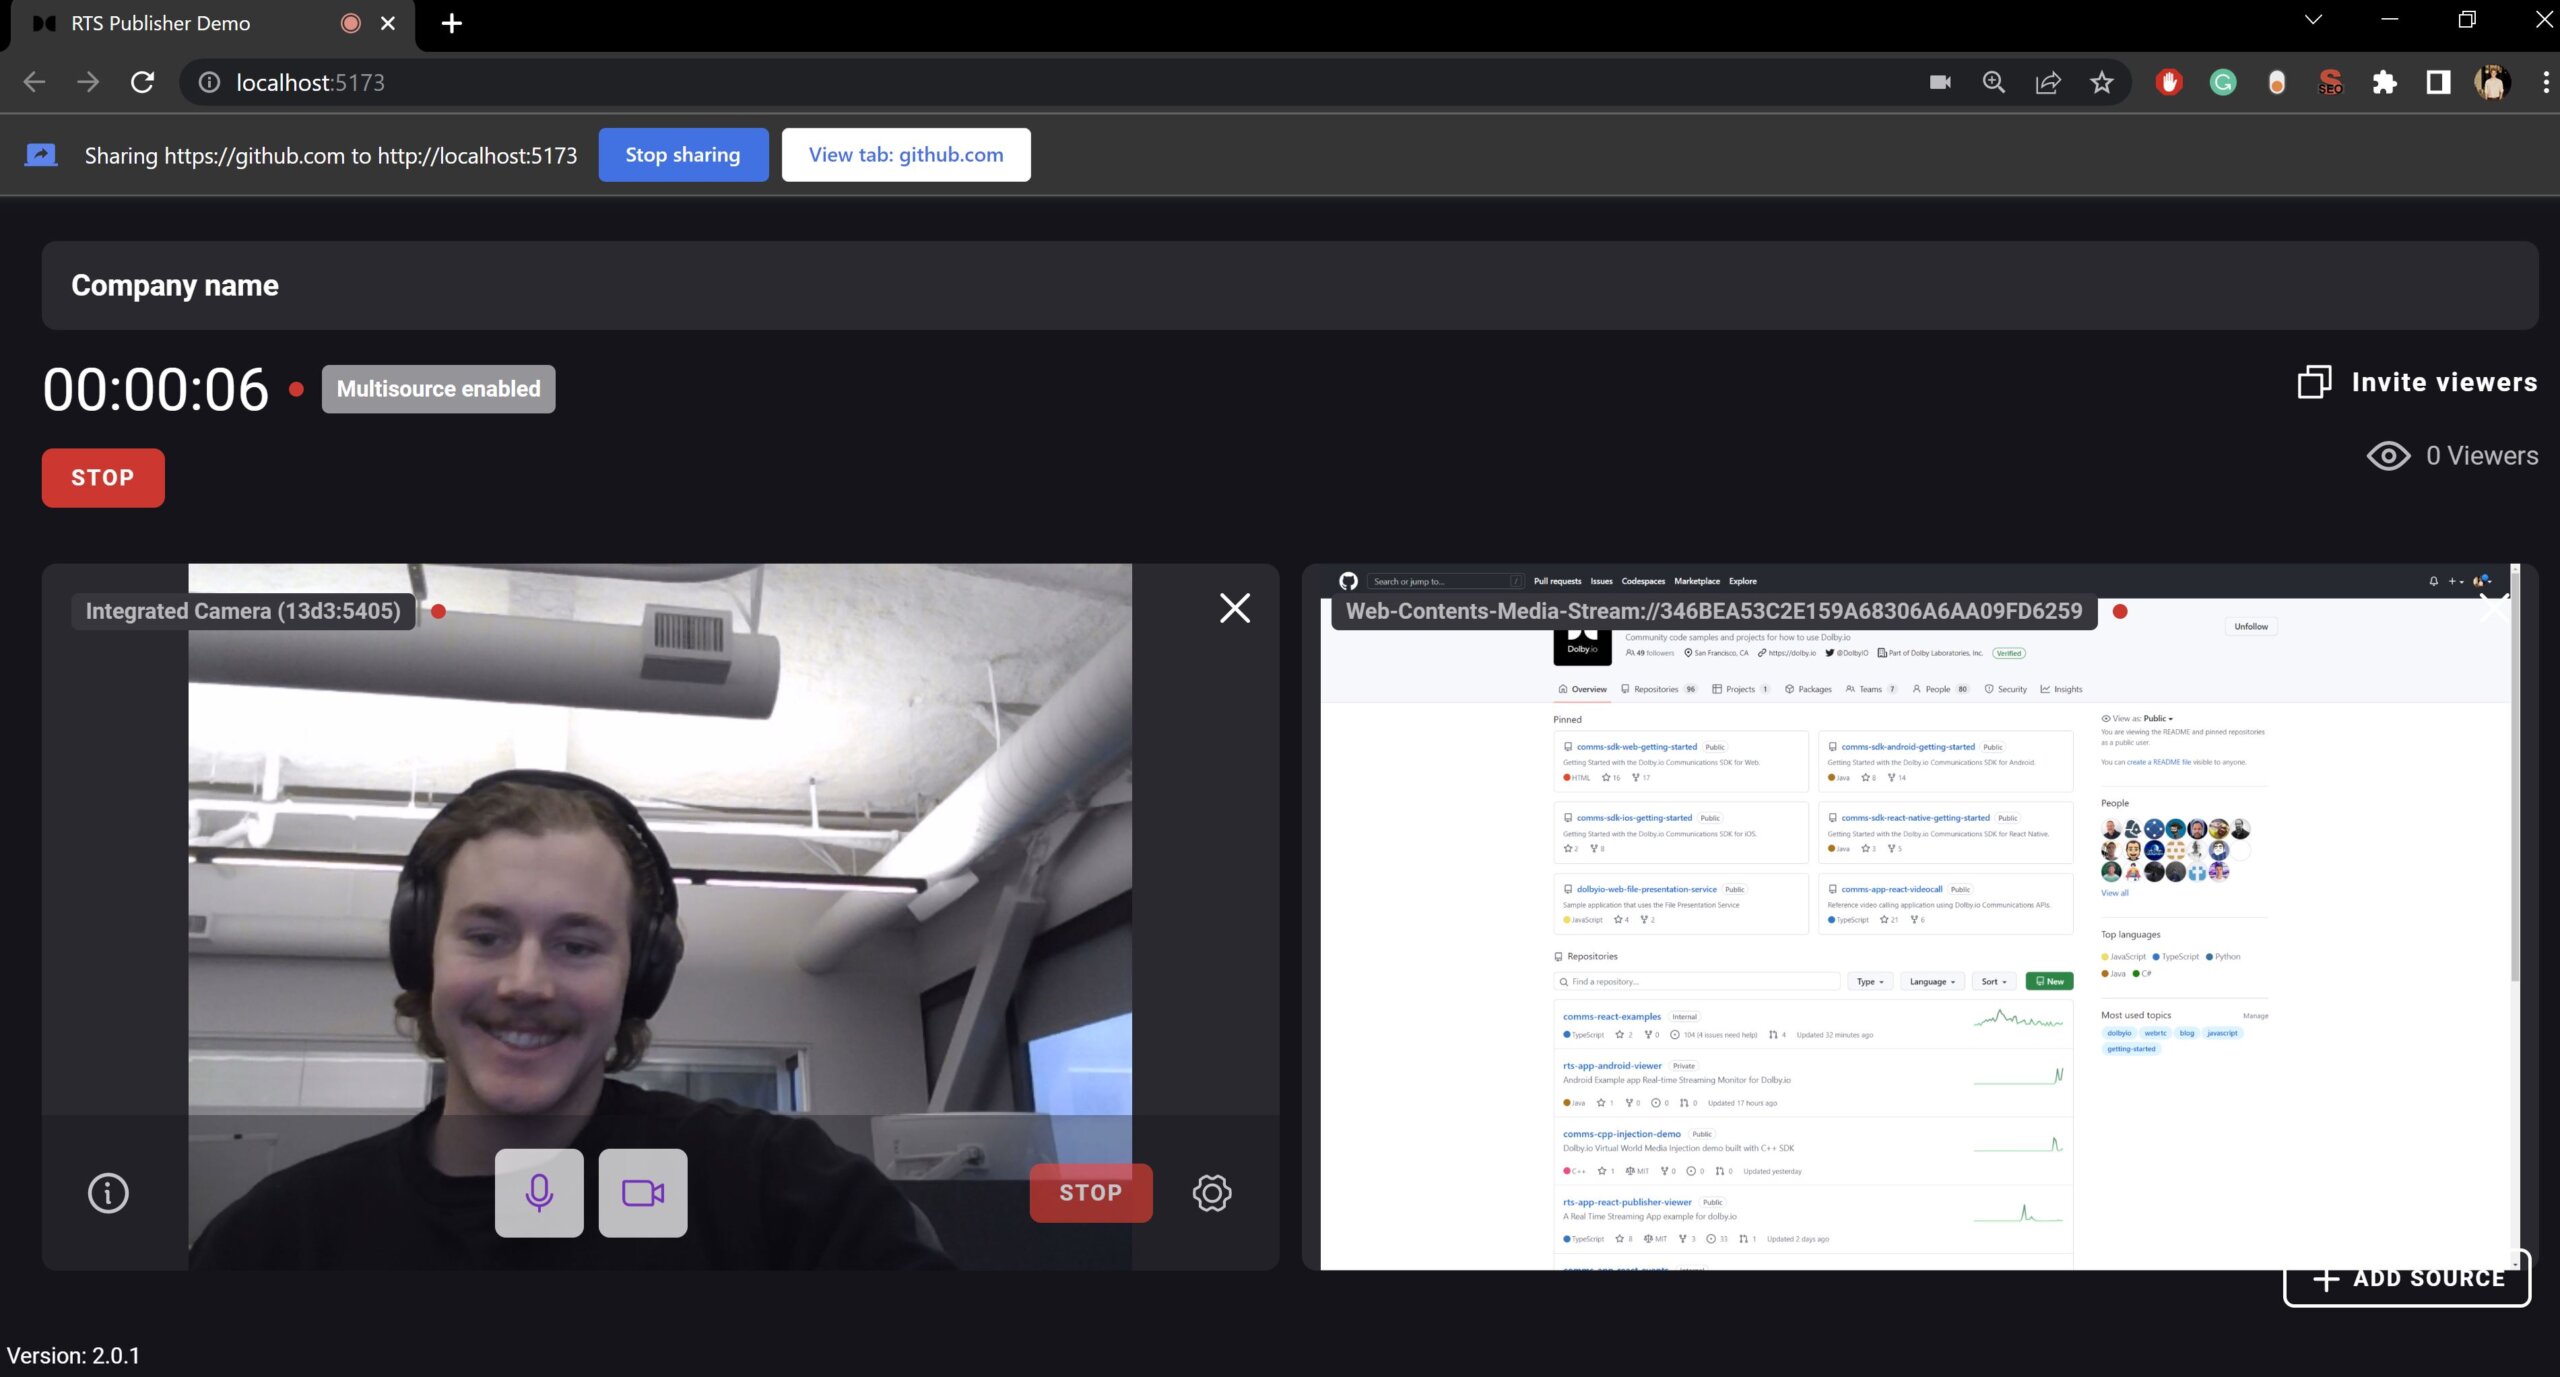
VITE_RTS_VIEWER_BASE_URL=http://localhost:7070/With all the credentials set up, we can now run the React streaming app. The app can be split into two functions, a publisher and a viewer. The publisher app, which is what a content creator would use, serves content to the end user who participates via the viewer app.
To start the publisher app experience:
yarn nx serve publisher
To start the viewer app experience:
yarn nx serve viewer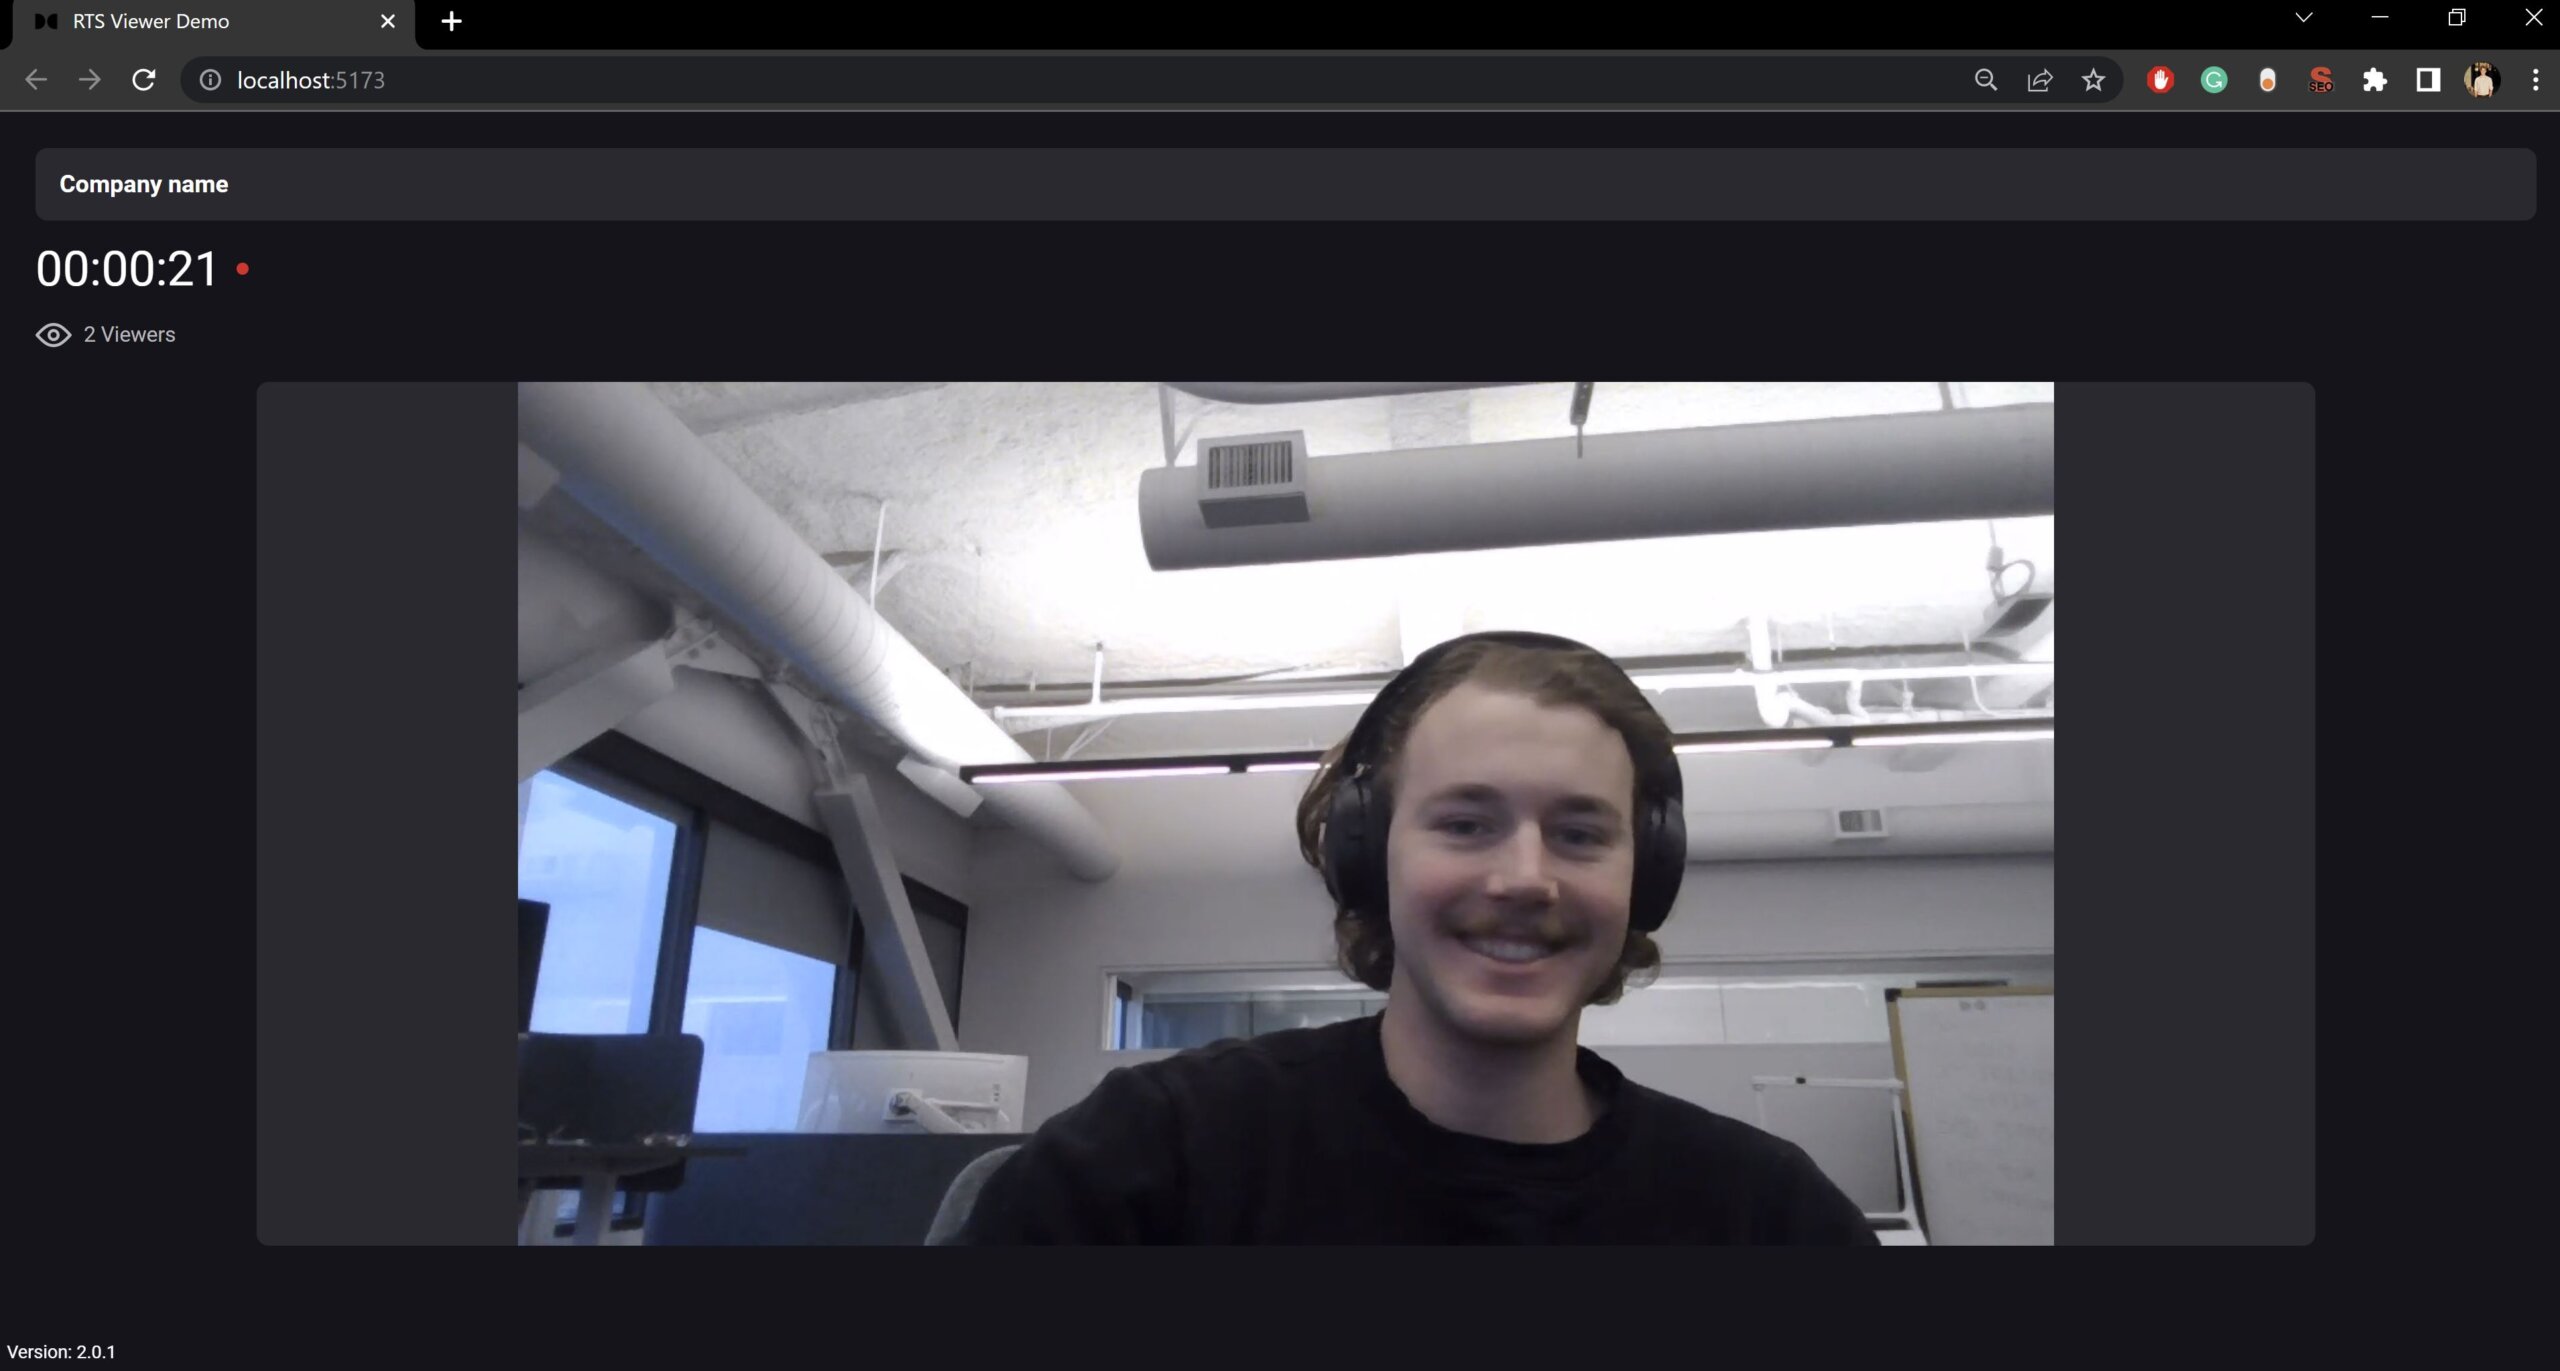
With both the viewer and the publisher running we now have a live streaming app with Node.js and React powered by Dolby.io WebRTC Streaming. This experience can be deployed on a cloud service such as Netlify to share publicly, just remember to add your branding and styling.
Building your own React WebRTC streaming app
With your Dolby.io account already created, building your own bespoke viewer and publisher experience is easy. Dolby.io Streaming has a React Native SDK allowing developers to quickly and easily build a streaming solution. If you are interested in learning more about Dolby.io Streaming check out some of our other blogs including building a Multiview web app or about our Dolby.io Streaming OBS integration.
Feedback or Questions? Reach out to the team on Twitter, LinkedIn, or via our support desk.

")